Showing posts with label Persistence. Show all posts

Thursday, February 11, 2021

The Battery Minder

I mentioned the "Battery Minder" previously that helped my 2005 Toyota start in its last years.  Well it may not have been the Toyota's fault.  I just don't drive far or often.  I know most people enjoy driving; I don't.  But it did make up for my lack of driving.

I discovered my new Subaru Forester was starting "slightly" slower than before I fell off the ladder and was taking some steps to attach the battery-minder to it the day I fell off the ladder.  But the Subaru battery is farther back under the hood than most batteries are.  The wire wouldn't reach!  I had 2 wires with the Minder and I spliced them together.  Used some brush-on rubber insulation to help prevent a short.  And there it say for 7 weeks!

Well I got back to hooking it up to the Subaru battery a few days ago.  I wrapped electrical tape around the new rubber insulation on each wire and them wrapped both together.  And set about attaching the spliced wire to the battery with the hood open.  The wire worked; the Minder came on flashing the appropriate lights. But you can't just leave the wire there, the hood will crush it when closed...

So I set about feeding the wire through the grill to the battery.  What a PAIN!  It didn't want to go from the battery out through the grill and it didn't want to go in through the grill to the battery!  It is REALLY cluttered in there.  No room for human hands...

I tried a bunch of different ways to feed it through and/or grab it with something.  It was getting REAL uncomfortable bending down into the engine compartment.  I FINALLY found a space I could get a hand into, but it wasn't enough.

Well, when several approaches don't work, try something else, right?  

I pushed a stiff wire in through the grill, and with one hand, guided it into view.  I made a loop on one end and tied some string to it and tied the wire to the string.  Perfect.  No.   The outside plug wouldn't pass through a narrow spot.

So I had to reverse the pulling wire.  The battery connection has 2 flat washers that slip over the battery posts.  I got the stiff wire through the grill from inside and attached the washers to the wire.  THAT didn't work; too stiff to get around a sharp corner.

So I pulled in partially back out, tied the string to the pulling wire (crushing the loop tightly) and pulled/twisted the pulling wire carefully.  

SUCCESS!!!

The Minder wires were through the grill and reached the battery.  I attached the washers over the battery posts and tightened them.  


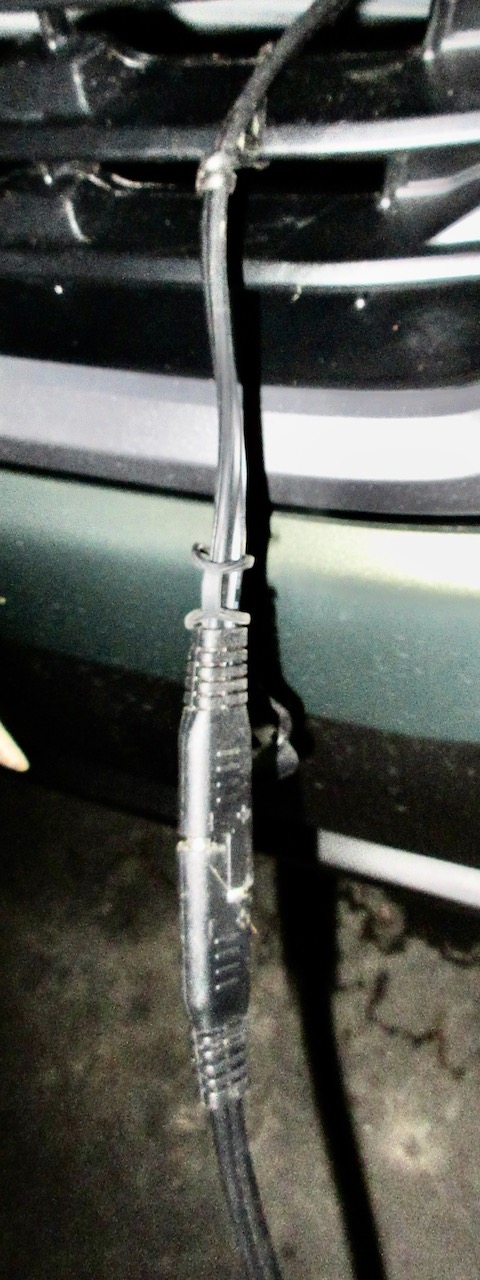
Attached the Minder plug to the grill (so it wouldn't get pulled in).  Plugged the Battery Minder to an extension cord, the Minder plugs together, and the Minder showed normal charging signals.

And the car needed it!  It stayed on trickle-charging (solid red light) for hours before it turned green (charged).  HURRAY!

I just don't drive enough to keep a battery charged without help.  Seriously, my new-bought 2005 Toyota only had 30,000 miles on it when I donated it to Vehicles For Change in 2020!  My new Subaru has only 500 miles after 7 months.  

But I got that battery-discharging problem fixed, and that is the important thing.  When I want to do a short errand, the car has to work.  So I make sure it does.

It's the story of my life; I am just not "standard".  The world just isn't built for my habits.  I always have to struggle...

I usually win eventually, but it sure is never easy.  ;)

Thursday, November 5, 2020

Cabinet Door Change

I expect the US election results to take days.  So life goes on...  One thing that has annoyed me for 25 years is an upper cabinet door.  My fault, I installed it that way.  I always assumed that cabinet doors right of the center should open toward the right and cabinet doors on the left of the center should open to the left.  

Assumptions are stupid!   The cabinet door nearest the passageway from the kitchen to the TV room has always gotten in the way.  I have hit my head on that SO MANY TIMES!  I would open it to get someting and forget to close it because I was in a hurry.

I clamped a straight edge under the door for ease in keeping it level while I changed it left to right.  THe kind of hinges it hhad allowed that easily.

But getting the screws out was a nightmare.  They wouldn't budge.  I wedged a screwdriver against them; no movement.  I finally hit them with a hammer to loosen them.  No luck.  Squirted some lubricant in.  That got them out with help of Many Bad Words.  Took many many minutes of struggling.  

So I put some paper tape where the new holes would go, reversed the door, and clamped it in place to mark the new drilling spots.  Took the door off and drilled.  Well, you have to be careful about drilling holes for screws.  No small and they are really tight.  Too loose and they don't hold well.  I have a little plastic gadget that has holes to measure screw size and recommends the drill size according to soft wood, hard wood, and metal.  Cabinets are mostly pine or particle board, so I started small.  

The screws wouldn't go in all the way.  And were hard to get back out.  So I went to the next size drill bit.  Same problem.  Went larger and squirted in the lubricant.  It got worse.  

I think the lubricant actually made the wood swell up a bit.  After 30 minutes, I was almost ready to try NAILING the damn hinges in, but I knew that wouldn't last.

Part of the problem was that I was up on a stepladder and you can't get much leverage on a narrow thing like that.  So I took a dining chair and clamped IT to a board against other lower cabinets so IT couldn't move.

With that bracing, I finally managed to get the hinge screws in with the door level and opening properly.  The whole process that should have taken about 5 minutes took 90.  The Mews were all hiding in the bedroom by that time.

I am not a trained or especially natural carpenter.  I do my best.  Persistence usually works and I've never built anything that failed structurally.  But damn, some things are harder than they should be.  

But I succeeded...  The open cabinet door won't be hitting my head again.

I always win eventually, but it sure can be a struggle sometimes!


Wednesday, February 12, 2020

Computer Problems 3

I'm not winning...  I got the NEW computer to load my Photo Library from the OLD one and thought my problems with photos was solved.  Well, sort of.  I loaded the files, but most were duplicated 2-6 times.  So I found  free program that was described as safe and effective on several Mac sites.  One thing ot does is remove duplicate files and you can specify which folders to search.

So I did that.  You click on "scan".  After it scans all the files in the folder, it compares them all to find the duplicates.  Then you click "remove" and hope...

It found about the right size of files (90GB).  It set about comparing the files. After several hours, it offerred "remove".  I clicked. After another several hours, It removed about 25% of them.  Argh!

I'm trying it again, because I still had the New one connected to the OLD one with a usb cable, and maybe that messed it up.

This is almost becoming a game.  Sort of like Tron or one of those old "quest" games where you form a team of characters and search a castle solving problems to get at the treasure at the end.  Well, better to view it that way than go running down the street screaming in frustration.  Though I have often screamed "WHAT NOW?" after some failures, I maintain a determined (and rather surprisingly) good outlook.

My entire Govt career was FIGURING OUT THINGS and SOLVING PROBLEMS, and to be honest, I kind of miss that.  So the game now is "Cavebear vs The Evil Computer".

The NEW computer doesn't have much on it yet (and the OLD one is actually working), so if it chugs away day and night I'm not really losing any functionality.

  ---------------------

But there is more to life than computers (no REALLY, it's true).  So in that spirit, here is my real life To Do list for the next few days:

1.  Feed the emerging spring bulbs with slow-release fertilizer to improve flower growth next month and bulb  regrowth afterwards.

2.  Lay down that packing paper shippers use as cushioning between the garden beds.  I save it.  I must have 100s of yards of it neatly smoothed and folded.  Then I'll cover it with large wood chip mulch.  That should kill the weeds.

3.  Three years ago, we had heavy snow.  There were enough fallen leaves on the top of my chicken wire garden enclosure for the snow to accumulate.  The weight bent the PVC-covered steel pipes I used.

It took a week to pull each one out of the sockets, straighten then, and replace them.  So I bought more steel poles to support all the centers of the existing pipes.  I need to set them up.

4.  I planted a lot of pansies last Fall, but I had some left over and put them in planter pots.  Ivident;y that doesn't protect them from the freezing weather enough (they and small and withery).  So I might as well bury the pots in the garden soil for insulation.


5.  I have briars growing in the front yard landscape bed.  Bad look.  So I better dig them out before they spread .  It rained a lot a few days ago, so the soil is workable.

Cheers...


Monday, February 10, 2020

Computer Problems 2

I think I actually solved the photos import!  After trying to import photos from the OLD mac to the NEW one  and letting it process for 3 days (!), I gave up and clicked on "stop importing".  It obviously wasn't working.

So I shut down both computers and looked at the possible cable connections.  HDMI cables give the faster connections, but each has only one and the new monitor I bought only uses HDMI.  So I couldn't connect the 2 macs that way. 

And trying to import the OLD photo folder to the 4TBMy Passport external drive wasn't working.

So I had the thought of just COPYING the OLD iPhoto folder to it.  Took 10 minutes!  Then I ejected and unplugged the My Passport external drive and plugged it into the NEW mac.  And restarted the NEW mac.  (Always a good idea to restart after attached a new device)

Then I went to iPhotos and tried to import from the My Passport.  Nothing...  Gloom...  The iPhoto Library folder stayed "greyed out"  (not recognized) on My Passport.  But I went back to Finder, and opened the file there.  It opened there just fine! 

So leaving it open, I went back to the NEW mac and opened iPhoto, chose "import", and moved my mouse to My Passport.  The iPhoto folder was BLACK (recognized.  I clicked OK (import)

AND IT STARTED IMMEDIATELY COPYING THE PHOTOS!

I can see the photos flashing by on the screen.  Apparently there are 65,000 files.  After an hour, there are 30,000 remaining, but IT IS WORKING!  As the Scarecrow said in 'The Wizard Of Oz'  "Oh Joy! Rapture!


Dr Visit

I put off the annual exams because of Covid, but went today (been 6 years, actually).  More questions from the Dr than I remember from past ...