Showing posts with label Compost Bin. Show all posts

Sunday, November 19, 2023

Compost Bin

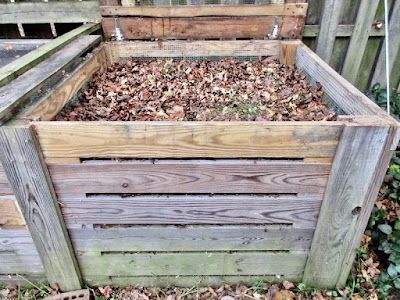
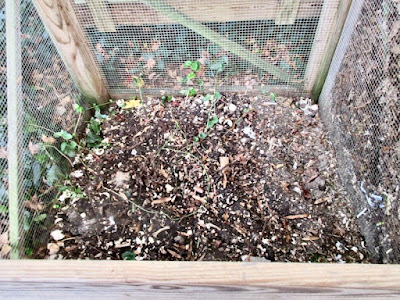
 After turning over the older compost and adding new material to it, the bin is finally heating up. It is 120F now and I expect it to get to 160 in a week or two.  

I had little compost last year (mostly just kitchen scraps).  But even that turned into "soil".  This year's batch will be much better.  

And I am adding more each week.  The English Ivy along the fence is mowable.  And I have 4 trash cans of shredded fallen leaves.  They make a good combination.  Both just grow themselves, LOL!


I am constantly amazed at how a pile of green and dead leaves turn into soil!

Monday, November 6, 2023

Compost Bin Plans

 I meant to mention yesterday that if any DIYer or handyman has any questions about details, feel free to email me at cavebear2118 at verizon dot net.  I will be glad to take additional pictures of areas where the existing pics were not as informative as required.  Or explain why I did some particular piece of work.  I've thought of a few improvements...

And I can give some general guidance on composting in general...


Sunday, November 5, 2023

Compost Bins

Marcia mentioned "compost bin envy".  So I thought I would discuss it.  I built a really bad one many years ago.  It kind of just fell sideways...  Who wants a bad compost bin?

So when I decided to build a new one, I gave more thought to structure and support. That time, I drew on paper, saw weaknesses and corrected them.  Sometimes, I can just "build" something, sometimes, there need to be plans...

So that time, I thought in terms of repeatable pieces.  So I thought of 2 backs, 2 outsides and a middle one, all the same.  Easier construction; just make the same thing 5 times.  And since I had a 4' roll of 1/4" wire mesh, that defined the size...

So I made 5 identical frames of 2" framex4" pressure-treated wood and attached the wire mesh.  After looking at them, I decided to add an angled 2"x2" diagonal braces to each.  

The corners are 4'x4" posts, buried about a foot deep.  I dug larger holes for those than required, but it gave me some wiggle room for bad measurements.  Nothing actually ever fits quite like the measurements suggest they will.

The pieces in front had 1" boards to create slots for removable front boards.  So I could slide them up and get at the lower compost.

Then I built hinged tops with more wire mesh in frames.  Those were kind of heavy.   But it occurred to me that counter-weights on the back would balance the weight of the tops.  Two more 2"x4" boards attached to the tops supported 4"x4" posts on the back.

Mike McGrath (former editor of Organic Gardening magazine) had a once a week 5 minute radio spot at the time and mentioned building compost bins.  So I sent him pictures of my new one.  The next week, he mentioned mine saying it was the best one he ever saw!   High praise.

I only mention all this because someone might want to build (or have someone build) a similar one.  It really is a gem.

I posted about the entire process of building it at the time.  If you want to build a similar one, here is the starting link...

It starts at compost-bin-part 1 and moves several posts forward from there.  I hope the explanations of the construction are clear enough.  An average DIYer or handyman can easily follow the steps.

It is easier than it may seem from all the pictures.  I tried to be very detailed about it.

If you build one or have someone build one, I sure would love to see the pictures...


Wednesday, November 1, 2023

Halloween And Other Stuff

I don't decorate much for holidays.  Once again, I bought a pumpkin and didn't carve it.  But no kids knocked on the door again, either.  It's been like 15 years.  I saw a couple outside, but they didn't stop here.  I was even wearing my wizard costume.  And I had good treats...  Oh well...

I'll set the pumpkin and 4 orange Mums out on the front doorstep to note the season, though. 

The Mums were cheap from Walmart.  The blooms all died, but I cut the seedheads off and they are re-blooming.  They will look good in 2 weeks, but I will have to bring them inside to escape the freeze predicted tomorrow.

I'm thinking of trying to cover and warm the tomato plants.  There are finally a lot of fruits getting ready to ripen.  Next week, the night temps are going to be warmer, so if I can protect them them for this one frost, they might mature.

Covering the whole bed of them is awkward, but I have a roll of 16' wide black plastic I could place over all the plants like a loose tent.  And a single standard light bulb under the plastic would keep them warm enough.  Anything for a few more ripe heirloom tomatoes!

Spread grass seed over the lawn 2 weeks ago.  They need water to germinate.  The forecasts kept saying it would rain, but it never did.  I watered the lawn with a sprinkler and the missed spots by hand yesterday.  Hopefully, some will germinate.

My compost bin is finally heating up.  Not as it should, but at least it is finally hotter than ambient air temp.  It was very imbalanced and dry.  So I soaked it, mulched and bagged lawn leaves and layered them.  Should start heating up seriously soon.

I need more earthworms in the compost bin.  I recall my Dad used to put plastic sheet in a clear ground area that encouraged earthworms to the surface.  He was doing that for fishing bait.  I'm doing that to encourage composting.


Friday, November 4, 2022

New Yardstuff, Part 1

I am thrilled with the warm November weather here.  It is unusually nice.   It has been in the low to  mid 70s for days again, dry, and sunny.  Perfect for outdoor work.  

I roto-tilled the areas in the front yard where the tree stumps and roots were grinded out  a few days ago so that I could add topsoil, level the area and replant grass.  I filled fourteen 35#  kitty litter tubs (about 5 gallons each) twice and 4 more to complete the raking.

Those were about 1/2 stump mulch and 1/2 dirt.  I used it to completely fill one 4'x4'x4' compost bin in alternating layers with shredded mowed and bagged fallen leaves, and grass and kitchen waste from the old bin.  I was worried there wasn't enough "green" stuff to feed the worms and microbes, but it seems to have been enough.

I stuck in a kitchen thermometer probe (can't find my long compost bin thermometer at the moment) and left it there for an hour.  It went up from 70F outside temperature to 114F in the bin, so it is heating up well by microbial decomposition.  I did not expect it to start to heat up so soon!  ðŸ˜€. In a few weeks, it may get up to  140F and that it perfect.  

Thinking that it could use more greens for long-tern heating, I cast my eye on the wild english ivy growing in the far back yard.  Well, I had the collection bag on the self-propelled battery-powered mower, so off I went at it.  

I should mention that the ivy (English and Poison) are invaders from my backyard neighbor who simply ignores the back 10' of his yard.  I fight them (the plants) constantly.  Also, a previous side neighbor planted Some Damn Invasive Vine (which I keep forgetting the name of) which has gotten into my flowerbeds and raised garden paths.

So, it occurs to me I have a self-perpetuating source of green material for the compost bins!  If I have a fast-growing weed I want to eliminate, I might as well get some benefit from it.  I emptied a few trash barrels of old dried grass and leaves, so I can refill them until I have enough to fill the 1st bin with.  If life gives you lemons...

Having the mower in the far back, I also mowed around my 2 year-old specimen trees.  I want to build 4'x4' frames around them from old pallet wood, cover the inside with packing paper from Amazon shipments and fill it with mulch.  That should stop the underbrush vines from growing up the saplings until they get large enough to shade them out on their own.  

And by that time, the pallet frames and mulch should rot away. leaving the trees to grow naturally.  As the leader of the 'A Team' TV show used to say, "I love it when a plan comes together".

The next project is to get the DR brush mower working again.  I have a backyard of wild blackberries and undergrowth to remove.  But I left old gas in it for 2 years and it won't start now.  

The good neighbor guy across the street looked at it and suggested where I could spray "starter fluid" into the gas injector system.  I'll get at that soon.  And if I can't fix it, there are local mechanics who can.

But that's a future post...


Monday, October 31, 2022

Mowing The Leaves

So, yesterday, I was ready to mow the leaves to add to the compost bin.  It went easily, though I thought the mower would shred the leaves more than it did.  It acted more like a vacuum cleaner that a shredder.   I expected some bulk but not so much.  But to avoid carrying the collection bag to the compost bin every 5 minutes, I brought out a big trash barrel to collect it in and drag that to the compost bin.  

A path of mowing from the barrel and back filled the bag.  The barrel held 3 bags.  So I would bring the barrel to the bin, dump it, and spread it evenly (about 6").  Then added kitchen waste from the other bin on top.  Then added 4 buckets of the grinded tree roots on that.

Repeat, repeat, repeat.  Literally, 3 layers of each!  I filled the 2nd bin to the top.  At 4'x4'x4", it should heat up nicely even over Winter.  


The 1st bin (where I had been dumping kitchen scraps for 2 years) was almost emptied.  There is some stuff left, but because of tree roots, I have to get the last 6" loose with my mini electric tiller.


So, all in all, it turned out great!  It has been a while since I collected enough plant material to fill either bin.  I'll check to see if the temperature is rising in a couple weeks (it takes a while to get going).  I might have usable compost by Summer.


Friday, June 17, 2022

A Slight Change In Appearance

A few weeks ago, I bought a hair grooming kit.   I had been using my electric razor trimming cutter to trim my own hair because I didn't want to go to a barber for haircuts (requires removing my mask).  The razor was awkward to use myself.

So I bought a trimming kit.  Naturally, right after buying it, I decided to eliminate the need.

Last week, I looked like this...


Not much hair, but some.  I really got annoyed with it tickling my ears.

And, oddly, a large impacted sebaceous gland on my head went away.

So I got bored bothering with hair.  Today, I look like this...


"Smooth and shiny", LOL!

Hats feel funny, but I'll get used to it.

I tossed the cut hair into my compost bin.


But wondered how long that would take.  So I went internetting and found this...  And note the interesting right sidebar about cats and dogs.


Friday, October 27, 2017

The Compost Bin

Well, I thought it was finished, but it wasn't.  The tops were heavy to lift.  And keeping them lifted meant lifting them totally up and over to rest on the fence.  Which annoyed me.

And then I had a totally wicked idea.  Counterweights...

The tops took 17 pounds of upward pressure to lift before (I weighed the lifting pressure with a fishing scale).  So I screwed 2"x4"x6' boards to the tops and added some 6"x6"x53" posts left over from building the new decks (I save scraps and this is why).

Here are the bins now.
The 6"x6" posts are attached to the boards.  I used two 7" lag screws anchored with fender washers up into the posts per board.  Those posts won't ever come loose!
The weight of the posts is perfectly matched to the weight of the tops.  Instead of  17 pounds, I can lift the tops with a finger.
And close them just as easily!
The tops sit upright on their own...
The front slats lift out for easy access to the compost contents.
The slats have small pieces of wood as spacers...
That fit into slots I created by sandwiching a 2"x4" board between two 1"x6" boards ...
 All the sides have braces...
And I even have a barrel of dirt to shovel a couple inches into the bin after every 6" of compostable material.

Wednesday, October 11, 2017

Yesterday, Neighbor and Project

The neighbor just amazes me more and more.  If there is anything he can do wrong, he does.

Yesterday, I looked out over the fence and saw the neighbor's contractors had made "volcano mulch mounds" around several trees.  You don't DO that.  It smothers the roots, invites fungal diseases around the covered tree trunk and invited voles to gnaw the bark away.

If I even meet this guy (he has to move in eventually, there is way too much work being done for a flip or a rental) I will try to help him.  Don't laugh, but I am a real boy scout and helpful type.

But the contractors were ordered to do the weirdest thing so far.

Most house on the street have "swales" at the front of the street.  Those are designed to catch rain from the street and direct them sideways in storm drains.  Those are all just slight depressions in the front lawns.  For some reason, the neighbor's property had to have an actual concrete depression.  I remember the builder being upset by having to install that at his own expense.  Maybe because it was between 2 storm drains.

The new neighbor had his contractor fill it up with rocks!  Rocks like the size of a child's fist.  I didn't say a word.  I'll do almost anything to not provoke this nut into painting my fence and make me take him to small claims court.

You know what happens when you fill a low space with rocks?  Dirt blows in, leaves fall in, mowed grass falls in.  Eventually, it fills up with soil.  And when a space designed for rainwater drainage fills up, water collects.  And around here standing water means places for mosquitos to breed!

And I have to laugh.  They had 3x as much rock delivered as they needed.   Evidently, the owner or the contractor failed geometry in high school.  And do you know how hard it is to shovel irregular rocks?  It is like digging into broken bricks,  A shovel cannot get a good scoopful of irreular rocks...
  -------------------
But while those poor suckers were trying to spread the irregular rocks, I was working on the compost bin.  The last part (I thought) was adding 1/2" wire mesh to the top to keep varmints out.  I measured it perfectly!  It fit precisely on the top.  I found zinc screws ans washers that would hold the mesh down tightly.

Oops, on only the front and back...  Well, the stuff is so stiff, I wasn't worried about the unsupported sides.  Until I pushed only a little and it bent down several inches.  ARGGGHHH!

OK, I can fix that.  1"x3" pressure-treated wood strips will be attached under the sides and I can screw washer over that to hold the sides in place too.  And THAT will complete the project.

I wanna see a varmint try to get into THIS compost bin.  I don't care how clever some varmints are, they can't.  When I put the latch on the front of the tops, I'm not sure some PEOPLE could get into it, LOL!

An addition...  My beloved 60" Samsung plasma HDTV died last week and I might have mentioned that.  The repairman was scheduled to arrive here today between 10 AM and 2 PM.  But that was last week.  So I called them at 9:30 AM to confirm the arrival and also ask if the schedule was more firm.  It is and they say he should be here before noon and will call 30 minutes before.

I've been watching a cheap 24" TV (Sumsungm LED from Walmart and not bad for $138) for a week and it is driving me mad*.  Political news shows are just fine that way, because I only listen to them really.  But the best shows the past few days have been about outer space  and I guarantee the universe does not look as impressive on a 24" TV as on a 60" HDTV! 

Nor do baseball playoff games!  My hometown Washington Nationals have played 3 games and I can't even see where the baseball is.  It is hard enough to see the players.  With luck (assuming the 60" TV CAN be fixed), I might see them "win or go home" later today.

* I must remember/mention that the first TV I ever saw had a 10" screen and when we got a 16" TV in the 60s it seemed amazing.  We never actually knew what Lucy Ricardo looked like before that.  And, BTW, that is why animated shows like the Flintstones were popular.  The characters were drawn LARGE!

TV producers caught on to that and that's why sitcoms and dramas had lots of close-ups back then.  

Historian Mark...  

Well, the TV repairman came.  He found a crack in the screen.  He showed it to me on a handheld device.    I felt there with a fingetip and could detect it. a slight crack.  He said the screen uses a gas sealed front panel.

He mentioned that this one was about the finest plasma HDTV Samsung ever built.  I could shrug that off as a repair pitch, but Consumer Reports said so at the time and that's why I bought it. then.  So he was correct.

It is going to cost $1,000 overall, but you can't get that plasma HDTV at any price now.

And let me say that $1,000 is a large amount.  I could do other things with that money.  But I have that TV on most of the day and love the detail.  Ayla follows golf balls across the screen.  Iza watches lions.  Marley pays no attention.  

The rrepairman asured me of a few things.  Wiping the screen occassionally had caused no damage to it.  I did not cause the failure.

Sometimes things just break...

So a mew front panel is coming.  If from California, several days.  if from New York, 1 day,  He doesn't get to decide that  But he will be the one to replace it.  

If I got scammed, they did a good job.  I suspect not.  Hopefully, in a couple days, I will have a rather  excellent Plasma HDTV good for 5 years.


There are times when you can't tell if you are being played for a sucker   

Saturday, September 30, 2017

A Week In The Life.

Some of you know that I don't live a regulary-scheduled life, LOL!

So here is the past Tuesday through Saturday:

1.  Stayed up all night Tuesday 8pm - Thursday 8 am visiting cat blogs, processing camera pictures, and shifting between a gardening forum and an atheist forum.  Yeah, that 36 hours.  Went through a 1.5 l bottle of wine and 4 packs of cigs (hey, it WAS 36 hours). 

2.  Visiting my cat-friends takes about 2 hours, and then I get email notifications to new posts and I comment.  I always comment.

3.  I love reading posts at the gardening site and spent a total of a few hours there.  Sometimes there are questions I know something about and I answer.  I've been veggie and flower gardening for a few decades, so I have some experience.  I I have a good library to consult when I'm not sure.  I consulted my Peterson Guide of Eastern Trees when somewhere was trying to identify the specific one in her back yard.  It was one I have never seen, but the leaf shape was unique, so I mentioned it.

Sometimes there is new information I value.  Sometimes I ask questions.  I am new to growing Venus Fly Traps (for example) , so I'm the one asking questions there. 

4.  The atheist forum takes a lot of time.  There are atheists, agnostics, and theists there, and many of the posts are long and factual.  It takes some time to reply to those well.  I probably spend a lot of time there.  I joined this forum October last year and have over 4500 posts there now. 

Mostly, I discuss everyday events with other atheists.  Yes, atheists discuss almost everything from politics to cooking, to movies.  But it does mean we don't have a religious view on them.  Atheists may have a more reality-based approach to life, but we also love sci-fi and can do the "willing suspension of disbelief" as well as anyone if not better.

5.  I tend to switch back between the gardening and atheist forums.  I use up all the threads in one and go back to the other.  I don't mean that I post fast.  I give a lot of thought to each.  My interest is to answer posts carefully, well, and in detail without be overly long.

You can always tell tell the theists' posts by length.  They go on forever before they start quoting religious texts to get to their point.    I treat them kindly, with facts.  They can decide whether to change their minds if they want. 

6.  After a long time on the computer, I usually feed the cats (yes I fed them regularly before) but always make sure to feed them a good meal before I go to bed.  Because staying up that long means I'll sleep 12 hours after.

7.  When I got up Friday, I started on making a hinged top for the new compost bin.  Sometimes you build things by measurement.  But having the compost bin built, I simply put boards on the top and marked the edges for cutting.  Friday, I cut a lot of boards to size.  I glued and clamped some but even with mosquito repellent all over me, they were fierce around my eyes and fingers.  I worked fast and ran.

8.  Saturday afternoon (after another 12 hours in bed- I did have to catch up)  I went out to complete the top.  Fortunately, it was windy and the mosquitoes have trouble with winds over 10 mph.  I got the entire top structure completed.  OK, not the screening, the wood structure.  The hinging was perfect.  The 2 bins now have tops that lift up smoothly.  All I have to do now is attach 1/2 wire mesh to the top and add a few spacer boards under it.  That will leave no space for even a mouse to get inside.

9.  Added a lot more garden stuff into the old toolshed with the new shelves.  Every day, I will clear more basement space.  Weeded the Fall garden a bit.  Not many weeds left.  A year of weeding as removed most and I suspect there aren't many viable weed seeds left there.  Which means I can FINALLY tackle the part of the backyard overgrown with wild blackberries soon.

There is always SOMETHING that needed attention "last year", and I am always behind on some part of the yard.  On the other hand, suppose I caught up with everything?  What would I do?  OK, fix up the house better...

I'll do that when Winter arrives...

Friday, June 30, 2017

Compost Bin Onsite, Part 3

The compost bin is finished!  Well, OK, I can add a lid ta keep critters out, but that's not urgent.  Last time you saw it, it looked like this.
The front posts were constructed to form slots down the sides to accept horizontal boards that could be removed for easy access to the contents of the bins.  So the next step was to make the horizontal boards.

I could have just cut boards to length to slide down into the post slots, but allowing air into the composting material is very important.  So I wanted to add spacers between the boards to create gaps where air could get in.

One site suggested using 3" screws sticking out an inch to make the gaps.  I decided they would eventually push into the boards below. So I made 1" wide wood spacers.
 Glued AND screwed, of course...  I want this compost to last 20 years.  The spacers leave plenty of air to get into the composting material.  And the sides and back are all wire mesh, so that is even more air (see the top picture again).
When all the boards were set in place, they sit above the top of the posts.
That was deliberate.  It will make the top slightly sloped back so rain will run off.  The top will be hinged in the back so that I can easily raise it to add or mix the composting material.

I started building the compost bin in mid-May.  The major reason is for making the compost, and I have a LOT of compostable material in the yard), but it was also a labor of love in the construction.  I am no great wood-worker or even a decent carpenter, but I put a lot of technique into this project.

I used tools and jigs I have owned for a decade and never used before.  I deliberately did some things that weren't strictly necessary but improved the strength and future durability.  I overbuilt it in some ways...

Because the first compost bin I built here "fell right over" and it has annoyed me for a decade.  I knew all the mistakes and made sure not to repeat them.

And I loved every minute of building the new one.  I got much better at some routine building techniques and learned new ones.  The tenoning jig was a wonder to use and I am now amazed at my hesitation to use it before!  I developed some new skills of half-lap board connections.  I even finally used my jointer.


And my tenoning jig.

I can now read Sanskrit, can divide by zero, and program in C!  Just kidding...

But I did learn some really good techniques cutting and fitting wood.  And that encourages me to try some indoors furniture.  I think an end table with a floating top will be a good project.  I would like to get into building Arts&Craft style furniture.  Just for me.  I'll never be good enough for selling anything. 

But the compost bin will do for now...

Wednesday, June 14, 2017

Compost Bin Onsite, Part 2

Well. last you saw, I had a corner established.  I gave those posts a few days to dry while I placed the other frames around the general spots and assembled the screws and tools for the next part. 

After the existing posts seemed solidly settled, I went after the rest of the structure.  Getting the left back frame attached was easy.  I just clamped on a good flat 4x4 post across the back and the left back frame HAD to be straight with the right back one.  Then I attached the left side frame so it was square to the back.

I have a 2'x2' square, so it was pretty definite.  That gave me everything in place except the front center post (which is "there" but just sitting loose in the hole).  I filled the other holes with clay, soaked them, tamped the soil hard to make a nice clayey mud, and let it sit for another 2 days. 

The board across the front was screwed on to keep everything upright and level while the clay hardened.  There are clamps at the back for the same reason.
The next day (leaving all the clamps and the board in place for stability), I went about setting the front center post in place.  I will admit it just drove me crazy!  I set a string line across the front of the 2 front posts, so it was obvious where the front of the center post HAD to be.

That at least gave me the dimensions for the divider frame between the 2 parts of the bin.  Because it was between 2 posts instead of outside of them, it had to be made last by onsite measurement.  Given the variations of lumber, there was no way I could figure the exact size of the center divider until everything else was in place.

The exact size doesn't matter and I don't even recall what it was but say 42.25" just to have a number...  I measured to the string across the front posts and then subtracted the thickness of the posts already between.  Had to be perfect, right?

And the frame I built to fit that spot was perfect.  Square, solid, flat; best one of the whole project!  Well, it should be, I had the experience of making the other 4 before to get it right...

But nothing wanted to fit properly.  The hole for the front center post was pre-dug and in the wrong spot by 6".  The center front post had to be, well, "centered".  There are going to be removable slats that drop down into slots in the front posts. 
The problem was that the center post should be exactly between the 2 outside front posts, the divider frame should be square to the back and front, and the frame and post should be level vertically.  I could get any 2 of those to work, but not all 3 at the same time.

A craftsman would have no trouble, a good carpenter might need a little "push".  I'm not that good...

Have you ever played a gsme called "telephone"?  A dozen people stand in a circle.  One whispers a short sentence to the person on the right (Like "I will be dining with the Queen tonight").  It gets whispered around the circle.  By the time it comes back to the originator, it may be "I hope I'll be dunking the squid in fright".

My carpentry is like that.  Every step gets a wee bit off perfection, and by the time I get to the last part. it is 1" too low and 1" too far.  That's why I have clamps and pry-bars and screws.  The last piece always has to be tortured into place!  I start with a perfect design and end with brute force...

Yeah, yeah, I know, it's "just" a compost bin.  Perfection doesn't matter all that much.  But its the principle of the thing.  I am, by nature, a builder.  I am also plagued by accumulated small errors. 

I understand that part of it is that I do these projects without any help.  I can't be on both ends of an 8' board, and I can't to 2 things at once by myself.  It is still disappointing, though.  I expect better of myself in spite of the difficulties.

BUT, brute force DOES make up for some errors.  A few screwed-on braces replace a hand, a few clamps make boards match up evenly, and enough screws will hold everything in place while the boards stretch internally (and they do) until things work.

Before I finally set the muddy clay around the front center post, I measured the distances between the left and center post and the right and center post.  They were exactly the same.  It looked perfect!  I was thrilled and relieved.  I soaked the clay, tamped it, and remeasured it.  Exact same distances.
The next afternoon, the clay had hardened.  I checked the vertical level of the front post, checked that the center divider was square to the back, checked that the front of the front post was precisely in line with the front corner posts.  Nothing could be wrong.

HAH!  The distance between the left and center post is 1/4" longer than the distance between the right and center posts.  I could cry...  The only explanation is that the universe is testing my sanity. 

On the other hand, it is utterly solid, completely functional, and should last for 20 years.  At which point I will be 87 and too old to consider rebuilding it.

The last part of the project is to make the slats that fit into the slots in the front posts.  That's for the next post...

Tuesday, June 6, 2017

Compost Bin Onsite

I got the site leveled.  Well, almost; the yard slopes, so nothing is ever perfectly level even when trying.  But it was as close as I could get it without making terraces.
I got the parts stacked outside.  I had added some diagonal braces for strength with some leftover ballisters from the deck.  There is a reason I keep leftovers around.  Always some use for them eventually.  

The braces were fun to make.  I actually got them cut to have points fitted into the corners.  Took some geometry.  If the frames were squares, it would have been easy (45 degree cuts).  But they are rectangles.  I eventually figured out that they had to be 55 degrees cuts on one side and 35 degrees on the other (55 and 35 equals 90 degrees).  My 11th grade geometry teacher would be proud of me!  Who says that stuff is useless?

That's part of the fun of building stuff myself; solving problems like that. Building it for the long-term, I both glued and screwed the braces.  Screwing the braces into the frames was some work, but I won't bore you with the details.

BTW, the picture below looks like there are X braces, but that is just 2 of them stacked together.  Each frame has one brace.  That is sufficient.
The mower and cart were good for hauling the parts.  Here it all is onsite.
Then I stuck the posts in the holes I had dug.  It gave me a visual on the size. 
The first requirement was to establish a corner.  It was harder than I expected.  I had measured carefully, but nothing goes according to plan.  I forgot the posts were on the INSIDE of the frame, so I had the holes 4" too far apart.  I had drawn it all on graph paper, but the scale was too small for me to notice the difference of 4".

I'm used to adjustments.  "Design in concept, build in reality".  So I made the post holes larger in the direction of the error.
With my trusty 4' level and some bricks for spacers, I got the first post level, and then attached a back and a side with countersunk screws.  Seriously, if I'm going through all this effort, I might as well do it right.  Pilot holes and countersunk holes for the screw heads prevents splitting the wood.  5 minutes of extra work means years of more solid posts.
I filled the holes around the posts with the clay soil, soaked it, and tamped the clay down around the posts.  When that dries, it will be as good as concrete.

The important part was to get the first corner post and 2 frames attached level and squared in all directions.  From that, all the other posts will be easier.  That board on top is temporarily screwed on to hold the posts and sides in place while the clay dries.

It may rain tomorrow, so I don't know if I can do much there tomorrow.  That's OK, I have other work to do.  My "To Do" list is way too long...

Thursday, June 1, 2017

Compost Bin Site Cleanup, Part 2

First, wow did I have "fun" getting those pictures right yesterday  They suddenly showed up with dates on them.  Not that the dates were wrong, but I don't like sudden changes not in my control.  I searched and searched for the cause and how to delete the dates.

And...  it finally occurred to me to check the camera itself.  Yep, I had somehow changed the menu to REQUIRE dates on the photos.  My bad!  I had fun retouching the photos to erase the dates...

SO...  Here are my photos of the spot where the new compost bin will go.  It was 2 days of sweat and various BAD words.  I had forgotten there was carpet buried down deep among the vines and weeds.


The space needs to be leveled and that is a rototiller job.  But I was so worn out yesterday I just didn't want to do that.  And there are stumps of junk trees that need to be dug out (the rototiller can't do that).

And everything is wet and muddy.  I'm taking the day off from that.

But here is a picture of part of the old compost bin, fallen over sideways...


I can't believe I only nailed it together and had no diagonal braces in it.  But I was inexperienced then.  You live and learn... 

Not that I'm not doing anything.  The old toolshed has a leaky roof from when a tree fell over on it 2 years ago.  Rain got in an ruined the cheap particle board shelves I foolishly installed 25 years ago (hey, they were under a roof and should stay dry - it seemed like a good idea at the time).  They swelled up like sponges and warped and fell apart.  So I needed real shelves.  And a new roof.  I'm still thinking about that.

But it needed cleaning too.  Generations of mice nested in the dark corners , in boxes, and under old equipment.  I had to use a snow shovel to carefully scrape out the nests and poop careful to not disturb it into the air.

And there were old weird tool holders in there.  I had to detach them after cleaning out the mouse debris.  I can't figure out how I even screwed in the brackets that held up the old shelves.  The screws were unreachable with the cordless screwdriver.  I must have done it by hand.

So I just beat it all off with a sledge-hammer.  Sometimes direct force is the only way to go.  I have a wheelbarrow full of debris from that.  The trailer is going to be used a lot soon.  Garden carpet, particle board, bent brackets, old framed bed boards...  The landfill charges by the ton.  Fortunately, also by partial tons.  I may have a half ton.  Unless I pound off the old toolshed roof and replace it.  Then I might have a full ton, and it gets cheaper that way.

Anyway, the new compost bin site is nearly clear.  I just want to rototill it to get it all level.  Then I can dig the corner post holes and start setting some posts in loosely.  With modular parts preconstructed, it becomes more "fitting" than "measurement".  So I will make large holes at the corners to allow for some adjustment and see what changes I need to make.

When the whole thing is in place and firmly set around the belowground posts, I'll build a top to fit.  Latched.  Part of this is to keep the varmints out of the compost bin.  Not that they eat much, but I don't need them around.  Rabies, parasites, diseases that might harm the cats, etc.  And the more varmints around, the more likely they will find a way into the enclosed veggie garden.  Enclosures are good, but none are perfect.

Tomorrow may rain too.  It may be Friday or Saturday before I can get at the new compost bin site to rototill it flat.  Muddy rototilling is not fun.  You'll know when I post about this again, LOL!

Sunday, May 21, 2017

Various General Work

Some days are just catching up on small things. 

1.  I spent an hour pulling grass up from the new front yard island bed.  With 3" of Fall leaves topped with 3" of compost, the weeds don't have a solid grip.  But they were lots of small weeds and it took a while.  Better now than when they good good roots into the soil...

2.  The pole beans and cucumbers are up.  But there were a few spots where a seed didn't grow.  So I soaked a few replacement seeds in water for 4 hours and then planted them. 

3.  I can't BELIVE I forgot to plant a cherry tomato seedling with the regular ones.  So I planted it 3 days ago and shaded it from the direct sunlight for 2 days.  It wilted a bit the first day but is happily hydrated now. 

4.  I have a 2'x8' framed bed against the southern side of the house.  Hottest part of the yard.  I planted 2 blocks of bico9lor corn there today.  One matures 2 weeks before the other, so I'll have a staggerred harvest.  And I'll plant 2 more blocks in 2 weeks, for more staggerred harvest.

5.  The Meadow bed is full of several dozen large bright yellow flowers, some dozen multiple flowers in reds/pinks.white, some white daisies, and some small blue flowers.  The plants are listed on the packet; I will look them up so I know what they are called.

6.  The Hummer/Bee/Butterfly bed is too new to have flowers.  BUT, on a whim, I scatterred old veggie seeds in there too.  I am harvesting the best sweetest radishes ever!  And there are a few corn plants coming up.  It is going to be a weird bed this year.

7.  I've been growing bok choy to harvest young for stir fries.  Some are old even to flower.  I just discovered that the pre-flowering heads are like brocoli, only sweeter.  I coukld grow them just for THAT!  But I also like picking the young leaves for the stir-fries...

8.  Got one major project done I meant to do last year and waited too long.  And almost waited too long this year.  The Spring Bulb bed has daffodils, tulips, and hyacinths.  The Tulips and Hyacinths are in wire cages to protect them from the voles.  But there is unused space between the wire cages and I want to plant daffodils to fill the bed (except for the tulip and hyacinth cages).

So I had to mark the spots of the tulips and hyacinths.   It was a close call.  The tulip leaves were still just barely visible.   I thought because the tulips bloomed after the daffodils; the leaves would last longer.  Nope.  I had to to some careful searching to find the spots.  I did. 

Which led me to how to mark the spots.  Well, first, I found the cardboard cutouts I used to make the cages.  12'x14".  Then I had to find cardboard to cut to size to place on top of the cages (so I wouldn't auger in to them in the Fall while planting daffodils around them.

An aside...  I keep things the are of similar size because they seem useful that way.  A dozen liter juice bottles, a dozen plastic jars that hold mixed nuts, etc.  Well, I buy the same wine by the case and I had a dozen of them stacked up in the basement (thinking they would be good for storing stuff fitting together perfectly in tight spaces).

Well, guess what exact size they were with a wide side and flap?  The size of my tulip and hyacinth cages!  And I have a weird curved linoleum cutter my Dad made.  It sliced right down the corners of the boxes perfectly. 

And guess what I also had?  Fifty 10" tent stakes!  Perfect for holding the cardboard down.  I cut them to size, put the debris in the recycle bin, poked a hole through opposite corners with an awl, and carried them all outside.

It was hard to find the remnants of the tulip leaves, but I had pictures of the bed from 2 directions from the blooms last year.  Between the few leaves and the pictures, I set down the cardboard covers and stuck the tent stakes in the holes to keep them in place.

Then I weed-whacked the whole area.   Why?  So that I can cover the entire area with black plastic to kill all the weeds.  The bulbs won't care; they don't like rain while they are dormant.  When the weeds are dead, I'll uncover them in Summer so the bulbs won't overheat (they are shaded all day now).

9.  All this work has been awkward.  I like to keep my kitchen knives sharp.  Stele them once a week to straighten the edges (they curl with use), and sharpen them every few months.  You know that test about tossing a ripe tomato at a sharp knife and it cuts the tomato in half?  Mine do that.

It does that to fingertips too.  I'm careful.  I have brushes to keep my fingers away from the sharp edges while I clean them.  But OOPS!  I cut my fingertip badly a week ago.  I hadn't seen that much blood in 30 years.  It was 15 minutes before enough pressure even stopped the bleeding.  Fortunately, I coagulate fast.

Anyway, I finally managed to get enough coagulation to put a bandage on it.  I have some of that triple antibiotic ointment on it first, then a large bandaid, then some adhesive cloth bandage along my finger to hold the bandaid in place. 

It HAD to be the index finger of my right hand of course.  The MOST inconcenient finger for a right-handed person.  Makes even putting on my velcro-strap watch difficult, never mind tying shoes.

But I may be a bit lucky there.  I think I was a natural lefty, taught to be right-handed in the 1950s (a common practice in the US, then).  I still do some things with my left hand naturally and deliberately do some things left-handed for practice.

It has certainly helped. 

10.  Making progress on the compost bin.  Nothing to show, as I was just collecting boards and posts for cutting and assembly tomorrow.  I looked at the boards and posts I already had and adjusted my design slightly to account for those.  Might as well use up what I have rather than buy new boards!  I'm always flexible about designs.


Wednesday, May 17, 2017

Compost Bin, Part 2


I set the work aside for a couple of days to catch up on weeding while the weather was cool.  But it hit 90F yesterday, so it was a good day to work in the cool basement.


So, I mentioned using the tenon jig to make half-lap joints...
Image result for half lap joint

This is the jig.

It holds a board upright to cut a large slot high.  I apologize, this picture was a reconstruction and the saw blade was not as high as in reality.  Sometimes I forget to take pictures during my work and have to recreate them.
I can make tenon cuts in 4' boards.  I could do 5' by removing a ceiling tile.
There was massive sawdust everywhere.  I had to wear a nose/mouth mask! I tried wearing glasses too, but the mask directed my exhalations up and fogged the glasses.
 Here is the table saw blade going through the upright board.  There is a lot of wood being removed, so I had to push slowly.  Its a 220v tablesaw, so there is a lot of power, but I still don't like to push too fast.
The 10" saw blade only cuts 3" (part of the saw blade is below the table).  So I get only a 3" deep cut.
I tried a few ways to complete the cut.  A regular saw took too long, a flush-cut saw made an uneven cut (and was slow).  The Saws-All did the job wonderfully!  I love electricity over muscle-power everytime!
The weight of the saw is perfect for cutting down the right distance.  The cut part just falls off.
So then I was ready to assemble some frames.  I had everything ready.  One drill for pilot holes for the screws, another drill for counter-sinking the screw heads (to avoid splitting the boards), exterior glue,  a rag to wipe off squeezed-out glue, a square, and a tray of 1.5" square-drive screws (I love those things).
Here is the first assembled frame.
Then to add the wire mesh sides (to hold the compost in).  I used an electric stapler with 9/16" staples where possible.  Pressure-treated wood can be rather hard even though it it's pine, so sometimes the staples don't go all the way in.  That means some gentle patient tapping with a hammer.  Sometimes, they won't go in at all, so I also have some heavier-duty staples that have to be hammered in by hand.  That takes some effort to get them in straight.  Fortunately, with pliers to hold them straight and a patient hammering, I got them in.
So here are the 1st 4 frames.  These are the 2 backs and 2 sides.  I need to make a 5th, but until I make and set in the front posts (yet to be constructed) I don't know the exact size to make.  Some things just have to be "fitted" at the end.
The next part is to make the back corner and front posts.  The front posts need to have spaces for slats to fit into.  I could cut slots in posts, but it is easier to build posts from several boards to create slots rather than cut them. 

I'll show that next time.  Meanwhile, there are some old deteriorated beds where I want to install the new compost bin, so I need to demolish those first.  And there is a shrub I want to save from there. 


This isn't the best time of year to move a shrub, but I don't have much choice.  I think I will take a dozen tip-cuttings and try and root them indoors before digging the shrub up.  And I'll make the rootball extra large to give it a best chance to survive the transplant shock.

Tomorrow is predicted to hit 92F, so I don't think I want to do serious work outside then, but I'll break up the framed bed it is in and get that part done. 

And I have work I can do inside or outside in shade.  I really try to do as much work as possible in the shade.  LOL!

Friday, May 12, 2017

Compost Bin, Part 1

Well, I got started on the compost bin I mentioned a couple days ago.  And it was about time!  I originally made a quick-and-dirty one not long after I moved here.  It was just 6 upright posts sitting at ground level with boards nailed around them and a divided to make it 2 bins.  Needless to say, it didn't last long.  Nails don't hold, pitchfork activity and leaning on the posts made it tilt over, boards came loose.  It wasn't a total failure; it did function for 10 years.  But I expect more than that.

I built a better one for a friend.  Posts set in the ground with cement, screws, removable angled fronts.  I always do better work for others.  For myself, I take shortcuts.  *sigh*

So I bought one of those big rotating barrels set on a stand with a handle to turn the barrel.  That lasted 10 years, sort of.  The gears to turn the barrel broke after 5 years, then a side can loose.  I was leaving grass clippings on the lawn, mower-shredding fallen leaves into the lawn anyway, so I used the barrel just to let kitchen scraps decompose.

But I'm changing back to making real compost again.  So I looked up a couple plans online, mixed some features together, and improved on them.  It has 2 bins each 4' deep and 4' wide and 3' high.  The 2 back, 2 sides, and 1 divider are made of five 4'x3' frames of 2"x4" pressure-treated lumber with 1/2" wire mesh attached to the inside edge.  Well, the divider is a little smaller to fit between 2 posts.

The 5 wire mesh frames are made with half-lap joints.  They aren't elegant joints, but they give plenty of surface space for gluing and screwing so they are very sturdy.  This isn't living room furniture; strength is better than appearance, LOL!
Image result for half lap joint

You can dado-cut half lap joints, but I have a tenoning joint gadget I've never used and that makes smoother cuts, so that's how I'm doing it.  I'll show actual construction pictures later.  But it takes some effort to make the half laps fit together perfectly.  You can't just find the center of the board; the saw blade removes material.  And the tenoning gadget was new to me.  Fortunately, I had scrap pieces of the 2x4s and got the cutting depth right after only 3 tries. 

The half lapped frames will also have a diagonal brace inside the frame.  I'll do that the easy way.  When the frames are glued and a perfect 90 degrees (clamped to some squares I have for that purpose), I'll put in screws for long term holding.  Even exterior glue doesn't hold forever.  THEN, I'll simply put a 2x4 under the frame, pencil the cut, and use a taper jig to make the brace fit into the corners.

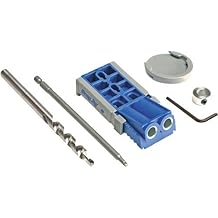
Then I'll attach the brace with pocket hole screws.
Product Details
I bought a pocket hole Kreb jig a few years ago and I love it.  Talk about SOLID!  I have tightened squeeky floor joists in the basement and loose deck posts. 

So my compost bin parts are modular.  Pre-constructed 4'x3' frames to be attached to in-ground posts I will space as I go.  Hey, I know my likely failures; if I dig the post holes first, they will be off a couple of inches by the end.


The posts will be set a foot deep.  With my clay soil, cement is not needed.  But I will use a tamped-down brick at the bottom of each hole to prevent settling and frost heave.  With the posts set in a foot, on firmly-settled bricks, and diagonal braces in each of the back and side frames, this compost bin will not tilt over.

Which leaves the front...  With most compost bin designs, you have to reach over the front to spear the material to shift it from one bin to the other (to keep it aerated and mix it well).  That gets awkward and tiring.  I build my friend's compost bin with angles slats set into cuts in the posts, but that weakened the posts (we had to fix that after 5 years). 

This time I am constructing posts for straight up slats to drop into.  I am sandwiching a 2"x2" post between wider boards to create a slot for the removable front slats instead of cutting one and weakening the posts.

The idea is that I can just lift the slats up through the space between the wider boards for easy access to the bin contents.  And the slats will have 2" long spacers under each end for aeration.

The top will come last after the whole thing is installed.  I know all too well from past experience that planned measurements can get off more than one would think on rough projects like this.  The top will be custom-fitted to whatever the exact constructed size of the bin is.   And quite frankly, I want to see the finished compost bin before I decide what kind of hinges to use.

Tomorrow, pictures of the half lap cutting, and possibly the first assembly of the back and side frames...


Adventures In Driving

 Last month, my cable box partially died, so they sent a replacement.  But they wanted the old one back anyway.  The store in town only hand...