Showing posts with label Projects. Pond. Show all posts

Monday, July 9, 2018

Pond Renovation, Part 1

Well, I have this 5'x3' pre-formed hard pond shape in the flower pond.  It has a shallow shelf around the edge and a deep spot in the center so it cant freeze.  I put in pots of Sweet Flag and waterlilies years ago.  It takes some maintenance.  And I'm not great at maintenance.

Every couple of years I just sort of forget about it and it gets a bit out of control.

Well, apparently, I set a record for ignoring it.  I mean, the plants grow, it rained enough to keep it filled naturally, and everything seemed OK.

Until I noticed that even after heavy rains, it wasn't staying filled.  So I refilled it with the garden hose.  The next day it looked dry again.  Oh damn, a leak!

So a few days ago, I decided to pull the individual potted plants out to find the leak.

Guess what?  I couldn't remove the individual potted plants.  They were intertwined.  In fact, as I discovered, the entire interior of the pond was nothing BUT roots,  and most of the plants were growing outside of the original pots!

I couldn't lift the mass of plants out the the pond.  But I have something called a "Digger Knife".  It is basically a dagger with a saw blade.  I started cutting pots out of the root mass. 

In 2 hours of hard work, I had 1/3 of the root mass removed and stopped for the day.  My work rule is 30 minutes max and 15 minutes relaxing.  I don't want to die stupidly.  I go inside to cool down and drink Gatorade.


I also wanted to save as many of the plants as possible.  Well, it really is amazing how many large containers you have around if you really search.  I found 4 and filled them up with water.  So as I cut one portion on plants loose, I stuck them in those until they were packed.  But as long as they have water, they are fine.

The next day, having many plants in water in containers, I got a bit more brutal.  I just kept cutting with the digger knife until I was down to about 1/3 the root mass.  I weighed myself in the  morning and later in the day.  I lost 3 pounds in sweat.  So I drank a lot more Gatorade, sat inside an hour and went back outside. 

THIS TIME, I was able to lift the preformed pond up and over, spilling the remaining root mass onto the lawn.  Whew, that was a great relief.  I now had the preformed pond loose and could look for a hole to repair.  And I couldn't find one.  The best way to look for a hole in something is to hold it up to the sunlight.  Nothing, nada, zip...  So I set the preform on the lawn and filled it up halfway (because it seemed to be leaking lower than that).


The next morning, the water level was exactly the same!  I was utterly baffled.  So I scooped out the water and poured it on plants (avoiding wasting water) and considered the shaped hole in the ground.  Well, it was never quite level, so I added some soil at the low end, and pounded in in removing the smallest bits of gravel.

So I put the pre-form back in place.  And refilled it.  It isn't "perfectly" level, but within 1/2" and that is good enough.  It used to be a bit tilted toward the back, so the front always looked a little empty.  Now the front always looks full.  Better.

Now I have to wait to see if it leaks again.  I put a stake at the spot where the water overflows.  If it is below that in 2 days (accounting for evaporation), I will drain it and decide whether to line the inside with plastic, scrub the outside and inside and paint it (inside and out with a water sealant, or replace it.

I have enough problems with some parts of the yard as it is (wild blackberries, english ivy, and poison ivy showing up everywhere).  I really didn't need this one.  But it was a very specific problem and I sort of needed that.

Those other problems come next.  I'm in activity-mode...


Saturday, May 17, 2014

Deck

Well, I had a deck builder come by yesterday to discuss replacing the old deck.

When I moved here 27 years ago, one of the first major things I did was build a 2-level deck.  The main floor had sliding glass doors 10" above ground level and a pre-made fence section nailed across the outside so that no one could accidently open the doors and fall out.

But below that was a sunken patio with a cinder block wall around it.  So it seemed like a good idea to use the cinder block wall to support deck posts, and I sort of wanted to use the sliding glass doors for "something".  I bought a book on building decks, designed one, ordered the lumber for delivery, and recruited a friend and a friend-of-that-friend to help.  I'm a by-the-book builder.  I follow "the rules" (Dad was an engineer, and certain habits get passed along).  Like bracing posts using small boards to anchor the posts.  The friend had the carpentry skills of a hippo (zero) and his friend was a "just do it fast" type.  It was not a good combination.

But it worked out OK.  They did the initial cutting away of some vinyl siding (I couldn't watch that part)  and heavy lifting to get the ledger board attached to the house.  I did all the rest myself so I could do it "my way").  Even today, the deck guy pounded and jumped on the deck and said it was still "damn solid".  But even pressure-treated wood does not last forever, the deck was never build "to code" (I had no idea there were codes at the time), and it is ugly as hell.  You can build something to engineering specifications and still have it "ugly".  My artistic skills are not outstanding.  If I had design physical things for a living, I would starve to death.  Let's just say that if life was a ballet, I would be a hippo!  My constructions are very functional, but that that's about it.

Plus, it is a 2-level deck.  The higher level is 12'x12' and the lower level 12'x16'.  I had in mind throwing parties in my new house.  I learned I couldn't fill a closet with "friends" and I'm am not a party-thrower...

So the new deck will be a slightly larger upper one and no lower deck.  The new 16'x16' deck will have very sturdy composite flooring (it used to be cheap and flimsy, but the current stuff is as solid as real '2" by 'wood, and will last longer than I will.  And it is colored right through, so no staining required. 

It will take a several weeks for the deck guy to get the building permit, which is good because it gets me past my dental work next week and also into the drier time on the year (the front yard is muddy in April/May and it is a LOT easier for him to bring the lumber into the back yard by small truck).  I can't wait.

BTW, I mentioned only one builder.  I'm good about competitive bids.  I had 4 estimates last Fall.  So I took the one I preferred among those and asked him for a revised estimate.  Since the revised estimate was so close to the previous one (even with a couple of changes) I just accepted that one.

Wednesday, November 27, 2013

An Unusually Productive Day

I have to admit, most days are spent preparing lunch and eating it while reading the newspaper, doing general daily things (blogging and helping the cats visit their friends' blogs, cleaning litter boxes, letting the cats in and out, playing with them, watching science/nature/politic news...  I do a few errands once per week (groceries, hardware, and odds&ends).  At this time of year, there is nothing to be done in the garden.  I often sleep late ( a pleasure earned by retirement - I got up at 5 AM and returned home at 6 PM for 35 years, so I plan to sleep late for 35 years to catch up) .

So today was a good day.  I was up an hour early, ate lunch faster than usual and took a look at the basement.  Oh boy, there's a year's worth of work.  But I got a good start on it...

First, I collected all the plastic 6-packs I grow plants from seeds in, filled up the laundry tub, added some bleach, and set them all in to soak old dirt loose for 4 hours.  All the damaged ones went into a bag for disposal or recycling. 

Second, took the two 35 pound tubs of new kitty litter and divided them among 7 smaller 12 pound plastic containers from a previous brand (easier to pour from). 

Third, my car battery dies randomly every few months (dealer says the battery is good and I must be leaving a door slightly unlatched to keep the internal lights on.  *I* say I have learned to watch the car EVERY TIME until the internal lights go out AND I check every door every time) - but I can't PROVE that).  So I keep a marine battery in the back of the car.  I used it yesterday, so I recharged it.

Fourth, had some caladium bulbs in planters and they needed to be removed from soil and dried out in cool (but above 50 degree temps).  I have more of them in lager planters I brought into the basement, but they need to dry out more.  Washed soil off the saved ones and set them to dry.

Fifth, shook the soil out of the soaked plastic planting cells in the laundry tub, rinsed them carefully,  and stacked them up in rotation to dry over a heavy towel on the top of the washing machine.  Next laundry day is 10 days, so they will be thoroughly dried to be stack together tightly for storage until January (when the whole planting season starts again - cant wait).

Sixth, collected all used dry potting soil into a big trash barrel for use with established houseplants and transplanted vegetables.

Studied the whole-house humidifier again.  It seems too dry in the bedroom at night.  I don't get static shocks like I once did (there was a time when I could get the fluorescent lamp on my headboard to glow when I touched it and stroking cat fur caused sparks).  But I'm on my 2nd humidifier.  The first was a sponge drum that rotated through a water tray and worked great.  But it (grungily) fell apart after 3 years.  But it worked great, (45% humidity)  The current one drips water down a honeycomb  panel and isn't worth a bowl of water on a heating vent for 3 years.  The highest relative humidity I can get with this one is 25%.  I need to get a drum-type again.  But the opening to the airflow it wants is leess than the current one, so I need to srew some sheet metal over the existing opening and then cut it to size.    It would be nice if there were standard sizes for those things.

Seventh, pumped up bicycle tires, wheelbarrow tires, mower tires, and handtruck tires.  I have an air compressor, but the darn thing is too big to move around conventiently.  I only use that on the car tires and I've never used it as intended. with impact wrenches and spay painting.  Sad.

Eighth, swept most of the basement floor.  I hate the noise of the shop-vac.  Plus it tends to sucky-stick flat on the cement floor.  I tried to epoxy some 1/8" wood spacers under the wide nozzle corners once but it didn't work.  Must try a new way. 

Ninth, took off the sprayer on the watering tripod I made a few years ago.  The round spray doesn't allow as mush water as a different kind I have  (more horizontal) that works better for my flowerbeds.  Measured the size hold-down clamps I needed.    Have a good list of stuff I need from Home Depot.

I decided that was enough for one day...


Saturday, May 4, 2013

Trailer Time!

A front loader bucket of Leaf Pro, about 25 cubic feet.  $30 where the same in bags at the local big box store cost about $60.
The before pic for the early tomato bed.  It's close to the house, so it stays warmer.
I started to add the Leaf Pro,  The box was only half full of soil (the falling down raingutters last year dumped tons of water and washed soil out).  The raingutters have been replaced.  So I decided to fill it with half compost. 
I dug the soil deeply, then added the compost and dug that deeply.  Then I added more and dug it deeply again.  It is one of the 2 sunniest spots left in the yard.  The soil has been left alone a few years.  With the bed being half compost, if I can't grow heirloom tomatoes there this year, I will have to give up here and consider a community garden spot.

Wednesday, May 18, 2011

Catching Up On The Yard Activities, Part 2

I have had the darndest time with the soil in the small crop bed.  The soil is unusually clumpy.  Not wet-clumpy, dry clumps.  And they are hard.  That is unusual.  I can usually just crush them by hand easily.  I even added compost this year.  Maybe I dug the clumps up from deeper in the bed this year.  I need fine soil for planting carrots and lettuce, etc.  Fortunately, it has rained for 2 days so I think I can crunch up the hard clumps in a couple days.  And maybe I better add a couple inchs of leaf-gro to turn in!


I cleaned out the small 5' pre-formed pond last week and siphoned it dry.
Then I repotted all the waterlilies and sweet flag, refilled it, and waited a week.

I added some mosquito dunk and was surprised to find ( a week later) that there were larvae all through it.  I took a full dunk and crumbled it up all over.  I am glad to see there are no larvae to be seen now!


So I added 4 small orange fantail goldfish to the pond.  They like to sit under water plant leaves, so they are hard to spot, but I stood by the pond for a while and finally noticed them moving around.  They stick together.  I may put some netting over the pond to keep the goldfish safe.  I had 3 that lived there for 4 years then all disappeared in a week.  I suspect a raccoon.


I pre-soaked some other crop seeds several days ago.  It gets the initial root started so you know which seeds are viable.  Flat Italian beans, corn, cukes, cantelope, honeydew, and watermelon.  I got those all planted just before the rains came Saturday.

So I'm waiting for the first seeds to come up.  I'll bet on the beans to show first.

Monday, May 2, 2011

Finished The Pond

Not much to show.  My hands got too muddy to take many pictures!

Basically, I had a dozen pots that were fallen over in the pond with the Sweet Flag leaves growing curved toward the light.  I had a large pot of mixed clay and pea gravel to refill smaller pots, broken terra cotta and golf ball sized stones for weight in the bottoms, and a new bag of pea gravel to cover the soil on the tops.

I found the corner of the sunken patio a convenient height to do messy work...

Here is a stage in the procedure.  The 2 pots on the right have had the stones put in the bottom, some clay/gravel soil added, then rooted portion from the original pots.  I am about to add new pea gravel on top and move them to the pond.

This is the small pond with Sweet Flag around the ledge.  There are 5 hardy waterlilies in the deeper center portion and several on the outer ledge.  The lilies on the ledge (and half of the Sweet Flag) will be moved to the larger pond as soon as I replace the damaged lining.

I have a small water pump for the small pond.  After it has circulated the water and filtered out the silt for a few days, I will add a few small goldfish.

At least I know now that I simply MUST lift all the pots each Spring and cut back the roots.  And next year I will cover it with plastic window screen instead of clear plastic sheet so the pond can breathe but the Spring Peepers can't mate!

Sunday, May 1, 2011

A Great Day To Be Out Yesterday!

What is so rare as a day in Spring?  Well in MD, they really are rare!  The average temp this time of year is 70F, but that usually means days of 55 intermixed with days of 80.  Finally, yesterday was actually in the upper 60s, which is MY kind of weather.

I spent almost the entire day outside.  The major project was to clean out the small pond.  I have a larger pond, but that project is for another day.

I have to mention first that I covered the pond with clear plastic because the Spring Peepers drive me crazy at night.  If there was 1,000 it would be OK because the noise would average out.  But I get just a few and there is a loud crok every minute or so.  Its like the Chinese water torture!  So, for sleepfulness, I cover the pond when they are mating.

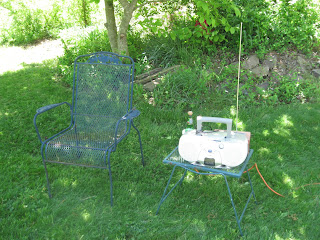
The first thing I do in a major outdoors project is set up a rest station.   Hey, I'm 60 years old!  Chair, radio, beer.  In the shade...
Here is the pond when I uncovered it.  Live plants...
But purple sludge!  My first thought was "red algae bloom" (toxic).  I washed my hands frequently.  I made a hole in the muck to get a hose siphon started.
It's easy.  I just laid out one hose downhill and attached another from the spigot to it.  Fill the first with water, disconnect, and get it in the "hole" in the pond fast.  Here is the downhill end of the siphon hose.
It took an hour to siphon (hence the need for radio and beer), but it was finally done.  Look at the mess I saw!
Meanwhile, as the siphoning was going on, I weeded the garden.  I dug up quite a bit on some invasive grass.  Nasty stuff that spreads by long underground runners.  I used to know the name of it, but it escapes me now.  Suggestions welcome.
When the pond was drained, I mucked out the bottom silt,  Its great stuff for the compost pile!  A pond skimmer net is good for getting that stuff out.
Because of the red algae(?), I sprayed it with chlorinated water.  I don't know if that will kill it, but it sure won't help them any (search for WC Fields and moths).  I scooped the remaining water out with an old pitcher and poured the rich silt-water on the neighboring flowers.


When I had the pond about as clean as I could get it , I refilled the pond center about 4" deep.  That's so I can set the surviving plants back in some water tomorrow when the chlorine has mostly evaporated out. 
They all need repotting.  I tried that last year and failed badly.  Some pots floated and some just fell over.  THIS time, I have gravel to mix with the soil and bits of broken flagstone for the bottoms of the pots to weight them down.
The repotting was necessary because, 3 years ago, I discovered that the entire pond was a mass of roots.  Stupid me, I didn't know that they grew roots out of the pots!!!  And it had been 5 years since I planted them.  I spent hours cutting the various pots apart (the roots were all intertwined).  And that was in the cold March water (I still shudder from the cold water)...
But this year, it is going better.  I have the stuff to repot them properly (read up on it at pond plant website).  And I am going to put a waterpump in there this year to keep the water circulating.  Does anyone know if those U/V filters really work?  I might try one.

Saturday, November 27, 2010

Winter Prep

Given the unseasonably warm November so far, I was surprised to hear the weather forecast for a low of 25F degrees tonight.  The first hard freeze always catches me by surprise!

So, the first thing I did was turn off the outside water spigots (from inside).  Then I went out and disconnected the hoses and stretched them out downhill to drain out all the water in them.  Then I secured plastic over the ends.  There's a reason for that.  Last year, I had one hose that became a Winter home for some insects.  I went crazy trying to figure out why my hose nozzles kept getting blocked up the next Spring!  It wasn't until I attached one that had a screen in it that I found it had bits of plant and dead bugs on the screen.  I tried picking the blockage out with a small wire, but it wasn't working after an hour's effort.  I finally had to tape a hose to the front of the blocked nozzles and back-flush them!  It was a messy wet business.  But it did work.

Second, I detached my 4-outlet gang valve from the backyard outside faucet.  For 3 years in a row I didn't do it soon enough, and the water it it busted out at least one fitting.  At $17 for a 4-way gang valve, I decided to make sure I did it on time this year.

Why do I have a 4-way gang valve on the back yard spigot?  Well, after I surrounded the foundation with a 12' deep flowerbed, it became to difficult to get the hose out from the spigot without dragging it over plants.   So, valve #1 has a 20' hose that leads to a hose-holder (and additional hose) on a post at the edge of the lawn.  And to save myself from needing 150' of hose there, I set another hose-holder (and hose) 75' away in the woods on the right side of the backyard to reach the hosta beds and pond.  Then I set another hose-holder (and hose) from there.  The last hose just barely reaches to the back fence where I have some edging shrubs that need more water in Summer than Nature provides.

Valve #2 has a 10' hose attached that reaches to the drip hoses near the spigot.  Just as I didn't like pullin a hose out to the lawn from the spigot, I didn't want to have to pull that one back in.

Valve #3 has a high pressure jet nozzle attached.  Very useful for cleaning dirt off tools and filling buckets.

Valve #4 has a hose that goes along the fence to the garden on the left side of the backyard.  That hose stays in place until it springs a leak from year-round exposure.  5 years and "so far so good".

The alternative to all that is about $3,000 worth of buried waterlines around the yard.  So replacing the occasional $17 gang valve is not bad.


Third, I disconnected my drip hoses and laid them flat on the ground.  Last year, I mounted 4 of them on a 12" high post on another 4-way gang valve for ease of access.  It never occurred to me that snow-weight would break the drip hoses off the brass attachments!  It did.  I haven't figured out how to repair them yet, but they are still sitting there in place.  I think I could cement plastic tubing that had an outside diameter that fit the inside diameter of the drip hose, but I haven't found any.  I've been wondering about some of that late-night TV waterproof shrink tape ads that suggests it can repair car waterhoses and house waterpipe leaks.  Suggestions are welcome...

Then I opened the outside spigots to make sure there was no water enclosed within them.

Fourth, the weather is supposed to warm to 60F in a few days.  I will coil up most of the (drained) hoses and put them in the shed for the Winter.  I didn't want to handle the hoses at 40F today.

I'll probably remember something else I should done a day too late.  Suggestions on those are welcome, too...

Monday, April 26, 2010

Small Pond

Small Pond looking GOOD!  I attacked the overgrown roots and cut them back to pot size.  That was massive work  It took all my effort to haul the huge root balls out.
.
 First, mud and roots...


I scooped it out wearing large water proof boots.

With the newly cut out pieces removed and chopped, I replanted the pond with pots....

Repotting the pieces of plants took serious cutting apart of ingrown roots.

And weighing the pots down with stones took some work.  I had forgotten the pots fell over when top heavy.    But I got it all right eventually.  It looked good at the end.

The lilies will take 2 months to recover and the sweet flag will take a month.  But at least there is room again for the goldfish to swim around.

I'll wait a week for the water to lose the chlorine from the new water again before adding goldfish.  But I will do that.

The pond will be so nice with a few goldfish in it. again.

Serious cleaning-up to do.  See all the excess roots?

All the excess leftover roots would fill the whole pond...

Sunday, April 25, 2010

Pond Renovation

My large pond (8'x10') liner started to leak in 2008.  When the water level fell to 4", it stopped.  I had a billion mosquito larvae in there!  So I punched more holes in it to drain the water.  I expected to repace the liner fast!

Well, I didn't.    The daunting task was moving the stones around the liner.  I built the pond 20 years ago and I've learned that I an nowhere near as strong as I was 20 years ago!  20 years ago, I lifted those stones and set them in place carefully.  Now, at 60, it is all I can do to merely roll them over out of the way.  One stone must have weighed nearlt 100 pounds and it took me 15 minutes to just roll it over!

I can hardly believe I ever moved them to begin with!  I recall lifting each of them into a wheelbarrow and moving them into place.  They were "heavy" then but I could lift them into the wheelbarrow.  I can't imagine doing that now!  I could barely roll them today...  One had actually fallen into the pond and it about killed me to lift it outside the area.  I'll probably wake up tomorrow with pulled back muscles.

Being 60 ain't like being 40!  I'm no special sports athlete, but I've always been able to push my body farther than my friends.  I'm now losing that.  :(  There are some of those stones that I could lift into the wheelbarrow at 40 that I can't lift off the ground now... 

But I DID get them moved eventually.  It was quite a trick in some cases because I have plants all around the pond and didn't want to crush them. 

Next, I have to shovel about 4" of composted leaves from the past 2 years out of the bottom.  That's good stuff and I will use it in my garden, but it is going to be awkward getting it out.  I'll be down 2' and lifting it up to the wheelbarrow 2' high.  I think the snow shovel is the way to go.

Then I can put the new pond liner in over the old one, bury the edges on the ground, move the stones back on the edge, and refill the pond.   I'll bet that takes a week!  At least it should be good for another 20 years.  After that, I won't be able to renovate it again.

Adventures In Driving

 Last month, my cable box partially died, so they sent a replacement.  But they wanted the old one back anyway.  The store in town only hand...