I built a better one for a friend. Posts set in the ground with cement, screws, removable angled fronts. I always do better work for others. For myself, I take shortcuts. *sigh*
So I bought one of those big rotating barrels set on a stand with a handle to turn the barrel. That lasted 10 years, sort of. The gears to turn the barrel broke after 5 years, then a side can loose. I was leaving grass clippings on the lawn, mower-shredding fallen leaves into the lawn anyway, so I used the barrel just to let kitchen scraps decompose.
But I'm changing back to making real compost again. So I looked up a couple plans online, mixed some features together, and improved on them. It has 2 bins each 4' deep and 4' wide and 3' high. The 2 back, 2 sides, and 1 divider are made of five 4'x3' frames of 2"x4" pressure-treated lumber with 1/2" wire mesh attached to the inside edge. Well, the divider is a little smaller to fit between 2 posts.
The 5 wire mesh frames are made with half-lap joints. They aren't elegant joints, but they give plenty of surface space for gluing and screwing so they are very sturdy. This isn't living room furniture; strength is better than appearance, LOL!
You can dado-cut half lap joints, but I have a tenoning joint gadget I've never used and that makes smoother cuts, so that's how I'm doing it. I'll show actual construction pictures later. But it takes some effort to make the half laps fit together perfectly. You can't just find the center of the board; the saw blade removes material. And the tenoning gadget was new to me. Fortunately, I had scrap pieces of the 2x4s and got the cutting depth right after only 3 tries.
The half lapped frames will also have a diagonal brace inside the frame. I'll do that the easy way. When the frames are glued and a perfect 90 degrees (clamped to some squares I have for that purpose), I'll put in screws for long term holding. Even exterior glue doesn't hold forever. THEN, I'll simply put a 2x4 under the frame, pencil the cut, and use a taper jig to make the brace fit into the corners.
Then I'll attach the brace with pocket hole screws.

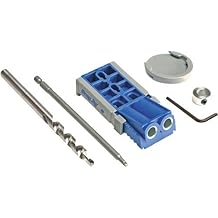
I bought a pocket hole Kreb jig a few years ago and I love it. Talk about SOLID! I have tightened squeeky floor joists in the basement and loose deck posts.
So my compost bin parts are modular. Pre-constructed 4'x3' frames to be attached to in-ground posts I will space as I go. Hey, I know my likely failures; if I dig the post holes first, they will be off a couple of inches by the end.
The posts will be set a foot deep. With my clay soil, cement is not needed. But I will use a tamped-down brick at the bottom of each hole to prevent settling and frost heave. With the posts set in a foot, on firmly-settled bricks, and diagonal braces in each of the back and side frames, this compost bin will not tilt over.
Which leaves the front... With most compost bin designs, you have to reach over the front to spear the material to shift it from one bin to the other (to keep it aerated and mix it well). That gets awkward and tiring. I build my friend's compost bin with angles slats set into cuts in the posts, but that weakened the posts (we had to fix that after 5 years).
This time I am constructing posts for straight up slats to drop into. I am sandwiching a 2"x2" post between wider boards to create a slot for the removable front slats instead of cutting one and weakening the posts.
The idea is that I can just lift the slats up through the space between the wider boards for easy access to the bin contents. And the slats will have 2" long spacers under each end for aeration.
The top will come last after the whole thing is installed. I know all too well from past experience that planned measurements can get off more than one would think on rough projects like this. The top will be custom-fitted to whatever the exact constructed size of the bin is. And quite frankly, I want to see the finished compost bin before I decide what kind of hinges to use.
Tomorrow, pictures of the half lap cutting, and possibly the first assembly of the back and side frames...