So I had daffodils in some tubs and meant to replant them last Spring after they bloomed. But didn't. I got busy with other stuff.
I tipped the bins over last week and picked the bulbs out of the soil, Wow, those bulbs loved the rich soil! Most had multiplied into 4. Well, I have this new island around a tree and boulder in the front yard. About 40'x20'. I tried planting Astilbe there, but the deer just kept pulling them up (couldn't eat them, but kept trying). Well, I know they sure can't eat daffodils (toxic to most mammals).
The bed was covered with large saucer magnolia leaves. I raked them just off the bed so that I could use my little electric tiller (which is great for small areas) to kill the weeds. I have a large tiller, but it isn't good in small areas.
I planted those recovered 100 bulbs in the front island.
I am now utterly worn out. I have put away all my planting tools. I am done for the season...
And actually, this was several days ago. I am really done. I've pushed myself to my limit, getting inside before sunset and sitting in a chair exhausted. I get muscle cramps from all the digging and bending. I've been getting my hands clenching up, cramps in my legs, stitches in my sides.
I AM DONE FOR THE YEAR!
But oh next Spring is going to look SO wonderful... It will all have been worth it.
Thursday, November 30, 2017
Wednesday, November 29, 2017
Daffodils
I wasn't just working on the hose reel platform this week. I was planting daffodils too. And a LOT of them.
The original plantings looked like this...
 One quarter daffodils... I decided to complete the circle this fall (avoiding where I had planted tulips and hyacinths in vole-proof metal cages) 2 years ago. I ordered 500 daffodil bulbs and they arrived 3 weeks ago. I looked at them all and said "OMG, WHAT was I thinking"? How could I ever plant so many?
It took 2 hours per day for 4 days. First, I thank technology for drill augers!

Attached to an electric drill, you can get fast holes for bulbs to go into. They even cut some small roots and lift out small rocks. It takes some work, but works better than those cylinder push-down bulb-planters in rough soil.
I kept track of where I planted bulbs from day to day by surrounding the planted area with bright yellow nylon marine rope and leaving the closest row of bulbs unburied.
And I had to do some exploratory digging. I had covered the tulip and hyacinth cages with cardboard cut to size and pinned with tent pegs. And the whole are was covered with black plastic sheeting to smother the weeds and keep the bulbs dry (which they like).
But even then, I was surprised to discover that some of the cardboard markers rotted and some were loosened when a windstorm came through right after I removed the plastic. Sad timing. But the tent pegs were still there and I spend a whole afternoon finding them. Which allowed me to replicate where the cardboard covers had been,
The recreated covers looked like this...

I planted all the new daffodil bulbs around the cardboard covers the other 3/4 on the bed.
Almost. I came short a 6'x5' section at the end. Home Depot had 40 bulb bags on clearance. Most were blends and I didn't want THAT! But I found ONE bag of one kind (King Alfred) and JUST barely filled up that last area.
Bed Complete!
But I had some in some tubs that needed a permanent space. That's tomorrow...
The original plantings looked like this...

It took 2 hours per day for 4 days. First, I thank technology for drill augers!
Attached to an electric drill, you can get fast holes for bulbs to go into. They even cut some small roots and lift out small rocks. It takes some work, but works better than those cylinder push-down bulb-planters in rough soil.
I kept track of where I planted bulbs from day to day by surrounding the planted area with bright yellow nylon marine rope and leaving the closest row of bulbs unburied.
And I had to do some exploratory digging. I had covered the tulip and hyacinth cages with cardboard cut to size and pinned with tent pegs. And the whole are was covered with black plastic sheeting to smother the weeds and keep the bulbs dry (which they like).
But even then, I was surprised to discover that some of the cardboard markers rotted and some were loosened when a windstorm came through right after I removed the plastic. Sad timing. But the tent pegs were still there and I spend a whole afternoon finding them. Which allowed me to replicate where the cardboard covers had been,
The recreated covers looked like this...

I planted all the new daffodil bulbs around the cardboard covers the other 3/4 on the bed.
Almost. I came short a 6'x5' section at the end. Home Depot had 40 bulb bags on clearance. Most were blends and I didn't want THAT! But I found ONE bag of one kind (King Alfred) and JUST barely filled up that last area.
Bed Complete!
But I had some in some tubs that needed a permanent space. That's tomorrow...
Tuesday, November 28, 2017
Hose Reel 6
So the post is in and solid. The metal bars are assuring it stays upright and level. Time to attach the hose reel...
The hose reel has 4 front screw holes and 4 back ones. I used 1 1/2" x 3/8" lag screws in pre-drilled holes. I put rubber hose washers on the bottom and fender washers (large washers with small holes) above those and drove the galvanized lag screws down tight. THOSE aren't going to come loose!
 The hose reel turns to the left...
 To the right...
 And rolls up the hose...
 It's a bit ugly because it is coldish outside and the hose isn't as limp as it will be in Summer. But as a test of the system, it is good.
After testing the "reeling", I used it to water the newly-planted daffodils. The hose came off the reel beautifully from any angle.
Tomorrow, planting daffodils...
The hose reel has 4 front screw holes and 4 back ones. I used 1 1/2" x 3/8" lag screws in pre-drilled holes. I put rubber hose washers on the bottom and fender washers (large washers with small holes) above those and drove the galvanized lag screws down tight. THOSE aren't going to come loose!


After testing the "reeling", I used it to water the newly-planted daffodils. The hose came off the reel beautifully from any angle.
Tomorrow, planting daffodils...
Monday, November 27, 2017
Hose Reel 5
I had a hose hanger on a 4x4 post there, and pulled it out. Then used a 6" spade and a post hole digger to deepen and enlarge the hole. That was easier than I expected. The soil was quite good. The bottom foot was mostly clay, and I saved that for backfill. Its stronger.
This picture shows getting down 20". I got down to 24" but the picture failed. I usually take several of each event and all are good, but not this time, Figures...
 But I got the post into the hole and stood it upright.
 I backfilled from all sides gradually. I didn't have a good tamp available, but realized the D handle of the shovel worked well. I'm good at using whatever is near at hand.
I packed that clay soil hard!
 Then put a level on the top and made some slight adjustments. Tamping hard on one side adjusted the post to perfect level. And then I set metal bars on either side (anchored with cinderblocks) to hold it it place. Then I used a piece of 4x4 post (more useful scrap) to really pound the clay soil around the post.
 The top was utterly level! I left the metal bars in place to assure the post didn't move while I soaked the soil and tamped some more.
 That post ISN'T moving!
Tomorrow, attaching the hose reel to the platform...
This picture shows getting down 20". I got down to 24" but the picture failed. I usually take several of each event and all are good, but not this time, Figures...


I packed that clay soil hard!


Tomorrow, attaching the hose reel to the platform...
Sunday, November 26, 2017
Hose Reel 4
So the post and turntable are all set for installation. I released the bench vice holding it and went to lift it. I couldn't lift it! It was TOO HEAVY!
I had to drag out my dolly.
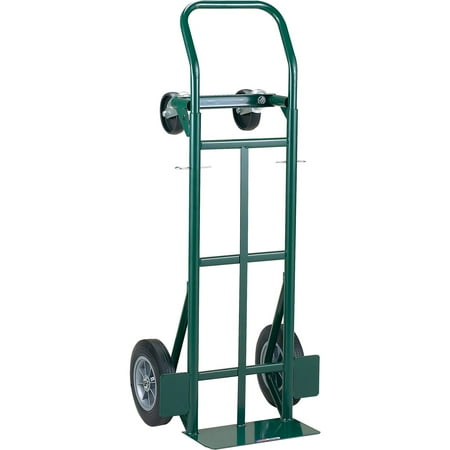
It took 5 minutes to drag it out of the basement to the installation site! Clutterred basement, rough ground...
Tomorrow, the hole for the hose reel post...
I had to drag out my dolly.
It took 5 minutes to drag it out of the basement to the installation site! Clutterred basement, rough ground...
Tomorrow, the hole for the hose reel post...
Saturday, November 25, 2017
Hose Reel 3
The rotating hose reel project has been a real challenge. Every time I think I has something right, it's wrong.
The original plan had a 6"x6"x5' post (a leftover from when the deck was built 3 years ago). Leftovers are always useful for SOMETHING eventually. That part stayed.
I was thinking that the turntable construction needed 12" boards across it for stability and some other boards as braces on the sides.
But it occurred to me that metal angle brackets would to that side strength. And then I realized the more metal brackets could replace ALL the boards. And a lot easier to install...
So what was first a rather complicated structure of 12" carriage bolts and 10" lag screws became a simpler build of 3" deck screws into angle brackets.
So I dragged the 6"x6"x5' post into the basement and clamped it upright in my bench vise. I needed two 3" angle brackets on the front and back and two 4" brackets on the sides.
But then I decided that having 2 brackets on each side of the post was even sturdier. One is good, two are better! I've never seen anything I can't over-build...
I had some 3" brackets and screwed them in. I had to buy some 4" brackets. To my surprise, all the DIY stores were CLOSED on Thanksgiving day. They are even open on Easter! Walmart was open though. But they had only 3" brackets. So I got the 4" ones Friday.
Reality is cruel! When I went to attach the 4" brackets, the screws hit the 3" bracket screws! ARGH... I don't have a picture of the 3" brackets screwed in, but the dots mark the spots
 I decided to offset/lower the 3"brackets by adding a strip of 1/2" plywood cut to size (more good use of scraps). That caused all the attachment screws to miss each other.
 Here, you can see the plywood strips, and brackets successfully attached... 4" ones here...
 And 3" ones on the othe sides.
 Note how the bracket screw holes are now offset from each other...
 The post, with the turntable top is now complete, and has strong as can reasonably be made!
Tomorrow, installing the post outside...
The original plan had a 6"x6"x5' post (a leftover from when the deck was built 3 years ago). Leftovers are always useful for SOMETHING eventually. That part stayed.
I was thinking that the turntable construction needed 12" boards across it for stability and some other boards as braces on the sides.
But it occurred to me that metal angle brackets would to that side strength. And then I realized the more metal brackets could replace ALL the boards. And a lot easier to install...
So what was first a rather complicated structure of 12" carriage bolts and 10" lag screws became a simpler build of 3" deck screws into angle brackets.
So I dragged the 6"x6"x5' post into the basement and clamped it upright in my bench vise. I needed two 3" angle brackets on the front and back and two 4" brackets on the sides.
But then I decided that having 2 brackets on each side of the post was even sturdier. One is good, two are better! I've never seen anything I can't over-build...
I had some 3" brackets and screwed them in. I had to buy some 4" brackets. To my surprise, all the DIY stores were CLOSED on Thanksgiving day. They are even open on Easter! Walmart was open though. But they had only 3" brackets. So I got the 4" ones Friday.
Reality is cruel! When I went to attach the 4" brackets, the screws hit the 3" bracket screws! ARGH... I don't have a picture of the 3" brackets screwed in, but the dots mark the spots


Tomorrow, installing the post outside...
Thursday, November 16, 2017
Hose Reel, Part 2
The turntable drove me completely crazy! I watched 3 youtube videos about how to install them and none made much sense. So I went back to the workbench and turn the pieces around in all directions seeking some way, seeking some understanding.
Think of it this way. Put a slice of ham between 2 slices of bread and THEN put mustard on the ham without lifting the bread or pushing it in sideways...
I went crazy!
I attached the turntable to the top and bottom pieces of wood in all possible ways. I even considered the turntable was sold cheap because it was non-functional. But I knew it wasn't. It was MY failure to comprehend the one BIG HOLE.
When Sir Issac Newton was trying to figure out the orbits of the planets, he tried many geometric shapes. And he hit on the right one, but made a simple math error and rejected it. Looking back later, he figured out his error and solved the problem.
I looked back too. And realized I had it right once but didn't realize it. Not that I'm like Newton, but we all make mistakes and find we were right at some point and didn't realize it.
I figured it out...
I can't possible explain, but I could show it.
All I can offer is some pictures...


 IT SWIVELS, IT SPINS! There are a lot of wrong holes in it, but it WORKS! And with new wood, I could do it again better. But it works. I got mustard in the sandwich without lifting the bread, LOL!
I bought heavy duty lag screws to attack the hose reel to the top piece. I drilled the holes to attach it.
But before I do that, I need to create a solid platform to attach it to the existing 4"x4" post. More of the same size scrap pieces glued and screwed to the post and cross pieces across those. But that's another day...
My friends say I "overbuild" things. But my stuff doesn't fall apart after a few years... I would have designed the Pyramids just as they are... LOL!
Wait til you see the finished product...
Think of it this way. Put a slice of ham between 2 slices of bread and THEN put mustard on the ham without lifting the bread or pushing it in sideways...
I went crazy!
I attached the turntable to the top and bottom pieces of wood in all possible ways. I even considered the turntable was sold cheap because it was non-functional. But I knew it wasn't. It was MY failure to comprehend the one BIG HOLE.
When Sir Issac Newton was trying to figure out the orbits of the planets, he tried many geometric shapes. And he hit on the right one, but made a simple math error and rejected it. Looking back later, he figured out his error and solved the problem.
I looked back too. And realized I had it right once but didn't realize it. Not that I'm like Newton, but we all make mistakes and find we were right at some point and didn't realize it.
I figured it out...
I can't possible explain, but I could show it.
All I can offer is some pictures...


I bought heavy duty lag screws to attack the hose reel to the top piece. I drilled the holes to attach it.
But before I do that, I need to create a solid platform to attach it to the existing 4"x4" post. More of the same size scrap pieces glued and screwed to the post and cross pieces across those. But that's another day...
My friends say I "overbuild" things. But my stuff doesn't fall apart after a few years... I would have designed the Pyramids just as they are... LOL!
Wait til you see the finished product...
Wednesday, November 15, 2017
Hose Reel
I bought a hose reel a few weeks ago, not sure exactly how to attach it to anything. The instructions say it MUST be attached to a wall or affixed to the ground.
HAH!
I decided I wanted it to swivel, so that I could pull the hose off in different directions. My initial thought was to put a 2" metal pipe in the ground and set a 3" PVC pipe on top of that so that would rotate on the metal pipe with some support structure to hold the hose reel.
That got kind of complicated, and PVC pipe is not the sturdiest stuff. So I let it sit in my mind a few days.
I was shopping for other stuff at the DIY store, and noticed a little 4" turntable (aka Lazy Susan) and thought, "Hey, I have a 12" one of those I bought at a yard sale years ago because I thought it "might be useful".
But I couldn't figure out how to attach it to a post AND attach it to the hose reel. The internet is an amazing thing. Ask the RIGHT question, and some other people know the answer and even do a video showing how.
I had figured out how part of it worked. There was a big hole in the bottom that allowed access to all the smaller holes. But I still couldn't see how to get at both the top and bottom since it seemed the holes got covered by a board no matter what I did.
Sneaky tricky stuff, but it all had to have a purpose. The big hole was the key. And not attaching the hose reel directly to the turntable. The video I watched showed about using the big hole to allow access to all the other small srew holes. I got THAT right. But then it showed attaching 2 square boards to the top and bottom and THEN attaching your "whatever" to the top baord.
DUH! Slapped forehead. And the video even expected that. It said "you can't do it the way you want to directly".
So I needed 2 boards suitable for outside conditions. Well, I could buy a sheet of pressure treated plywood and cut it to size. Or use stuff I had. I didn't have anything 12" wide. But I had scraps of 2"x8" boards leftover from building the framed garden beds 2 years ago.
But I had to attach 2 pieces of it twice together (a top and a bottom). Gluing wasn't sturdy enough. But I had a "biscuit joiner" I bought 20 years ago and had only used once. AHA, I had a reason to use it! A biscuit joiner cuts oval shapes in the edge of a board and you gkue precut ovals into the cut slots.
I ran the scraps of wood through my planer to make the surfaces flat and exactly the same thickness, used the plate joiner to cut slots in the edges and glued in the biscuits (ovals). Clamped them tight and held them flat with clamps and weights. The wood ovals swell up from the moisture in the glue and the squeeze-out gets between the boards and hold even more. He stuff makes 2 boards are solid as one larger board.
Naturally, I forgot to take pictures (and I had my camera in my pocket)! But I can replicate some of it to make sense of all this text.
And that is where I stopped for the day to bring some deck plants in because of the first hard freeze of the season.
More later...
Friday, November 10, 2017
Monday, November 6, 2017
An Old Project Done
Sometimes, I buy stuff for a project and never get around to it. Sometimes it is funny just seeing the stuff sitting around for months or even years, thinking "I really need to get that done:. Sometimes, it is really annoying, like when I look at a bag of bolts and hooks or some stuff and have no recollection what I intended to do with them. And sometimes, I know what they were for, but I did something different to solve the same problem.
At least THIS time, I knew what the parts were for and still wanted it done!
Twentyfive years ago, when I was building the fence around the backyard, I needed sawhorses. I bought these cheap aluminum brackets you screwed 2"x4" boards into, and the sawhorses were flimsy.
Ten years ago, I bought some sturdier-looking brackets with a unique way of attaching boards. And they sat around at the back of a shelf every since.
Hang in there, there WILL be pictures...
Yesterday, I looked at them and decided to just "get them built"! The poly-something brackets are nicely designed. They are specifically molded to accept both 2"x4" or 2"x6" boards, and you can bolt wider tops on if you choose. The bracket is also molded to hold 2"x4" legs at a proper angle with heavy-duty poly wedge blocks that are ridged to dig into the boards a bit. The box even has a convenient chart to tell you how long to cut the legs to get about a dozen possible heights.
So yesterday I went to the DIY store I went for a 2"x6" top. The 2"x4" pressure-treated boards (P-T boards because they are for outside use - I have fancier adjustable stuff for shop use) I found there were JUNK (twisted or bowed)! I chose the best I could find. But when I went looking for the 2"x6" board, I discovered better quality 2"x4" boards next to them. So I returned the junk boards to the bin and selected the good ones. $1 more per board...
So with my perfectly straight boards, I went home and and cut them to length. That was enough for the afternoon and I had other things to do.
Today, I went to assemble the parts. The first thing I discovered was that the 2"x6" top board didn't fit in the pre-molded slot. I had tested a bracket with a regular 6" board, but apparently, pressure-treated wood gets a little bit swollen in the process. So I had to shave off 1/8th" from the ends using the table saw. Same with the 2"x4" legs. Its a bit ugly, but it's just a sawhorse. If I had it to do over again, I would have just ripped 1/16th" off both sides. And it actually would have been easier. Ahh, "hindsight"...
But everything fit eventually. I marked the spot where the 6" top needed a 5/16" hole drilled for a carriage bolt to attach the top through the poly wedge to hold the legs in place and set up my drill press to get the holes perfectly straight.
And then discovered they should have said an 11/32" because I had to hammer the bolts through the board to get them through. Well, I suppose they figured not everyone has an 11/32" drill bit. I do, but hammering was easier than drilling all the holes slightly larger. I do not object to "brute force" on rough projects. And carriage bolts are designed to be hammered into place. They have a 1/8" square shape intended to be pushed into the wood to keep them from turning.
Holding 2 legs AND placing the poly wedge was a bit tricky while I placed the large wing nut of the bottom of the carriage bolt, but a shoulder was a sufficient "third hand". I have gotten used to doing things that require 3 hands, LOL!
Tightening the big wing nut between the sawhorse legs took some creativity. I finally figured out that using a large screwdriver as a lever got 1/3 turn and a large pliers got another 1/3 turn, repeated over and over. There are some things that are hard to describe but obvious when you try them.
Anyway, I finally got that wingnut so tight that The Hulk couldn't pull those legs loose. And even then, I might put a couple of 2" screws through through the poly bracket and into the legs.
And the instructions suggested that added crosspieces of wood across the middles of the legs would improve stability. Naturally, I did that. But the legs are at angles. So, feeling a bit "perfectionist", I wanted the crosspieces to match the angles of the legs and not stick out.
One little tool I love is an angle tool. It is nothing but 2 pieces of metal with a wing nut tightener at the connection. You loosen the nut, set the 2 pieces to match the angle you want, and bring it to the tablesaw to match the angle of the miter gauge to the saw blade.
It worked perfectly, and I even used scrap PT 1"x3" wood (intended for but not used on the compost bin project). After I screwed THOSE on the insides of the legs, I sat of the sawhorses and they didn't give at all!
Now, finally, PICTURES...
The 2 sawhorses...
 The poly-something bracket...
 The leg crosspieces (showing how nicely the angled cuts match the legs...
 They don't exactly "nest" on each other, but can be stacked...
 The box info. The brand is Crawford and the model is #90. I looked them up on Amazon and they are up to #90-6, so maybe there are improvements. And there are similar products from another brand.
 Very worth it for outdoor sawhorses. These might outlast me.
At least THIS time, I knew what the parts were for and still wanted it done!
Twentyfive years ago, when I was building the fence around the backyard, I needed sawhorses. I bought these cheap aluminum brackets you screwed 2"x4" boards into, and the sawhorses were flimsy.
Ten years ago, I bought some sturdier-looking brackets with a unique way of attaching boards. And they sat around at the back of a shelf every since.
Hang in there, there WILL be pictures...
Yesterday, I looked at them and decided to just "get them built"! The poly-something brackets are nicely designed. They are specifically molded to accept both 2"x4" or 2"x6" boards, and you can bolt wider tops on if you choose. The bracket is also molded to hold 2"x4" legs at a proper angle with heavy-duty poly wedge blocks that are ridged to dig into the boards a bit. The box even has a convenient chart to tell you how long to cut the legs to get about a dozen possible heights.
So yesterday I went to the DIY store I went for a 2"x6" top. The 2"x4" pressure-treated boards (P-T boards because they are for outside use - I have fancier adjustable stuff for shop use) I found there were JUNK (twisted or bowed)! I chose the best I could find. But when I went looking for the 2"x6" board, I discovered better quality 2"x4" boards next to them. So I returned the junk boards to the bin and selected the good ones. $1 more per board...
So with my perfectly straight boards, I went home and and cut them to length. That was enough for the afternoon and I had other things to do.
Today, I went to assemble the parts. The first thing I discovered was that the 2"x6" top board didn't fit in the pre-molded slot. I had tested a bracket with a regular 6" board, but apparently, pressure-treated wood gets a little bit swollen in the process. So I had to shave off 1/8th" from the ends using the table saw. Same with the 2"x4" legs. Its a bit ugly, but it's just a sawhorse. If I had it to do over again, I would have just ripped 1/16th" off both sides. And it actually would have been easier. Ahh, "hindsight"...
But everything fit eventually. I marked the spot where the 6" top needed a 5/16" hole drilled for a carriage bolt to attach the top through the poly wedge to hold the legs in place and set up my drill press to get the holes perfectly straight.
And then discovered they should have said an 11/32" because I had to hammer the bolts through the board to get them through. Well, I suppose they figured not everyone has an 11/32" drill bit. I do, but hammering was easier than drilling all the holes slightly larger. I do not object to "brute force" on rough projects. And carriage bolts are designed to be hammered into place. They have a 1/8" square shape intended to be pushed into the wood to keep them from turning.
Holding 2 legs AND placing the poly wedge was a bit tricky while I placed the large wing nut of the bottom of the carriage bolt, but a shoulder was a sufficient "third hand". I have gotten used to doing things that require 3 hands, LOL!
Tightening the big wing nut between the sawhorse legs took some creativity. I finally figured out that using a large screwdriver as a lever got 1/3 turn and a large pliers got another 1/3 turn, repeated over and over. There are some things that are hard to describe but obvious when you try them.
Anyway, I finally got that wingnut so tight that The Hulk couldn't pull those legs loose. And even then, I might put a couple of 2" screws through through the poly bracket and into the legs.
And the instructions suggested that added crosspieces of wood across the middles of the legs would improve stability. Naturally, I did that. But the legs are at angles. So, feeling a bit "perfectionist", I wanted the crosspieces to match the angles of the legs and not stick out.
One little tool I love is an angle tool. It is nothing but 2 pieces of metal with a wing nut tightener at the connection. You loosen the nut, set the 2 pieces to match the angle you want, and bring it to the tablesaw to match the angle of the miter gauge to the saw blade.
It worked perfectly, and I even used scrap PT 1"x3" wood (intended for but not used on the compost bin project). After I screwed THOSE on the insides of the legs, I sat of the sawhorses and they didn't give at all!
Now, finally, PICTURES...
The 2 sawhorses...


Saturday, November 4, 2017
Seeds
Today I went around and snipped off all the flowerheads I could find in the meadow bed. I figure they will do better if I keep them in the fridge over Winter, and spread them out next Spring. I filled up a continer of rubbed-aoart seed heads.
Then I did the same for the bee/butterfly/hummingbird bed flowers.
Then I did the same for the odd huge marigold that volunteered this year.
3 containers of hopefully "self-sowing" seeds and I will try to help them in Spring. I figure spreading them around rather than just letting seedheads fall in clumps will be a good idea. We'll see.
Subscribe to:
Posts (Atom)