Despite several tries, I just can't seem to get a good meadoe bed established. The 1st year was good, though rather uniform..
It went downhill fast, with weeds and grasses taking over. And mock strawberries.
So I decided to start again. Tilled the soil and raked it so there were furrows. Watered it deeply. Then scratched up the soil again. This time, I planted 3 circles of sunflowers, then scattered various annual seeds I had saved from some potted deck plants last year.
The idea isn't to establish a meadow bed this year, but to grow annuals that will shade the weeds out for a proper planting next Spring. Lots of saved marigold seeds and leftover seeds. It's late in the year, so I don't expect much.
But one never knows and a bed of marigolds and some random flowers is better than weeds and grass.
I saved a few Queen Anne's Lace that grew naturally. And I also have some purple coneflowers growing in the garden paths to try to transplant (yeah, this is the wrong time of year for that, but I need to remove them from the paths anyway) and there are black-eyed susans all over the place so I wil try some of them too in clumps.
Here is what the bed looks like now...
It will be interesting to see what it looks like next month. It may look just as dead or it may have some transplants surviving with new flowers growing. We'll see...
That's the amazing thing about growing plants. You never really know what you will get.
Thursday, July 9, 2020
Wednesday, July 8, 2020
The Daylilies
Individual pictures of them are great. But they don't show the whole of the row.
Left half...
Right half...
And the whole of it.
I'm going to stick a color label at the base of each plant. Because they are large enough to want to be divided this Fall. I never object to free plants, and lilies are very hardy. I think they will make a nice border along the drainage easement (think "artificial creek along property line") because they grow thickly enough to smother weeds and tolerate almost any conditions.
Tuesday, July 7, 2020
Pruning And Shaping
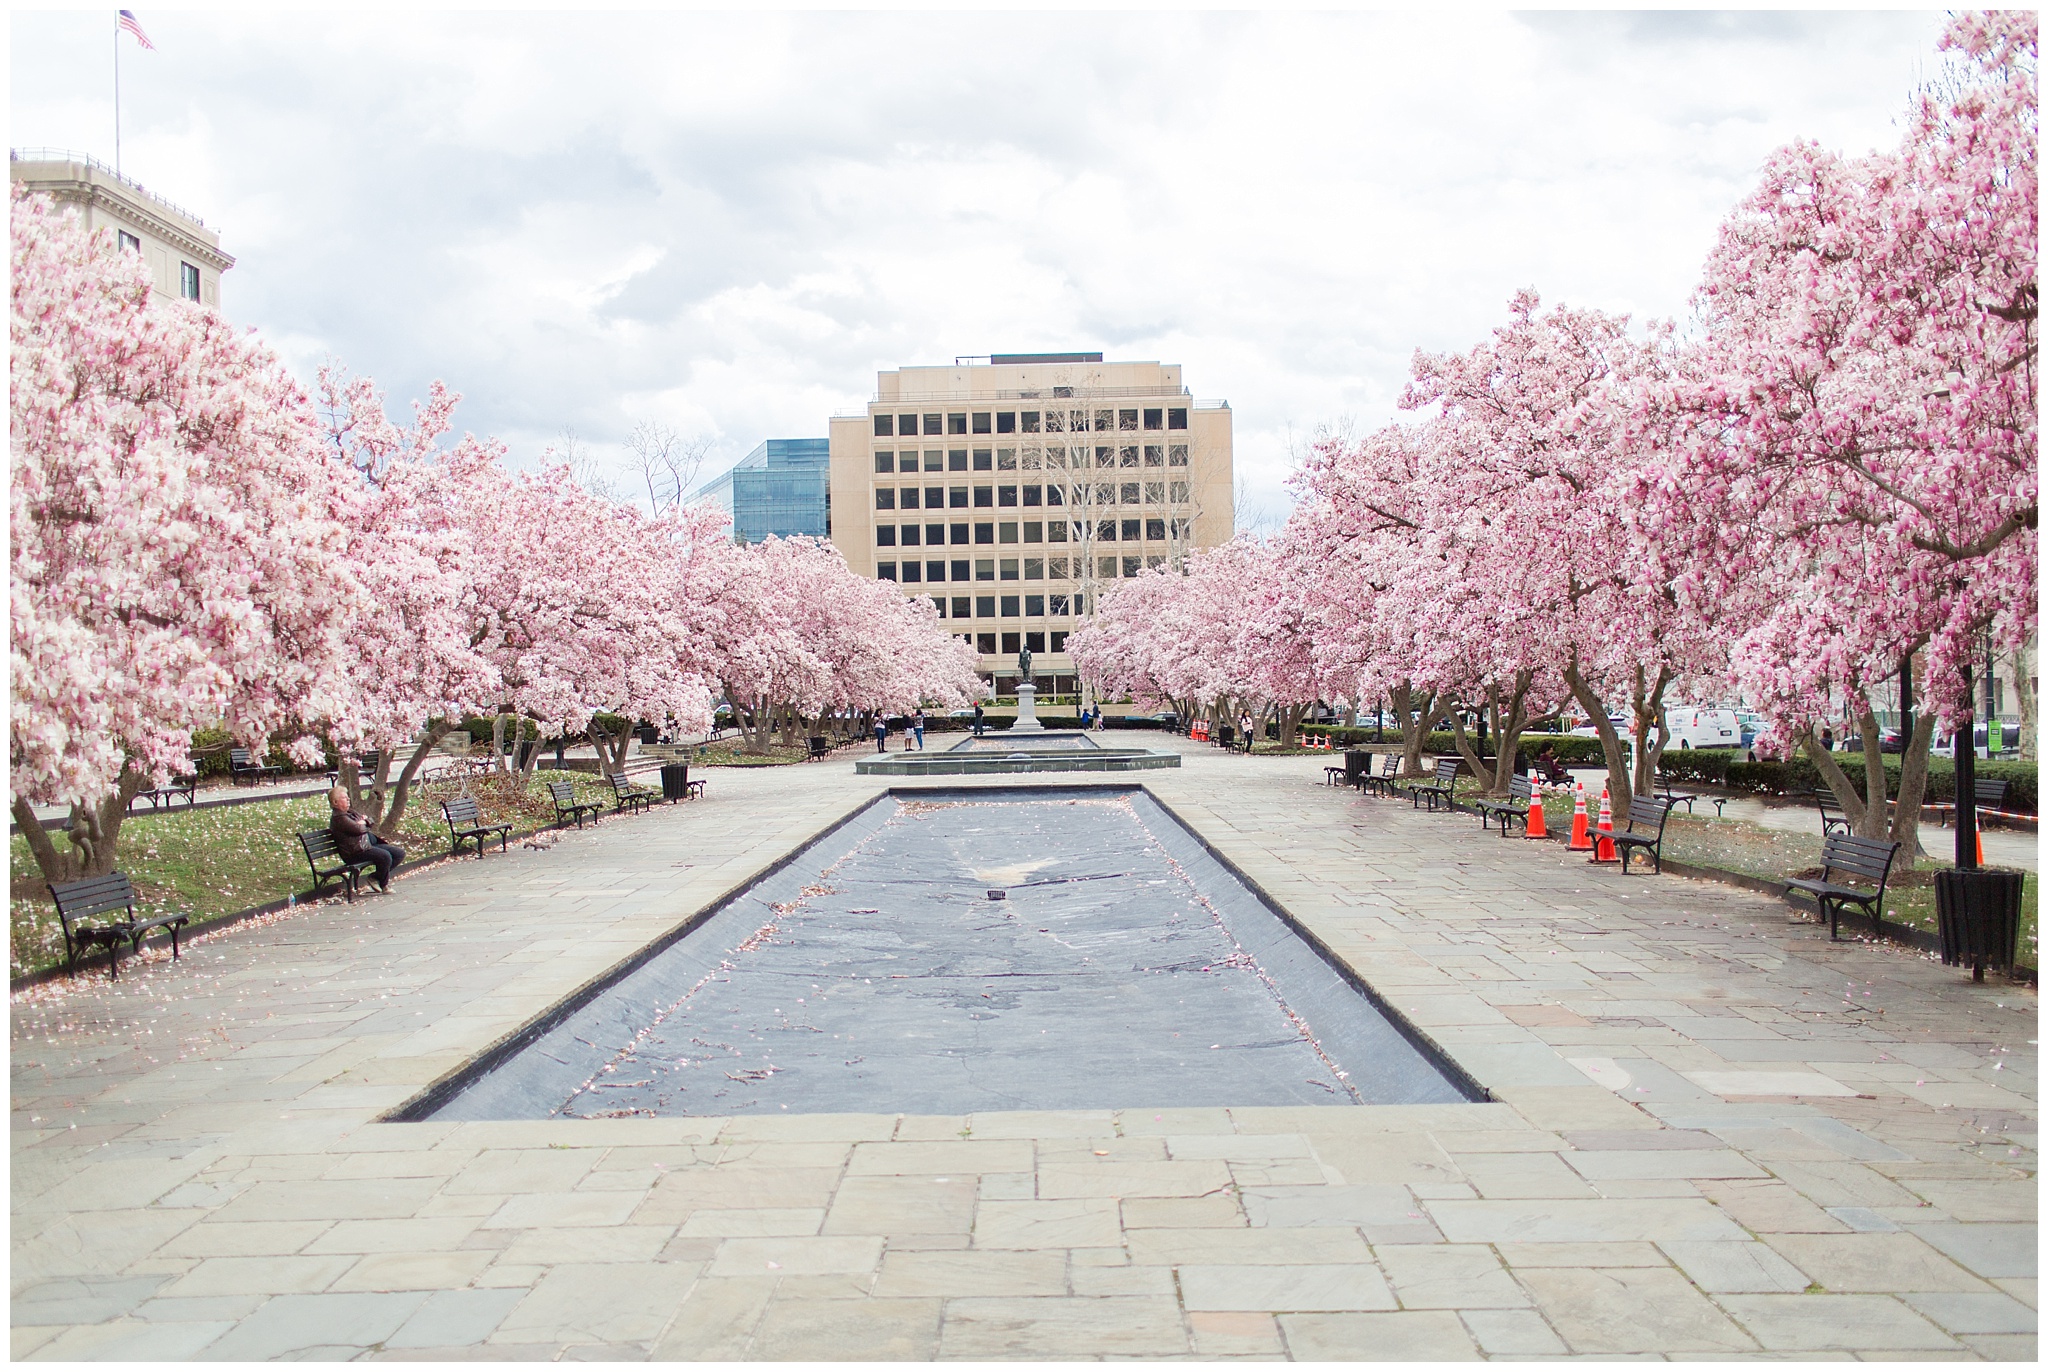
In 1984, I got a job at a new location. Across the street was a very small park. It had a reflecting pool and a statue. And was surrounded by old Saucer Magnolia trees that bloomed in early Spring. I fell in love with those trees.
The trees themselves were pruned nearly skeletory with the branches forced at odd angles. So even when not in bloom, they were "unusual". I immediately bought 2 saplings and planted 1 in the front yard and 1 in the back. I have enjoyed their blooms for 3 decades.
But they don't naturally grow into the odd branch angles I also loved. It takes an arborist's skill to do that. And I am no arborist.
But I try to shape mine as best I can. Every couple of years, I go at them with saw and loppers to remove the excess growth, clearing out deadwood and internal branches that "clog up the appearance".
I spent most of yesterday doing that on the backyard tree. Here is the BEFORE pic...
Some branches were drooping so low, I couldn't walk under them. Other branches were crossing each other or being shaded by others. So I decided to make some major changes. Loppers and an electric chain saw can do wonders!
I didn't do it fast. Shaping a tree takes consideration. Some branches were easy to decide to remove as they were all droopy and there were uprights that had no value. I removed those first and then stood back and considered the tree from all sides.
After that, things went slower. There was one branch in a low position that was in the right place, but had a cavity I knew would fail as the branch grew. I used the chain saw on it below first and from the top after. THUMP! Clean branch collar cut!
After that, I started small, trimming upshoots and crossed branches, always removing the lowest ones.
The AFTER pics...
It looks better already, and I have a few new branches growing out at odd angles that will at least suggest the masterpieces at Rawlin's Park. The lawn is covered in tree cuttings...
There is more to do higher up in the tree, but it was enough for the day. It was hot out and close to dinnertime. After all the gardening and some seed scatterring and raking around the newly-tilled meadow bed, I was soaked in sweat from hair tips to toenails. It has been a week of 90+F with high humidity and another week of it forecast. So (not to be indelicate but utterly practical), I stripped and stood in a hot shower to wash off all the sweat and salts. I felt great after THAT!
And then fed the cats, made a nice dinner for myself (deboned chicken thigh cubed with whole mushrooms, shallots, and garlic over angel hair spaghetti with soy sauce and toasted sesame oil. With a side of beans, beets, and a large tossed salad. Then watched some MSNBC news commentary. Good way to finish a day.
Next, I'll do the same on the front yard Saucer Magnolia.
Monday, July 6, 2020
The Veggie Garden
Yeah, the Spring crops failed. I was a slacker about watering. Paid too little attention. It SEEMED it was raining enough, but seedlings are so demanding. And I was distracted by other concerns at critical times.
So I focussed on the Mid-Summer plantings for Fall crops for once. I normally don't, but when it is July and the veggie beds are mostly barren, why not?
The wide shot...
The first corn...
And a 2nd on the left
Cukes look healthy...
Flat Italian pole beans are growing up the trellis. I actually have 2 trellisses of them. You can't have too many beans!
This is a volunteer daisy. I'm leaving it because it attracts good bugs.
The tomatoes are growing an inch a day in the warmth and sun. I might get fruits in early September. And for 2 more months after. It stays warm here alost 2 weeks longer than when I moved here 34 years ago.
Leeks. Good with cream of potato soup. I don't bother to grow potatoes anymore since my favorites (Yukon Gold) are in the grocery stores these days and taste the same. Some crops are worth growing because they taste better fresh. Potatoes are not one of them.
Yellow squash seedlings. I'll select the best one and pull the other 2. I have another close to there for cross-pollination.
One framed bed is currently dedicated to transplants. This Knockout Rose has no smell but lovely flowers. The insects don't bother it at all (because no smell, I assume). I will take cuttings from it to multiply.
And I have discovered something odd about my camera. It just won't focus well on solid red flowers. I tried these on macro, normal and at a distance enlarged. It all comes out the same bit fuzzy. Same with the Maltese Cross flower - solid red and I can't get a sharp pic.
Saturday, July 4, 2020
Independence Day
Happy Fourth Of July (well it IS the Fourth of July everywhere). But in the US, that also means Independence Day.
I will do as I usually do. Which means that I will stand on the deck and read the Declaration Of Independence out loud. I'll have a rather "Americanish" dinner of steak, corn on the cob, green beans, and a tomato/cucumber/onion salad with ranch dressing. And a pale ale instead of my usual red wine.
Later, I will watch (from home on TV) the fireworks display on the Washington DC Mall.
Whatever you all do today (celebratory or not) be safe!
Thursday, July 2, 2020
New Car
Well, I spent yesterday transferring all the stuff from the old Toyota Highlander to the new Subaru Forester.
The BEFORE pictures:
Cloth bucket seats. The shift it automatic, but made to look like a stick shift. I don't drive a stick, too much work...
Second row seats are split bench but effectively bucket seats. Doesn't matter to me, I'll just fold them flat and leave them like that.
The back. There is a moonroof, spoiler, and rails on the roof. I have little use for those, but they came with the package.
Corner view. Never saw the rear lights split between the side and the tail lift before! That little shark fin on the top is the antenna. Good; I had to remove the Highlander antenna to go through car washes.
Driver seat view. Overly complicated. I do like that the sound system controls are duplicated on the steering wheel. Cruise controls are there, too. Also, I like that the headlight and wiper controls are virtually identical to the Highlander. I also like that the display shows current MPG. And there is a little display that shows compass directions ON THE REAR VIEW MIRROR. But the A/C and fan controls are less convenient and the sound system selection is more complicated.
Front view. The headlights are LED and adjust to turns.
Inside Back view.
Enjoy the nice new uncluttered car. It will never look like THAT again!
AFTER:
The bins are from a huge Daffodil order. Excellent for loose stuff like bags of groceries. I immediately folded down the rear seats and removed the cargo cover. The gray carpet is from the Highlander. I always cut an area carpet to fit. Saves wear on the installed carpet. It almost fits perfectly as is. I will cut it more to shape later.
I keep plastic boxes on the floor behind the front seats. They hold booster cables emergency kits, rope and bungee cords, gadgets (like powered tire inflator, flashlight, DC-AC power convertor,etc).
Passenger front seat holds useful stuff (tissues, N95 mask, coupons, and stuff I need to bring to a store).
I'll take a few more pictures soon when the car is in the driveway for better light and color.
Monday, June 29, 2020
Answer Mode "On"
1. Planted the Fall veggie garden.
Broccoli, cauliflower, cabbage, pak choy, brussels sprouts for "cole" crops, carrots, radishes, beets, leeks, corn, beets, cukes, spinach.
2. Got new checks.
Hurray, I can spend money the old-fashioned way again!
3. Attached trailer ball on riding mower.
Cavebear's First Law Of Applied Geometry: If you can bend it enough, it will fit. Cavebear's First Law Of Physics: The bigger the bench vise, the more you can bend stuff.
4. Bought new car.
New checks burned a hole in my pocket. Actually, it was a race to see if the checks would arrive before the dealer incentives ran out. I deliver the check today after the towing hitch is installed and they drive the car here. More about the new car tomorrow. But it looks like this. I like green.
5. Figured out new edging better than that plastic crap.
Randomly-cut pressure treated wood 6-12" high, connected with stiff zinc-coated wire attached throgh screw-eyes at the top and bottom. I'll show pictures when I do it. I was going to do stackable concrete blocks but the neighbor beat me to it and I don't copy.
6. Got non-subscription 2019 MS Office for Mac.
MS demanded an annual subscription on $69.95 per year, but I found a site that sells it for $99 no renewal cost or expiration. I'll be good for 10 years with that.
7. Made a pizza from scratch.
Bread machine has a "dough" setting. But their recipe sucks. I used a 20 year old one taped to the inside of a cabinet. But I screwed it up royally this time and had to add water during the process. Amazingly, it came out perfect. I won't ever be able to duplicate it. On the other hand, I know what dough should feel like. I make a loaf of bread* every couple of weeks. Pizza dough can be a bit thinner for easy rolling.
I have a pizza stone, that helps. And a paddle. I usually simmer crushed canned tomato until it is thick. Spread some thinly on the dough, add sliced pepperoni (or hot italian sausage), green peppers, mushrooms, and onion. More sauce, then add provelone slices and bagged "italian" shredded cheese. Not too much cheese. Baked on the pre-heated pizza stone at 500F about 10 minutes...
I can't understand why my pizza (with a tossed salad) isn't considered the healthiest food on earth.
* Use beer instead of water, and add a heaping tablespoon of oregano, crushed garlic, and onion flakes and friends will BEG you to bring bread to the party...
Sunday, June 28, 2020
Resolved Issues
This past week...
1. Planted the Fall veggie garden.
2. Got new checks.
3. Attached trailer ball on riding mower.
4. Bought new car.
5. Figured out new edging better than that plastic crap.
6. Got non-subscription 2019 MS Office for Mac.
7. Made a pizza from scratch.
1. Planted the Fall veggie garden.
2. Got new checks.
3. Attached trailer ball on riding mower.
4. Bought new car.
5. Figured out new edging better than that plastic crap.
6. Got non-subscription 2019 MS Office for Mac.
7. Made a pizza from scratch.
Saturday, June 27, 2020
Garden Equipment
I bought a John Deere riding mower in May. It was highly recommended by Consumer Reports magazine and it had high ratings at a couple other sites. Well, my previous riding mower was approaching 20 years old and more expensive to keep repaired every year.
I bought the previous one (and a cheap riding mower-that-came-before that lasted only 5 years) because I had been mowing lawns with the push kind since I was 12 and was damn sick and tired of it. I mowed our lawn with a push mower and several local lawns with one for spending money.
I was the eldest son and so responsible for mowing the lawn. The year I went to college, Dad bought a riding mower because my younger brother simply refused to mow the lawn.
The immediately previous mower was good. 20 years is impressive. But it was time for a new one. I researched everywhere. It's good, but the tires could be better. They slip in damp grass a bit. There are better treaded tires available, and chains. I might consider that.
But this post is about ball and coupler towing.
My car has a trailer ball. My 5'x8' utility trailer has a ball coupler. My 2.5x4' yard cart has a pin attachment. My new mower has a pin attachment. I bought a trailer dolly that has a ball so that I could move the empty trailer back and forth to keep the grass growing under it and mow where it was previously.
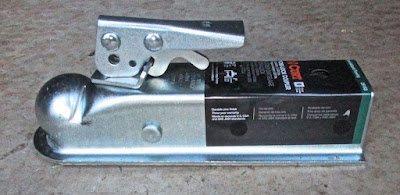
I decided that was altogether too awkward! So I found a ball receiver (the coupler the trailer ball goes into) that fit over my small yard cart. I haven't installed it yet because I haven't needed to use it yet, but I made sure it fit. I wil have to drill a second hole in the yard card handle, but I know it will work. So I put a trailer ball in the back onf the riding mower to move the larger utility trailer.
The trailer wouldn't go that low! So I went online looking at ball mounting kits. There are so many kinds. Interestingly, none were returnable. Well, I suppose buyers beat them up a lot and then want refunds. Whatever.
There is a metal plate on the back of my new mower. There are even some pre-drilled holes for various company attachments. The farthest apart were 10".
I found one I thought very stable. It attached to the lower pin hole and raised about 10" with 2 arms near the top to attach to the rear metal plate (pictures lower down will help). $70. OK, fine, but seemed high for simple metal braces. I ordered it.
I recieved it a couple of days ago. Assembled it per instructions. Remeber I said the predrilled holes were 10" apart? These braces were designed for 14". Not that they specified that...
I was about to try to pound the braces into shape, when it occurred to me I might get better leverage using my very strong metal bench vise. I was actually able to bend the metal braces rather easily . How far each time was a problem though. I went too far at first and not enough back the second. And each time, I had to clamp the braces to the hitch and measure the distance between the holes.
I eventually got them to 10". Took a good 30 minutes. But I went out to install it with various wrenches and vice-grips.
That was tricky. The gas tank is nearly against the back metal plate and it seems the purpose of the metal plate is just to protect the gas tank. I wasn't try to put metal bolts in where the gas tnk would rub, and access to the back of the metal plate was very limited.
The bottom was open, but the holes were 8" up and I couldn't get my hand up that far holding a bolt. There was a 1" hole in the side but neither my finger nor tools could reach. Time to stop and think...
Well, I collect weird tools. I have a funny flexible grabber. You press the top and 4 small stiff wires open at the bottom. I tried that holding the bolt in the grabber part and bending the flexible spring around. It took 10 minutes of frustration, but I finally got the screw-on part of the bolt through the hole in the mower plate.
The nut has a nylon inside that holds it on. Which made it nearly impossible to screw on because of the resistance. I had to use a weird very long-necked plier to finally grab the hex head bolt while I used a ratcheting wrench to tighten it. The plier kept slipping off. It took 20 minutes to tighten that bolt!
So, I went to the right side. It was worse! first, the brace hole didn't match the mower plate hole by 1/2". But I did a "Hulk" and just squeezed until it matched. And I paid for it later with a muscle cramp. But you have to do what you have to do sometimes. There wasn't even a hole in the side. But, I discovered I could get my head under the metal plate if I held my ears flat. I did plan that approach. All my tools were laid out in a line next to me.
I'm far-sighted. So my close-up vision is not good. I had to remove my reading glasses to get my head under the mower and then get the glasses back on. And it was dim light under there. But once under there, it was actually easier to get the bolt in (facing outwards) and clamp the hex head bolt with the vice-grips.
The difficulty was that I had get a washer on the outside part and tighten the nylon coated nut with the ratchet wrench by touch. It kept slipping off, which drove me nuts at first. Then I realized that I was thinking of the direction to turn it backwards. Yeah "lefty loosey, righty tighty", but I was looking at it in reverse.
When I figured that out, things went a bit better. Got every tightened and scraped my head out from under the mower. The slight scar on the ear is healing well, thank you...
After that, all I had to do was attach the trailer ball. Naturally, I had taken the big wrenches back into the house thinking that I wouldn't need them any more. Fortunately, there was enough friction on the ball attachment so that mere hand twisting tightened it beyond any natural loosening.
The entire assembly is as solid as a rock.
The ball is at a good height for attaching to the utility trailer and the assembly comes with a pin hole attachment at the bottom. But I probably won't need it (I also bought a ball receiver for my small yard cart as I mentioned above).
So now I can haul anything around with trailer hitches.
I mowed the lawn today and tried out hauling the utility trailer around. It worked great!
Friday, June 26, 2020
Garden
Between one thing and another, I got SO behind on my gardening this year. But I'm hoping to catch up.
I only got my tomato seedlings planted last week. Granted, they were in large pots after 2 transplantings and 18" tall, but I can only hope there is time for fruits to grow and ripen. They should. Most take about 85-90 days and I have 120-150 days before first frost. But this will not be one of the great tomato years for me.
I also planted corn, and that will be "iffy". I planted pole beans and cucumbers, and I'm not sure how they will grow. All the cucumber seeds came up. The pole beans are about 50%.
But for once. I am on a Fall planting schedule. That is best for some crops. They grow faster on the Summer heat and mature in the Fall coolness. The cole crops (broccoli, cabbage, cauliflower, brussel sprouts prefer that. Root crops are protected from early frosts, bein underground, so I may finally get carrots and beets larger than a single bite, LOL!
I need to plant more carrots, beets, radishes, celery, and lettuces
I would provide pictures, but a 1" corn plant is not very impressive.
Subscribe to:
Posts (Atom)
Election
Well, I guess I'm ready to vote. Most of my choices were settled months ago, but there were some local elections and ballot questions ...