Showing posts with label Plantings. Show all posts

Friday, November 17, 2023

The Pansies

 First, here is the spot emtied of the dead tomatoes...


And here is the Winter's Pansy Bed in the same spot.  Might as well use it for something...


That was a lot of plantings for one day!

They are basically triangulated and I tried to not have the same colors next to each other, but I had a LOT of yellow ones.  And they look a bit weak right now (got a bit dried), but I watered them for 15 minutes, so they will perk up tomorrow.  And will grow.

Some had no flowers, so I don't know what color they will be.  That will be fun to watch.

I have saved a dozen for the deck pots...  Some of the best.  You'll see them growing and blooming soon.

Friday, July 1, 2022

Let Us Grow Lettuce, He Said Crisply

The lettuce planters on the deck continue to grow new leaves after I harvest them.  I love that.

They got limp after a dry spell but recovered nicely.


 I do have to have salad with my dinner...

Friday, June 24, 2022

A Day Of Small Tasks

Yesterday my lower back wasn't bothering me and  my right knee wasn't feeling stiff, so I spent the day doing constant but light work.  Well, I didn't want to stress my back of knee (give them another day of rest).  It was mostly clean-up stuff like collecting broken 6-packs of seedling planting pots, slow-speed kitchen and bathroom cleaning, watering houseplants, gathering up scattered cat toys, etc.  It is good for the body to just stay mildly active sometimes.  

But I did get a few more serious  things taken care of:

1.  One of the more important things was to straight the bent electrical conduit pipes that fit inside the PVC tubes for the frame of my garden enclosure.  That may seem like serious work, but it is more tedious than physically hard.  It is most just getting some leverage.

I stuck one end of the metal conduit (which is thin compared to real iron pipe though not exactly flexible) under the trail hitch of the riding lawn mower and set a cinder block a few feet out.  Mild body weight was enough to bend part of it straighter again.  Then turned the pipe around and did it again.  Repeated that for the 4 bent conduit pipes.  Then moved the cinder block a little further away and did the middle part.  

They aren't perfect, but they are "straight enough".  They are just there to keep the 10' lengths of PVC tube from sagging.  I had to use PVC for the framing because the connections were complex at spots.  PVC has more connection options than electrical metal conduit (like this)...

1" White 5-Way Furniture Grade PVC Fitting

The image is upside down to show all the connections.  The top one actually is used pointing down to attach a support pole to the ground.  The others hold ceiling poles to support the chicken wire covering the top of the enclosure.  

2.  Then I had to figure out what broken PVC and connecters I needed to replace.  To my relief, I only need 3 straight-line connectors and some new PVC cement and 3' of straight PVC tube.  The parts broke at angles that can be cemented back into place.  

Then I can roll the chicken wire back over the top and sides.  Actually, that will be harder than it sounds.  First, vines have grown up the sides and connected in fallen chicken wire and they all need to bu pruned away a few inches at a time.  I've done some of it, but it is slow work and I'll leave that for next week.

Second, part of the reason the top chicken wire collapsed was that the stuff is 4' wide, so there are 5 strips of it over the tops and sides.  I had clips holding them together, but they were weak.  They really need to be "sewn" together with aluminum wire.  I didn't do that when I built the enclosure and meant to every year after.  This time I will.

3.  I've been cutting apart old overgrown shrubs along the fence where I have a long 50' straight flowerbed of perennials and The Mews Memorial Garden.  I don't do too much at a time.  It takes a lot of twisting and bending, and too much of that causes muscle cramps and stiffness.  But I have the trailer stacked about as high as I can safely tie down, so I will be off to the County Recycling Center some Saturday soon.  

They pile up yard debris to make mulch/compost.  If I go on a Saturday, I can get the trailer loaded with it for free, and I have plenty of places to use it.  I could go there any Saturday, but I feel slightly guilty if I'm not providing fresh material.  LOL!

4.  Planted 2 cherry tomatoes in a large pot on the deck.  Well, 2 grew in one small pot, so rather than damage their roots separating them, I just planted them as one.  They are draped over the lower rails.  To ease the bending, I stuck foam tubing on the rail boards. The stuff is actually insulation for putting around hot water pipes to reduce heat loss, but I have a talent for "repurposing" leftover stuff.  I try to help my plants as much as possible!

5.  My meadow bed has wild grass growing in it, which competes with the flowers.  Since I went to a lot of effort to plan 40 seedling and transplanted 8 existing Black-eyed Susans there a couple weeks ago (and they seem to be getting established - at least none have died), I wanted to think of a way to help them a bit.  Well, I collect a lot of thin cardboard from cat food trays from the stores.  So I cut them into 10" squares.  I'll cut a 2" hole in the center and a slot to one edge.  Then I'll slip them around the seedlings to smother weeds/grass.

6.  Mowed the daffodil bed.  In previous years, weeds and grass grew over the Summer.  I've tried covering the area with black plastic sheeting for several years (after the daffs died back), but it collected rainwater and mosquitos bred there so I kept having to poke holes for drainage.  It finally got too brittle from U/V rays and ripped apart.  This time, I'll cover it with black water-permeable fabric.  It is more U/V resistant and lets water sink through.  But that's for "next week" too.

  -------

After that, it was making dinner, watching The January 6th Insurrection House Committee Report summary/analysis on MSNBC, and processing some pics off the camera.  

Thursday, June 17, 2021

Garden

 Well, I finally got something done in the garden today.  Between last year when it just stayed cold and dry and nothing thrived (I mean 2 TREES died) and this year when I fell off the extension ladder and couldn't get started until late in the season, it has been a bad 2 years.

I have seedlings of various veggies and flowers large enough to plant.  But the framed beds were weedy and the paths between were invaded by Horrible Vines.  It was a mess.  So the first thing I did was attack the vines.  They are a "gift" from a neighbor 15 years ago.  Some invasive type almost impossible to kill due to the depth of the roots.  

The neighbors killed their's because they could just keep mowing it.  Here it is mingled with flowers and the veggie garden.  It has a flower like this.


I SWEAR whatever a dumb neighbor does never causes them long-term problems but I suffer.  I have poison ivy and english ivy all around because of careless neighbors.  I don't hate my careless neighbors, but I sure "resent" them sometimes.

So, I have an electric string-trimmer.  I have a gas-powered one, but I'm afraid of the damn thging and I HATE the noise.  So I went after the vines in the paths with the electric.  You have to work at the vines from the top down, because otherwise they wrap around the shaft and stop it from turning.  I actually got pretty good at it.  

Which is sad I have to do that.  I bought an electric mower when I built the framed veggie beds.  Just enough room to move the mower between them.  Sadly, I didn't realize I could turn the corners.  I have to lift about 40 pounds to change direction.  I did that.  But it left vines on the sides.

So, the string trimmer.  It took 2 hours fighting to chop the vines (1/2 the time unwinding vines from the trimmer-head).  There are some corners I couldn't get at, but I will use the hedge-trimmer to take care of those.  

And the outside of the enclosure will take more work.  Vines grow up the sides of the enclosure and "shade is bad".  I'll have to use a pruner and cut them off at ground level and slowly to the ends.  Every photon matters to a veggie.

SO, after I whacked the vines I needed to prepare to plant tomatoes.  For several years, I used a red plastic groundcover.  It was supposed to reflect sunlight back up and cajuse insects to leave.  It was also solid plactic sheet, so I couldn't water through it.  I was watering individual tomatoes through the cut part around and that took a lot of time .

This year, I have 100 yards of permeable black plastic mesh 4' wide.   


 I can just water all the plants at once.  And it will suppress weeds.  So I rolled it out on one bed and anchored the ends with bricks, cut it to size for that bed (my beds vary) and dragged my tomato cages out of the weeds (Everything grows here).  There are maybe some disadvantages to being organic; every weed loves the yard too.

I set them on the landscaping fabric-covered beds for spacing.  But it was 6:30 and I needed dinner, so I put everything away for the day.  

Tomorrow, I cut slices in the fabric in the center of the spaced cages, remove the cages, and plant tomatoes (and bell peppers around them) and cukes and melons and squash.  If it is too late, well, I'll still try.  And there is still time for a Fall crop of minor veggies like spinach and radishes.  

I am PRETTY much recovered from the ladder fall.  I no longer have the even think about walking normally, getting into the car is like it used to be, and I only notice it in bed when a part of my shoulder sticks up.  But at least it isn't stopping me from gardening.

And, next to the cats, gardening is important to me.

Wednesday, March 25, 2020

Garden

I got the first seeds in the soil yesterday.    It was good to scratch up the dirt.  First was pre-germinated snow peas.  I soak then 24 hours and then let them sit 2 days.  I plant the obes tat send out a root.

This morning, I planted a 6' pattern of 35 spinach seeds.  I tapped out a handful and they were the exact amount.  Yay!

I also planted a sq ft each of radishes, beets, carrots, and kholrabi. 

The basement light stand is full of trays of tomatoes, peppers, cole crops, and flowers.  Most are emerging.  And I've started the dormant Venus Fly Traps in the cold garage; 4 hours of light this week and 1 more hour each week until it is warm outside.

Stared my war against the voles.  The voles eat plant roots.  And use mole tunnels o avoid predators.  So to rid the yard of voles, I have to chase the moles out.  Poor moles...  But they have to go to make the voles go.

Voles are like mice but eat plant roots.  And they love to hide.  They are the ones that eat your tulip and crocus bulbs.  They are also what the cats call "mousies" mostly.

I replanted my lettuce trays too.

Wednesday, April 3, 2019

Garden and Yard Plantings

I mentioned the tree saplings yesterday.  But there are also veggie and flower seedlings to start inside each week (for the past month).  I started the tomatoes and peppers and cole crops weeks ago in individually set-up flats of plastic cels.  But 4 weeks ago, knowing I needed numerous flats at 7 and 4 weeks before last frost date, I set up 8.

That meant filling the cels with my self-mixed potting soil mix in flats set into sturdy plastic holders (those planting flats are thin and bendy), adding rainwater I saved in jugs (seed-starters can get obsessive) to soak the potting soil, and stacking them up on my basement potting bench. 

Hey, when it gets to actual planting day, that can save a LOT of time.  And in spite of giving individual attention to planting, assembly-line procedures make it go faster.  But there is ALWAYS something that has to be done you don't expect.

The first surprise of growing plants indoors is lack of good light.  Well, I set up a light rack years ago.  But of course, some bulbs burn out and for some reason that escapes me, they do it over Winter when they aren't even turned on!  At the end of the indoor growing season, they all worked; at the beginning of the new one, about 25% are dead.  Which is why I buy tube bulbs by the case (somewhere between 5000-6500 Kelvin and 2900+ lumens.  They last about 2 years (on 16 hours per day for a couple months) and gradually get weaker over time. 

I'll be buying LED tubes in the future.  They are 2x the cost (but coming down), last 4-5x as long, and stay at full lumens until they suddenly stop.  So, anyway, I had to replace several of the old bulbs and it can get awkward.  I seem to be a bit inept and changing them.  I suppose I need to just use more force turning them into the connections, but I'm always afraid they will break.

So I had 3 requirements (not counting changing the tubes).  First, I replanted cels where the seeds didn't germinate.  If I think I need 12 marigolds and only get 8, I replant quickly.  Seed companies are weird.  If I order celery seeds, I get 1,000.  and what do I need with 1,000 celery plants?  Yet if I order zinnias for a mass planting of 60, they put 25 seeds in a package and I need to order several.  LOL!

Second, I had to move flats around on the light stand AND 6-pack cels from flat to flat.  Some plants grow faster than others.  You want the seedlings close to the lights, so taller ones have to be together.  I keep a label in every 6-pack cel for that reason.  A flat of all the same plants only needs one thankfully.  But mostly I have mixed seedlings in a flat so they need to be moved around.

Third, I built wooden stands of various heights the size of the flats.  That allows a lot of easy height adjustment to keep the seedling near the lights.  And for other adjustment, I cut a few 2"x4" boards the width of the stands so I can raise them 2" or 4" easily.

So I had a choice (this was Monday) to plant some seeds outside or plant a lot more inside.  It was chilly and windy out; guess which I chose to do?  Yes, inside.  I'm planting a LOT of self-sowing annuals for either "just" flower or butterfly/bee/hummingbirds.  I tried scattering butterfly/bee/hummingbird (BBH) flower seeds and covering them lightly per package directions 2 years and they didn't grow much.  This year, I am starting a lot inside and will transplant them into the BBH bed in hopes of better growth.

I'm not depending on the transplants except for first year growth (and hopefully "self-sowing").  But I HAVE to have enough to attract them and get them used to coming here.  The meadow flower bed did reasonably well the first year and "OK" the next.  But I think it needs more help getting started, too.  So about half the seeds I started are for there.  Its not like BBH don't like meadow flowers too, just that they aren't as dedicated to producing what BBH need.  Though I suspect some will be good plants for caterpillars to eat. 

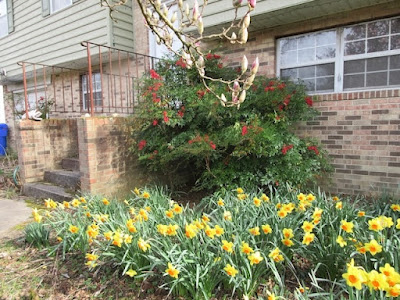
Still, the meadow bed is mostly for ME to enjoy looking at.  And partially, the meadow bed is so that I have something to enjoy looking at while I renovate my 25 year old perennial bed along the fence.  It has slowly lost ground (literally, LOL) to invading fosythia, poison ivy, some vine I don't recognize, old age. and changes in sunlight.

Parts of it are undisturbed and thriving (hurray for Stoke's Aster and Autumn Joy Sedum and some individual plants like Brunerra Jack Frost), but it mostly need to be ripped up and started over.  Ans this time as a cottage garden, I think.  Tall flowers (that self-sow) so thickly-growing that they shade out the weeds.

I've change my flowerbed habits several times over the years.  It's always a decision with ups abd downs.  Annual flowers need transplanting every year, but they bloom all year.  Perennials last years (for most) and decades (for some) but flower briefly.  Self-sowing annuals might be an interesting combination.  The pictures I've seen of self-sowing cottage gardens suggest that they might flower like annuals bur last for years.  I know that in a house I rented for 4 years. Four O' Clocks (annuals) reliably filled the space all the time I was there.

I may be an interesting growing season...


Monday, March 12, 2018

Seed Starting

I've mentioned before that I have a box of index cards I created that reminds me when to start seeds indoors, outdoors, and transplant dates.  Some years I get behind, but this year I've been staying on schedule.  Or so I thought.

Oh NO!  I completely forgot about the flowers!  Those aren't in the index cards because I change flowers too often and even varieties of the same kind can have different indoor or oudoor planting dates. 

But I have that information for the flowers on my seed list.  Sure enough, I should have planted some of them a MONTH AGO!  So I stayed up late Saturday to set up 6 flats of my starter soil mix in my 36 cels per flat and poured warm water into them to soak the soil.  I have been expanding my selection of flowers the past couple years.  They all want different conditions.

Sunday, after changing all the clocks (and I sure have a lot of them) I planted!  And it isn't just pushing seeds into the soil.  Some want 1/8", some want 1/4" and some want NO cover at all (needing light to germinate. 

And some want cool temperatures (50-60), some want 70-80, and some want in between that.  And since some want cool temps and light, and some want warmer temperatures and don't need light until the emerge, it got really tricky.  I spent an hour just sorting out seed packets by requirements, LOL!

But when I had that all done, it was easier.  Some were super-easy.  A whole flat of one kind, like marigolds or balsams or salvia required no combinations with other seeds.  Others did though, and as a result, I will have some more of some flowers than others I am used to. 

And, BTW, when I say a 36 cel flat, I really mean 35, because I always leave one cel cut out for easy watering.  I used to lift a corner of one cel to water under, but I noticed that one one seldom grew (because I was bending and thereby ripping the roots I think).  You learn stuff...

But I got most of them sorted out by temperature and germination requirements, and here is what I have growing!

I planted 6 flats.   Some can be under lights in the 64 degree basement.
 Some can be upstairs at 72 degrees and need light but are sitting on a countertop  (covered to prevent cat-exploration).
Some are in the cool basement and not needing light yet...  And, BTW, that light-color stuff is vermiculite which doesn't crust over like soil and makes it easier for the seedlings to emerge.
 Some are in the cool basement uncovered and exposed to light...
And aside from all that, my veggie seedlings are all up and growing well.  
Most of these seeds are several years old.  But because I keep them in sealed vials in the basement refrigerator, they last 3 times as long as the packets suggest.  I got almost 100% germination this year.
Next week, I have more flower and veggie seeds to plant indoors (and some outside).  I think I need another light stand!

But with any luck, this should be a fabulous year gardening year.  Most of the new flowers are self-sowing "cottage garden" types and will not need annual replanting (well, maybe some every few years) but it is a start at a "self-maintaining flower bed" in some parts.  Some parts of the flowerbeds have dependable perennials, and I love those. 

But I'm exploring self-sowing annuals lately.  We'll see how well that works in a couple years.  I'm patient. 

Thursday, December 22, 2016

Last Gardening

I've done about all I can do outside until about March.  The ground finally froze (it got down below freezing for several full days and nights).  The surface will thaw and refreeze for a few weeks, but I can't do anything useful with that.  I thought I was done 2 weeks ago after I cleared off all the garden debris and filled the framed beds and planted 250 daffodils.

But I discovered that 450 crocus bulbs that I ordered last year and never got around to planting because I wanted to make wire cages to plant them in to protect them from the voles and squirrels were still solid and seemingly sound after sitting in my garage for the whole year.  So I set about planting them everywhere I could think of.  Some 150 went into a bed I plan to move hostas to next year.

Most ended up in containers, though.  I used to grow Yukon Gold potatoes in 4 large plastic bins, but the grocery store started selling them, so I stopped.  I just buy them now.  That gave me 4 bins.  And several years ago, the County switched from hand-carried recycling bins to bigger-than-trash-can sized ones, so I had 3 of the old ones.


I filled them all with 4" of topsoil/compost mix, planted extra daffodils, covered those with 2" of soil, planted crocuses on top of that and added another 2" of mix on top of that.  So I have about 100 daffodils and 300 crocuses in 30 sq ft of those.  Hopefully they will grow and I can reharvest them in Late Spring for more permanent locations (in wire cages for the crocuses).

I don't know if they WILL grow after sitting around for a year, but I know for SURE they won't if not planted.  

Sunday, July 3, 2016

Yardwork

Well, I may have had some problems after the yardwork yesterday, but I did get some good work done that I will enjoy seeing later.

I have 3 edged areas in the middle of the backyard.  One is for wildflowers (nearest my garden, so I am hoping to attract a lot of native pollinators).  The 2nd was originally intended for a lovely but invasive plant with the idea that I could mow around it, but it spread seeds around so I am killing it (it will take some time).  The 3rd is my favorite so far.

That is the area where I planted tulips and hyacinths in cages to protect them from voles and squirrels.  The tulips all came up nicely, but no hyacinths.  Well, they were planted late.  I worried that the hyacinths all rotted (or oddly, grew stems larger than the wire cage mesh and were cut off).  The 200 hundred daffodils were planted freely as they are ignored by pests. 

So this Summer, I gave thought to other plants to grow there.  A single-season flowerbed is sort of wasteful of space.  Spring flowering bulbs want to stay a bit dry Summer and Fall (or they rot) so you can't surround them with plants that need regular watering. 

So I thought about lilies.  They are tough, they have tuberous roots that collect and hold what little water they need, and I had lots of them rescued from an area that was dug out 2 years ago.  Really, they survived plopped in small 6" pots and ignored except for natural rainfall.  So they were good to add among the tulips for Summer color. 

Well, it is probably too late for blooming this year, but I managed to plant 30 of them around the outer edges of the circle the past week.  And then, knowing they wouldn't bloom this year, I considered what I had that could survive no special watering this year and might provide some color.

I should mention that my regular flowerbeds need serious work.  I didn't give them the attention they needed last year and couldn't do it this Spring (my bad knee).  And I had planted 3 dozen marigolds, 2 dozen zinnias, and 2 dozen salvia indoors under lights in March, expecting to use them in the regular older flowerbeds.

Well, marigolds are pretty adjusted to dry soil, so I started planting them around the lilies today.  And then added most of the salvias and zinnias when I ran out of marigolds.  If they live on natural rainfall and bloom "HURRAY"!  If not, there wasn't anywhere else to put them.

So I planted most of them among the lilies and will hope for "something" from them.  And even then, they were the lesser of all the seedlings.  I used the best in 7 deck planters last week.  So no loss and some possible gain.  I bet in a month, I will have some good flowers to show.  I don't grow wimpy flowers.

That 3rd 20' diameter edged circle is the one closest to the deck, so I will see it better than the other 2 most of the time.  And the main birdfeeder is in the center of it, so that draws my attention there as well.  And to not disturb the plants, I have a small path to the feeder from the side and stones to set my ladder on for refilling it. 

This Fall, I will take some leftover largish flat rocks I bought for edging the old flowerbeds and make a path to the birdfeeder.  I intend for the area to be filled enough with future plantings to need places to step.

And cramps or not, I have more annuals to plant, so I will be out there again tomorrow...


Wednesday, March 23, 2016

I'm Thrilled!

Yes, really.  When I was late planting tulips and hyacinths in wire cages I made from 1/2" wire and buried 10" deep in 2' square holes a but late (Dec-Jan), I didn't know what to expect.  Same for 200 daffodils that don't need cages, so I just used a small auger to make 10" holes.  I'm not a bulb expert.  I know they need chilling temperatures, but I wasn't sure if that was for the bulbs to just grow or for flowers to develop.

Well, now I know part of the answer.  There are tulips and daffodils emerging from the ground all over.  I saw the first tulips a week ago, then there were 15, then 26, then 46, and today I counted 51 tulips.  And I suddenly realized today that one type of the 2 daffodil varieties are poking up all over too.  I assume the other daffodils and the hyacinths are later-emerging and will appear in a couple weeks.  If some are growing, the others probably will too. 

Not anything to take a picture of yet.  An inch tall tulip leaf is rather insignificant, after all.  But I get to watch more appear every day, so when they get large enough in one group, I'll post pics.

I planted the tulips 8 or 9 to a cage; the hyacinths 7 or 8 (they didn't divide up among the number of cages perfectly). 

But even if they don't bloom this year (but have vigorous plants), it will be a success.  Because they WILL bloom next year if not this one.  I was mostly afraid they would just rot, being too warm this first shortened growth season.

In a few weeks, I will be transplanting purple coneflowers and daylilies there too, between the cages of spring bulbs.  Maybe add some Mums for Fall color

That was in just one of the 3 new planting areas I worked on last Fall after I had that annoying english ivy, poison ivy, and wild grape covered ridge removed in September.

The larger of the 3 got spread with some "meadow-flower" mix back in November.  It certainly is covered with "green", but I have no idea if anything good is growing there.  It could be all weeds (and I can tell that some are), but there may be some nice self-seeding annuals and some flowering perennials there.  I am encouraged because it is much greener than the last circle where I planted nothing yet. 

So the difference between those 2 patches SHOULD be the meadow seeds I scatterred.  I probably won't be able to tell much about that until mid summer.  And if it turns out to be nothing but weeds, I will cover it in black plastic to smother the weeds and try again next Fall.  And in fact, I may just grow 100s of individual plants and do the planting more deliberately.  But I'll hope for success this year.  A 20"x15' patch of natural meadow would be very nice.

And not just nice to look at.  The beneficial insects, bees, and butterflies would love it.  So would the cats!  Not just because they would have tall plants to sneak around in, the think undisturbed growth would attract all the voles in the yard for them to hunt.

Speaking of bees, I saw my first honeybees of the year moving among to blooming hyacinths near the house.  My yard is mostly organic (I sometimes have to get lethal with the poison ivy that invades from my neighbors' yards).  But that's not where the bees and butterflies are attracted. 

The 3rd circle is for the lysimachia firecracker.   I love the purple foliage and yellow starry flowers, but it is too spreading for my main flowerbed.  So I'm moving them to an edged circle I can mow around easily to contain them.  They are related to Loosestrife, but not quite as invasive (being a domesticated hybrid, I assume).  But kept to themselves, they are lovely all season long, grow thickly enough to shade out all weeds, and look impressive in masses.  They don't seem to have any serious pests or diseases either. 

So with the 3 patches, I will have a naturalistic meadow, a patch of 2' tall purple plants, and a patch with spring bulbs and summer/fall plants.  It might be a thing of wonderful constant changes though the seasons or a visually-discordant disaster!

You will all find out about as fast as I do.  The good thing is that plants can be moved or replaced or expanded.  

Sunday, February 28, 2016

Gardening Season Starts

I'm more than ready to start the new gardening season.  I've BEEN ready since the last one ended.  I went through my saved refrigerated seeds last month and bought replacements for the ones getting too old or that had been used up last year.  I emptied old soil out of planting pots.  I cleaned all the pots and planting trays.  I threw away the damaged ones and got new replacements out of the shed.

A little story on that.  15 years ago, I bought a nearly lifetime supply of trays and 6-packs.  It made sense.  At the bulk prices, more started to become almost free.  I'm only 1/2 through the BIG BOXES now.

But what I didn't have was seed-starting soil.  And that is slightly a technical term.  It's not "potting soil" (though I have often used that in the past and it seems to work pretty well).  Seed-starting soil is sterile and has no fertilizer.  That helps avoid moss growth, fungal diseases (a seedling's worst enemy), and weeds.  Plus, the stuff is very loose so roots grow quickly.

This year, the only seed-starting mix I could find was ridiculously expensive and even the potting soil was poor (highly-fertilized Miracle-Gro or a cheaper brand that was (I discovered last year) dyed to look better than it was and wouldn't retain any moisture.


So I decided to return to my past habits and mix my own seed-starting soil...  My gardening book had a good recipe:  4 parts compost, 2 parts peat moss, 1 part vermiculite, and 1/2 part perlite.  I can't tell you what vermiculite is (does "hydrous phyllosilicate mineral" tell you anything?  Me neither).  All I know is that it is lightweight, non-compacting, and retains water.  Perlite looks like ground-up styrofoam, but it seems to be like popcorn made from volcanic ash.  It is also very light and holds water.


I don't have to know that, just that those 4 items make a really good seed-starting soil.   So I found all the ingredients over the weekend and set about mixing them together today.  OMG!  It took 4 hours.  I had to sift the peat moss and compost through 2 meshed screens (when you are filling 2" planting cubes, you can't have sticks and pieces of bark in there).  Then I had to mix the sifted peat moss and compost with the vermiculite and perlite.

I have to laugh.  It took four 5 gallon buckets and 3 large trash cans and a small 1 gallon bucket as a scoop, a lot of lifting and dumping, and when I was done I had enough on the basement floor to fill a 5 gallon bucket to add into the finished product.  I filled a 40 gallon trash barrel right to the top perfectly! 

Its the best-looking seed-starting soil I've ever seen.  I figure it cost $50.  An equal amount of commercial product (with fertilizer I didn't want, dyes I didn't want, and less of the vermiculite and perlite I did want) would have cost almost the same ($48).

But I still have 2/3 of my raw materials leftover!  So for 4 hours work, I have a better quality seed-starting soil at 1/3 the cost plus more raw material for future use.  I am very pleased with my work.


Tomorrow, I plant seeds!


Sunday, January 10, 2016

Weather

I have to admit that I appreciate the delayed Winter here.  On the other hand, the bad forecasts are driving me crazy.

I look at The Weather Channel website FOR MY ZIPCODE (which should be pretty specific) and it says 0% chance of precipitation for 5 days.  And so I walk outside to plant more Spring Bulbs (daffodils now) and heavy mist is falling.  Which means the soil is muddy.  ARGHH!

Well, at least I have gotten 90% of the tulips and hyacinths planted in vole/squirrel proof wire cages.  There are a few leftovers of each and I can plant them in pots to be enclosed in the garden area with hopes of getting blooms and replanting them next Spring.

I still have daffodils to plant, but they don't need cages (being toxic to the varmints).  I can plant THOSE using my 12" drill auger.  As soon as the rain stops...

And with just drilling holes and dropping bulbs in, the daffs go in fast.  Which is why I left them for last.  At least I'm done with the digging of 14'X16" holes 12" deep!

I always try to do too much.  LOL!  Well, better than trying to do too little.

I have a lot of crocus bulbs, but those are going in some large shallow plastic bins to grow in Spring and then be replanted in May along a border.

It didn't seem like THIS much work when I ordered all the bulbs last Fall!  I'm bad at estimating the work my projects require.  But it will be worth it in Spring and for many Springs to come.   I don't think I will be planting any more Spring bulbs for many years to come.

Tomorrow is supposed to rain all day.  Good.  I have some serious inside cleaning to do!

Tuesday, December 29, 2015

More Bulb Planting Fun

The Project That Never Ends continues...  WHAT was I thinking when I ordered 350 tulips/hyacinths/daffodils to plant?  Well, I suppose because I had new space and I decided in September to landscape rather than just plant grass.  And its not the bulbs, its the making of and the digging for all the wire cages to protect them from the Evil Squirrels and Nasty Voles.

Just planted in the ground, the squirrels dig them up from above and the voles eat them from below.  I'm hoping the wire cages keep them safe and blooming for years.  But I never expected it would be so much work!

I've bored you with the process before, so I won't do that again.  But even to do a few cages takes time.  It's the weather...

In one sense, I have been very lucky with the weather.  The ground is usually frozen hard by mid November and it has stayed oddly warm this year.  So I have had more time to plant them.  On the other hand, it has rained some  almost every day for 6 weeks.  Not that we are flooded; the rain is a soft drizzle.  But that's enough to make the soil slippery and muddy.  And you don't want to dig in wet soil because it packs down.  And at the end of a day working in wet soil, I would look like The Swamp Thing!

So I have a large 36'x30' sheet of plastic I cover the area with every day.  OK, the bottom 4' are not covered, but that section was the first I planted so I don't have to step in it.

So every day when it is not raining, I take all the stones off some of the edges of the plastic, peel it back for where I want to plant, and get 3 more bulb cages (holding 9 bulbs each) set in.  3 cages take about 90 minutes and after that I'm tired.  Well, each hole has to be 14"x16" and 12" deep.  And the dug up soil has to go somewhere other than on top of the previous plantings (I have styrofoam plates marking the planted spots and I can't cover THEM).

So putting the dug-up soil gets trickier the more cages I plant.  I have all the tulips planted (20 cages) and I am on the hyacinths at the outer edge on one side.  That side (of the 30' edged circle) is the easier to dig in (sandier soil vs clayier soil), so I favor that area for digging.

The other side of the circle will be for daffodils, more about those when I plant them, but they are FAR easier to plant...

So I wanted to start on the hyacinths yesserday.  The forecast looked good.  The Weather Channel website for my town said no rain until 6 pm.  Hurray!  I got started at 2:30.  It took 15 minutes to get the ools and bulbs outside and peel the plastic sheeting off.  So I started to dig the first hole.

And then it started to rain!  Misty at first but then more steadily...  Dammit!  I waited a few minutes as the rain got heavier.  But I gave up and re-covered the planting site with the plastic and put all the tools away. 

Fortunately, I also needed to go grocery-shopping, so off I went with rain falling on the windshield.  For 2 minutes...

Then it stopped completely.  For the rest of daylight.  ARGHHH!

Well, at least I got the grocery-shopping done...


Saturday, December 5, 2015

Tulip and Hyacinth Bulb Cages

One of the biggest problems for Tulip and Hyacinth bulbs around here are the voles.  They are evil!  I planted 5 circles of 8 Tulip bulbs some years ago and in Spring, I discovered holes dug out from the surface and sides to every single bulb.  There were bulb fragments left.

Daffodils are no problem; they seem toxic to voles.

But I love Tulips and Hyacinths. 

So I am making wire cages to keep the little voles bastards out. 

I designed an efficient form to use 36" wide hardware mesh wire.  The dark line in the middle shows where 2 shapes are cut.
I cut many to size. ..
I figured out how to fold them into cages...
They are easily opened for adding bulbs when buried in the ground.
I still have time to plant the bulbs.  The ground won't freeze until January here.  Building the cages is labor-intensive.  I have 14 cages constructed and want 14 more for the 25' diameter edged circle I set in.

But I don't have much time left.  I'm sure gonna be busy next week, LOL!

Monday, October 26, 2015

The Last Edging Circle

It nearly done.  I did the last digging yesterday.  Almost...  There are 3 tree roots crossing the edging trench.  I don't want to chop them out; the tree needs them.  They ARE slightly below-ground though.  I think I will cut the bottoms of the edging to fit over top of the roots.  But I sure need to have the whole rest of the edging perfectly fitted around the trench before doing any cutting-to-fit.

Seriously, it has to be about as precise as wood-working.

So I went round and round the circle trench to get it as uniformly deep as possible (but not too deep either, so I can lay in this last area of edging.  The edging is heavy (but cuttable) plastic, and I'll get it to all fit in tomorrow.

But I thought this would take 2 weeks and it has been 6 weeks.  *sigh*  Other demands get in the way.  Laundry, grocery-shopping, cooking,  etc...

At least I'm close to done!  But that's not "quite" done.  The center areas is edged, but that is for transplanted Lychimatria Firecracker to.  Lovely plant; very invasive though.  So I have the circle for it that I can mow around all year and keep it from spreading.

The last area is for semi-shady wildflowers, spring bulbs, and some dwarf azaleas.  I have no idea how that will work out, but I don't have to worry about THAT until next Spring.

Meanwhile, the older flowerbed along the fence has been ignored for months.  I needs work.  Mostly, it needs areas that have been taken over by grass killed.  Fortunately, it won't take more than a day (he said optimistically)  to pull the grass tops off and cover the areas with black plastic for the Winter.  I hope they will die.  And least they will be weakened.  And that whole area needs to be rebuilt next year.

There is too much space there with "just a few of this and a couple of that" left in spots after years of gradual die-backs.  Even perennials don't live forever.

I need to collect the surviving ones from various spots together (9 same plants together look better than 3 spots of 3 plants).  Some long-lived perennials (like purple coneflowers and black-eyed-susans) tend to self-seed to places the prefer, and some plants get exposed to more sunlight than they like when other plants die back and need better conditions.

The good news is that I have 15 daylilies saved in pots from the ridge that was removed, I have 30 azalea cuttings that have been rooting for 2 months, the dwarf butterfly bush and the dwarf knock-out rose seem healthy enough for cuttings (I have a well-lit plant light stand),  and I have LOTS of viable seeds of marigolds, zinnias, salvias, forget-me-nots, butterfly weed, herbs etc.

I am slowly changing from multi-yearly troublesome perennials, that bloom briefly, to replaceable annuals that bloom all year long.  The nice thing about annuals is that you can turn the soil early each Spring before planting and expose the germinating weed seeds to be killed with a shallow hoeing.

Some perennials solve all the problems by growing high and thick so that no weeds thrive.  That's why I'm trying to give the Lychmastria their own space.  There are 2 areas of plants where no weeds grow.  The Lychimastria and the Stokesia (Stokes Asters).  I'll divide the Stokesia (guidance says in Spring, which seems odd, but OK).  To set up another 6x6' area.


Saturday, October 24, 2015

Projects

Ever feel you are mentally done doing yard projects for the year?  But they're not finished?  I'm tired, but there is more to do.  I did finally get one done.  The far edged area intended for wildflowers...

I needed to loosen the soil, and I couldn't get the rototiller to start.  It has always been an "iffy" engine.  So I tried to rake the soil loose.  Too much gravel.  But it is supposed to rain lightly tonight and tomorrow while staying above 50F and that would be good for germinating the seeds.  So I thought about it...

Well, I had 2 trashbarrels of a half compost, half topsil mix.  What the seeds want is to get thoroughly moistened to trigger germination, some soil to surround them to trigger rooting, some soil below for the roots to penetrate, and some regular moisture after that for the roots to absorb water and minerals to send upwards to stems and leaves. 

So I used my 2 barrels of compost/soil on the area.  It only came a 1/4" deep when spread around, but the soil under there is decent.  So if they root, they will grow.  Wildflowers are exactly that; "wild",  They don't depend on people spreading fertilizer and in fact usually don't want it. 

So I spread the meager compost/soil mix, scatterred the seeds, walked all over the surface (and using a flat rake to also press down), and then watered the area.  Once lightly, waited 10 minutes and did it a gain, and repeated. 

Why water before a light rain?  To settle the soil around the seeds.  There is less chance now of a rain causing the seeds to get washed into uneven pockets.

And I did it later than I should have.  The package instruction say they want 2 weeks before the first hard frost.  Well, we've already had a frost, but that was before I planted the seeds and the forecast is for at least 10 days without another freeze.  So I may get lucky...

I'll know in a week to 10 days...

Wednesday, October 14, 2015

Solved It

OK, so the planting timing problem was caused by my wanting to plant lots of spring-flowering bulbs where I was planting wildflowers earlier and not wanting to walk on the sprouting wildflowers.  I had to think on that a while. 

Solution?  Walking-boards and cheap plastic tubs. 

The walking boards will be some pieces of 2"x12" boards left over from the deck construction last year.  With small pieces of 4"x4" scrap wood attached to the bottom, the footprint will be minimal, but allow me to walk out to the pre-dug holes for the wire cages for protecting the spring flowering tulips and hyacinths from the voles.

Each spot for the spring flowering bulbs will have a predug hole with a cheap plastic tub of the soil there.  I will walk out on the supported boards, lift the tub, set the wire cage down, add an inch of soil, set the bulbs down, add the rest of the soil, walk off the board and lift the board off the wildflower sprouts.  

Every problem has a solution...


Friday, October 2, 2015

Heavy Rain On New Lawn

After more than a month without and measurable rain, I was beginning to think I could ignore the possibility of rain in my new lawn plans.  Silly me...

I got the new lawn soil leveled and planted in the front yard in plenty of time for the soil to settle and the new grass to emerge and set down roots.  The back yard waited.  I got the back leveled and seeded about 10 days ago.  The grass barely emerged when we finally got some rain.  And of course, not just some rain, but a lot of it.  We have had 3.75" so far.

That left me 3 concerns for the front yard.

First, would serious heavy rain overflow the drainage easement and wash some of my new soil away at the edge?  Second, would the heavy rain wash some of the new grass away and/or create runoff ditches?  Third, would I discover new places of standing water (part of what my soil-raising efforts were intended to stop)?

The first is uncertain.  I can't see any drainage edge erosion, but I can't get too close to it to be sure.  The new soil is too soft to walk on to go investigate.

The second worked fine.  There was a full day of light drizzle and that settled the soil a bit, and the soil was so dry it soaked up almost all the rain.  The grass seems to have stayed in place.

The third isn't so good.  I have a 4'x10' standing puddle in the front of the lawn.  OK, there is supposed to be a "swale" there ("a slight depression for directing water runoff", in my case to storm drains at either side of the front of the yard).  But it ISN'T supposed to have a low spot that holds water. 

It wasn't obvious by eyeballing the new soil level, but water never lies.  There is a low spot that won't drain in either direction.  So I need some more soil to add there.  I don't need much; a cubic yard (cubic meter) should do fine.  I just need the rain to flow off toward either drain.  It could be worse; my adjacent upstreet neighbor has an actual concrete channel for a swale (makes for awkward mowing, it keeps filling with dirt and debris, and it is ugly).

The back yard did not fare so well with the rain.  I planted the grass seed there 8 days ago and it was barely up when the rains hit.  The day before the rains, there was a uniform fuzz of new grass.  Today, there are large bare spots and a few channels 2" deep where the rainfall flowed downslope.  I'm going to have to relevel that and plant new seed.  Fortunately, a local garden expert addressed that very question online Saturday and said there was still time to plant new grass seed in a week after the soil dries out a bit.  Of course, that's assuming we don't get another hard rain in a week (none forecast though).

Well, nothing is ever guaranteed when planting anything.  Sometimes, you have to do it again.  At least I'm not depending on grass as food, LOL!  If I was a cow, this would be a lot more serious.

Thursday, August 21, 2014

Those Late-Planted Flowers

I mentioned that I planted some impatiens and coleus under the deck in the framed bed I recently constructed.  I was unsure if they would grow.  They've been sitting in those little 2"x2"x2" plastic 6-packs since I planted the seeds in February.  Seedlings can become permanently stunted when kept in small spaces. 

But it was either toss them out or plant them.  And since I built the bed for transplanting hostas to next Spring, there was no harm in trying the cel-pack seedlings.


I'm pleased to say that they have already shown some growth.  Four of the impatiens have already opened flowers, and the coleus leaves are growing larger and I see new leaf buds along the stems.  So maybe they will do their planty business and grow enough until the first frost (about late October here).  They may look pretty good by the end of the season, which should encourage me to start seeds of them again next February and plant them out sooner than August, LOL!

It probably sounds odd, but I feel an obligation to the plants I start from seeds.  Like, I started them, so I owe them their full season of existence.  I don't mean I think I am their plantish diety (though one could argue I have somewhat deitish control over them), but I feel vaguely guilty when I start plants and then never plant them.  And there are always some.  I usually start more plants from seed that I actually set in the ground. 

There is always less space for them than I thought, most die while outside in flats and it doesn't seem worth planting the 3 of 6 survivors, I forget to water them inside once too often, I get too busy to plant them when I should, etc.  Always something...


Saturday, August 9, 2014

That Deck Box

First, just want to say the pictures may not match up to the paragraphs.  I didn't do a good job taking pictures as I went along the work.  But enjoy them anyway.

Wow, I never did so much "Grub Hoe Trenching" before!  The guys who had to dig the 2' wide and 2' deep holes for the deck posts complained about the hard soil (and they had power tools) and now I sure understand why!  The stuff around the deck is hard rock and clay.  Even with a pick and grub hoe, it was murderous just making a 3" wide trench for the boards to sit in!

To make things worse, I found that the cinder block wall around the patio is neither level compared to the house AND not level to the yard.  That made constructing the frame enclosing the area level in both ways impossible.  I did get real close...

So I did the best I could, attaching boards to the new deck posts, and keeping the long way boards as level as I could.  Tricky, when nothing is flat, level or square to the house or the deck posts.  And don't worry, all the bottoms of the boards will be "just" covered in soil outside in the lawn direction and perfectly level inside.
The good part is that the top boards are relatively level because I gave a lot of care to making sure the bottom boards were level.  But that still made me fight a bit to get the top boards level. 

The problem with DIY home projects is that you seldom do them twice, so you don't learn a whole lot that is useful from one project to the next.  My biggest surprise was discovering that the metal rods I pounded through the holes I drilled in the very bottom boards were too close to the edges(you csn see the little dots on the first 2 pictures).  My 3" exterior screws hit them before they were fully in.   ARGGHHH!  I had to find a bunch of 2 1/4" screws to use.  I'll probably never have that situation again OR it will happen again so long in the future that I will forget!
Hopefully, using the exterior wood adhesive and several more shorter wood screws will solve the problem.   Still, those kinds of surprises are maddening.  Guys who build decks every day KNOW to avoid those kinds of errors.  I only discover them ONCE!

But it was solved and I went forwards and upwards.  I did underestimate how much trench-digging I had to do.  Using a grub hoe around the twine line-marker and underneath the "just-low-enough-deck to hit my head on if I stood upright was more not-fun stuff.  I banged my head more than once just standing up (and I even checked the height most times).   It was actually safer (if harder) to use the grub hoe while kneeling. 

That mailbox you see is for storing hose nozzles.  Very useful for not losing track of them.  I have another out in the garden for small hand tools (pruners, trowels, etc).

Finally, I reached the last board at the top of the slope!  And discovered I had to bury it.  Well, I knew the soil sloped down along the cinder block wall, but I hadn't noticed that it also sloped UP from it.  I mean, you stand around and a few inches of sloping are not all that noticable.  Well, it IS when you are down at ground level with a 3' bubble level tool!

And that soil was the part the deck guys complained about be "undiggable" (and they had power equipment).  So there I was kneeling awkwardly on the ground hacking away at the rocks and hard clay to make the last 6' board level and even at the top with the previous one.  That one last board took an HOUR to get both level AND matching the previous board. 

I was drenched with sweat enough so the cats kept kept their distance, but I finally got that last board in place ans screwed in.

Sometimes I don't understand WHY I do this stuff.    It's just for me (and you in pictures).  I blame my Dad.  He taught me to DO stuff, and I don't really know how to stop.  I just feel "right" when I'm doing "something".  Sometimes I think I do a lot more "stuff" than he did.  LOL!

But it's better than sitting around watching bad TV.

Tomorrow, I will use my leverage fork to dig up the soil higher than the boards and move it down to the empty space.  That will leave some space for better soil and some compost to bring it all up level with the wood framing.  I have 2 flats of annual coleus and impatiens dying to the planted there.  Well, I had expected to have this frame built a month ago.  Still, I'm sure they will be happy. 

Next Spring, I will be moving most of the front yard hostas to this space.  That will save them from being eaten by the local deer (and I am contemplating venison steaks this Fall in revenge).

But this project HAS taught me the methods that I need to dig some shallow trenches and construction needed for the new framed beds and upright chicken-wire structure for my major garden.  I'll finally get at that September 1st. 

It never ends, and I'm glad it doesn't...  And there are more projects on my list...  The good news is that I could do this again better and in half the time. 

Looking Up

 While I was outside with The Mews, I laid back and looked up.  I thought the tree branches and the clouds were kind of nice. Nothing import...