OK, I'm annoyed. I got an ad from PetCo about their online great prices and selection. So I checked them out.
Of the cat food I order, their prices were $5 higher per case over the place from which I've been I have been ordering (which I won't name here as this is not an ad for them) and they had fewer of the stuff my cats like. OK, every company has their price-points and offerrings.
But when I tried their "contact us" site to ask them about that, I hit a wall. To send my email, I had to undergo CAPTCHA werds. And they were BAD ones. I tried twice and "no go". I clicked through a dozen looking for ones I could see the characters of. "no go" I made my best guess several times and "no go".
I couldn't even TELL them about their high prices, and I was trying to be HELPFUL and INFORMATIVE. They probably assume "no complaints, no problems". Well that's because I couldn't even get through to them past the worst CAPTCHA characters I ever saw.
Sometimes you just can't help some people even when you want to...
Hey PetCo, you contact me if you want information feedback. And I promise no CAPTCHA challenges from MY end...
Mark
Sunday, May 31, 2015
Friday, May 29, 2015
That Garden Enclosure
I don't want to mention much about it until it is done, but I had to correct an error. The existing chicken wire is black vinyl-coated. Because of a silly mistake in thinking of the length of the sides, I was two 50' rolls short of complete coverage.
So I ordered more. Wrong type. Non-vinyl-coated and gray. I envisioned it. Alternate strips of black and gray... Functionally irrelevent. But it would have bothered me for 20 years. So I ordered 2 rolls of the black vinyl-coated chicken wire today. Should arrive in several days
Better to pay to make something right in a week than be annoyed for 20 years... I'll find a use for the gray chicken wire elsewhere eventually.
Monday, May 25, 2015
Memorial Day (Observed)
I had elders who fought in the World Wars... They survived. Others did not.

 And I do not forget that THIS day is for the ones who did not...
Those who did not come home changed our history. On the battlefields to be sure. But also in our current world. Some of those who did not come home would have had children, but they did not. Some of those children who never were might have grown to become doctors who cured diseases, engineered better buildings, made inspirational art, developed new varieties of plants to feed the hungry, or just been that good neighbor you needed when times were hard.
We will never know. Their loss may ripple through history. What next genious, what next innovative doctor, was never born through the untimely death of some soldier? So when we remember those who gave their lives to protect us, we must also consider what bravery, focus, skill, and dedication was also lost to our present.
Saturday, May 23, 2015
Shed Door
My shed door has a small garage style door. It came off the track yesterday!
Its not one of the things I've ever worked on before, so it took some examination. The track is attached firmly to the front of the shed. So that hadn't moved. The back of the door support has a triangle of flat metal pieces hanging from the ceiling of the shed. But THEY weren't loose. Bafflement...
OK, the door hangs from wheels in the track with axles going into the door to hold it into the track. While the one that came loose seemed to have the axle come out, I couldn't see why. The door has worked for 9 years and I found nothing loose.
Dang, I hate it when the problem isn't obvious. Well, I reconstructed (in my mind) the way it SHOULD have looked if it was working properly. And saw that the axle holding the track wheel was nearly out of the door. So, to get it working, the axle has to be firmly in the door. OK, that's a start.
So the track is too far away from the door. Why? Nothing loose. Can't see why it came out. But I can see how it is SUPPOSED to be. Can't make the door wider, so the door TRACK has to be closer. Nothing's loose, so an adjustment is needed.
It only took 2 hours... Well, seriously, I had to figure out how the whole thing was put together and how adjustments could be made. It was the back braces. One was set wrong. The back braces have to match the front ones AND the door, and the back ones were over 2" wider.
I found the one bolt that had to be removed and set into another set of brace holes. Was that easy? Of course not! All the other bolts in the track were short aluminum ones that easily fit in and out of the holes in the braces. Not THAT one of course. It was steel and it was long, and it was rusted. The original installers must have run out of the proper short aluminum ones and found this one on the floor of the truck. It was even slightly oversized so they had to screw it into the holes (making threads as they went like with sheet metal screws).
And of course it wasn't easy to get at. I had to break the rust loose (how did it rust inside a dry shed?) with a wrench and a hammer. Then turn the nut off the bolt tiny turns at a time. THEN unscrew the bolt out in tiny turns of a wrench for all 2".
So at least then I could change the hole connections on the 3 flat metal strips acting as the braces. IE, make the triangle smaller and the track moves closer to the door. I did that. Then the track wasn't square to the door, so I had to do the same on the other back side. That went easily. Then it took another adjustment to the original side.
The door slides beautifully now. Well, it MOSTLY did before, but I think it was only pulling the track close until it finally popped loose and I was just assuming it was the weight of the door that took some effort in raising it.
NOW it works as intended... Nearly weightless.
* SIGH * Like I didn't have anything better to do on a nice 70ish day with a list of other PLANNED projects...
Friday, May 22, 2015
Soil
OK, this isn't about the garden enclosure I said I wouldn't mention until it was completed...
But while digging the post holes for the screen door for the (*coff, coff*) thing, I noticed something interesting. The soil in that area when I moved here was clay and gravel at the surface and lower,
In the holes I've dug, there is 4" of topsoil at the top now in the most neglected area.
4"! In nature, it takes a 1,000 years to make an inch. I got 4" in just 28 years just by sowing grass and leaving the mowed clippings on the surface. And some very mild organic fertilizer... And fertilizer doesn't create soil.
What if I have another 28 years?
Thursday, May 21, 2015
Milestones
We all have milestones in our lives. The years depend on your culture, but they are generally when you first walk, get your first adult kiss, can drive a car, etc. I've been through those a LONG time ago.
Today I'm 65. I get accorded "senior status".
Whoppee...It means I get $2 off my haircuts at my usual place.
I suppose it means I'm supposed to start considering my own mortality. But not... Things change. When my grandfathers were 65, they WERE old. They looked it. 65 WAS old in their day. They were weather-beaten, tired and wrinkled, face hanging loose under the jaws, etc. They had harder lives. My Dad was less "old" at 65. He was far healthier and active. But he still looked "older".
I've had an easier life. As best I can tell, MY 65 is the Grampa's 45 and Dad's 55, and I might even be better off than that. You probably recall how some guys matured early in high school. They were the athletes, the school presidents and that sort of thing. I wasn't one of them.
It was really irritating at the time, but I am enjoying the benefits now! Nothing is perfect; my hair thinned out at 30 (paternal mom genes). If you are a guy and want to know the future of your head hair, just look at your Mom's Dad, LOL!
But otherwise, I'm the beneficiary of modern medicine and healthy food, and don't look 65 (in the terms of my ancestors). I slipped in after good child medical care and before fast-food. I ran (was allowed to run) wild as a child and was exposed to all the good dirt that I could get into. If there was any microbe in the State that I didn't lick of fingers, it wasn't from lack of trying! My immune system is outstanding. I haven't caught the flu since I was 12 and only then because my younger brother caught it at school. And it bothered me mildly for 2 days. My younger more protected brother was in bed for a week. And he is sometimes sickly to this day.
But I wasn't. It shows. You can't find a blue vein on my body. I noticed a tiny wrinkle on my neck while shaving last week, but I had to look for it carefully.
So why do I mention all this? Because sometimes I can be really annoying LOL. But more because I love the fact that many of us my age are literally in "middle-age at 65" and have so many years left to us. My grandads were old at my age. More accurately, OUR grandads were old at OUR age, and we are not. WE are going to live to 90 in generally decent health. And mental health matters too. I have continued to learn all my life and learned to do new things that are challenging. My mind might outlast my body decades from now.
And THAT's what I am celebrating today!
Physical and mental health for decades to come...
Mark, 65, and only 2rds through life!
Tuesday, May 19, 2015
Awkward But Slightly Humorous
Some of you may recall that several years ago I had these really insane neighbors across the street. A Mother and Son, and a Wife, with baby. The couple were obsessive late-night screamers, always fighting. The Mother was utterly inept at resolving the issues (why she lived with them, I do not know). The baby was often the hostage.
They would start their screaming episodes at about 2-3 am in the Summer and wake me up. The guy would take the baby into the car, the woman would would go out yelling, he would take of in the car, and she would spend the next hour laying in the street screaming. Or she would take the baby and sit out on the street screaming first. We got tired of calling the police...
They even had their friends park their cars on my lawn when they threw parties.
The woman would even stand in front of the car and scream until the guy PUSHED her with the car. I always assumed that EVENTUALLY they would both be arrested and child-care would take control of the baby, but that never happened.
I had some lapses when I went yelling at them to just STOP! LEAVE! Move OUT! (it was a rental)
One of the happiest days of my life was when I saw them packing up and leaving.

But guess who lived in the McMansion next door to them? The guy's dad. Really!
So guess who has moved in with Dad this year? The Crazy Guy! Its been a bit awkward. I'm perfectly fine with the Dad and have been for years. We used to help each other on minor projects. But with Crazy Son (without Wife and Child there - I assume she escaped him) the past few months, it hasn't been the same. Crazy Son has always been out there on the front lawn anytime I could talk to the Dad.
So I drove out last night on an errand, and a dog ran in front of the car. I wasn't moving forward, so waited to see where the dog went. Couldn't see it anywhere around the car, so I couldn't move. I saw The Crazy Guy in the street, so I called out all friendly (and pretending I didn't recognize him), "Hey there's a dog near the car and I don't want to move so I don't hurt it". Can you see where it is?" So he came forward, calling his dog.
And since I had my car door open, the dog came over and acted friendly, so I scritched its head and talked nice to it. Told it that was a Good Dog! Crazy Guy saw I was being nice to his loose dog, so he came and got it and had to thank me for being careful.
I mentioned that dogs are friendly and all that and I was being careful with it being around the car.
I could tell it was KILLING him to have to be polite to me because I was being considerate of his dog, LOL! GOOD! I enjoyed every second. I pretended not to know who he was. I have a long memory for Crazy People, but sometimes it is good not to officially recognize them when you don't HAVE to. I'm not sure the Crazy Guy knows I know who he is (and I'll keep it that way if I can).
I'm completely willing to let the past be the past. He isn't a screamer NOW, and that's all that matters to me. But he sure had a tortured look as I was caring about his dog and I'm still enjoying THAT! He knows who I am...
Saturday, May 16, 2015
Garden Enclosure
Its all worse than I thought and I'm not going to say another damn word about it until its done...
Friday, May 15, 2015
Different Day, Same Subject, New Problem
Two Garden Enclosure Fun Surprises...
1. When I assembled the PVC pipe frame, the pipes jammed into the connecting fittings so tight I couldn't even pull them out again. No need to cement the top pipes together. And the rest of them sat with gravity. The only pieces I cemented were at the bottom, because they merely snapped on to other pipes and had upward pressure from attaching the chicken wire tightly. And with the sides all closed with taut chicken wire, the top pipes couldn't very well come loose.
RIGHT...
2. The enclosure is 20'x20'. So five 4' wide rolls of chicken wire had to fit across the top exactly! 5x4=20, right?
RIGHT...
-----------------------------------
Dang I'm stupid sometimes. Well, OK "inexperienced". I continue to try to fight "Murphy's Laws". It's not that I don't recognize their reality, it more that I never see ahead of time when they will apply. Actually, that may be the secret of Murphy's Law; it WHEN you don't think it can apply that it does...
Take the item #2. The 4' chicken wire rolls are, after checking, 4'11". The 10' PVC pipes are anywhere from 10' to 10' 1/2". And each PVC connector adds about 1/4". The result is that the chicken wire comes about 5" short of covering the top.
OK, a little thinking, and I realize that if I leave the gap at the edges, I can cover the gap with the chicken wire coming down the sides by starting 4" over the top. If that's not obvious to picture, just trust me.
So to do that, I have to slide all the wire over the top along the top PVC pipes. The first roll I tried to slide, one of the pipes came loose and fell to the ground. With the weight of the wire on them, it took me 15 minutes of struggling to get it back up, and I realized I would have to cement all the top PVC pipes after all.
Most of the pipes were in solid, but I wanted to cement all the joints. So I had to tap most of them loose with a rubber mallet, apply the cement, then tap them tight again. Half the effort was moving the stepladder around in tight areas.
It only took 2 hours, but I resented every minute of it. It was 2 hours that I THOUGHT I was going to spend making the final tightening on the chicken wire from the top to the bottom. So that I could start the last part of the project setting the screen door in place.
And that wasn't the last. I had been fastening the chicken wire with nylon ties. Those are thin ribbed straps that hold tight once pulled. In fact they are SO tight, they won't slide along the PVC pipe. So to make the chicken wire move along the pipes, I had to cut most of them loose.
When I got that done, I stopped for the day in relative disgust. Fortunately, I had gone grocery shopping, so the fridge was full of my favorite foods. I pan fried a chicken thigh, cooked corn on the cob, steamed asparagus and made a light cheese sauce for it, and made a very complex tossed salad. With Zinfandel (and I don't mind saying I had several glasses)...
But I'll be back at it tomorrow! Just my luck, Saturday and Sunday are forecast to be hot and humid...
Wednesday, May 13, 2015
Another Garden Enclosure Post
I'm beginning to wonder when this is going to end! When I started it last Fall, I expected it would take most of 2 weeks. Sad laughing at THAT now! A day to break up the first couple of old rotting raised beds and transfer the soil to the other beds, build a couple new ones, transfer the soil to the new ones and then remove the other old frames.
Then a day to dig holes for the new frame (15 minutes each, right?), and the rest of the day to construct the basic frame (just "tinkertoy" stuff, right?) Another day to toss chicken wire over the frame. Then a day to tighten the chicken wire all around. And then a day to build a screen door into the structure.
Oh what fools we mortals be...
I keep finding problems to solve. Now, I'll grant that solving problems is an enjoyable challenge. But "2 weeks" has turned into "2 months" (given a break over Winter), and it's not finished YET! I am both HORRIBLE at foreseeing problems AND estimating time to do work.
In my defense, doing things you have never done before in any way is difficult. But I PLANNED this and had a pretty good idea of the work. Sort of... Well, I didn't expect digging a simple 2' deep hole wouldn't take just 15 minutes, but 30, and after several I was worn out for the day. I bet my estimate of the total time is only 1/2 was it was, but what I didn't realize was that I couldn't keep at it 6 hours a day.
I then there were surprises. Who knew chicken wire was so heavy and resisted being pulled tight? Who knew that tolerances for fitting PVC pipes (with steel conduit inserted in the PVC pipes for rigidity) would be so important? Who knew that making the tops of the frame would be so tricky on ground that sloped East/West AND North/South. And I assumed the hanging chicken wire would be easily attached to the ground with 6" landscaping staples.
So today, I decided I needed to attach steel conduit reinforced PVC pipe at the bottom of the frame (to attach the bottom of the chicken wire). I went to the local big-box DIY store to buy them.
The idea was to use something called a "snap-tee" to attach the PVC pipes at the bottom of the frame to attach the chicken wire using nylon cable ties.

It fits over existing PVC pipes by friction, but can also be cemented. So I bought more PVC pipes and the snap tees and conduit steel pipe, and got them home. Brought out my can of PVC cement and read the instructions. The instructions mentioned that if the cement was "jellylike", DO NOT USE .
So I opened the can of cement and of course, it was "jellylike". Well, it WAS 10 years old. So back to the DIY store for fresh PVC cement. Everything takes more time than you expect...
OK, I had the cement, the PVC pipes, and the steel conduit rods for rigidity. I was confident the rest would go well today and quickly. I had set the upright frame VERY carefully, so the PVC pipes at the bottom HAD to fit perfectly, right?
Of course not! So much as a 1/4" off and each cross pipe at the bottom required cutting to size. And with the fitting, the steel conduit pipes had to be 1 1/4" shorter. Argh! I had to cut each steel conduit pipe shorter and the PVC pipes shorter by varying amounts (they are NOT all exactly the same lengths, varying by as much as 1/2").
There was a lot of cutting involved...

It's all maddening, sometimes!
So, I was ready to use the snap tees and cut-to-length between each individual set of uprights pipes. That should be all that was required, right? No.
The snap tees weren't exactly what I thought. I thought they fit over half the pipe, so that another could be placed opposite each on the other side of the pipe. But they fit 2/3ds over a pipe. So you can't put one opposite the other on the same pipe.
 They have to be one above the other...
If I had it to do over again, I would have made a jig to cut the snap tees to fit half the pipe instead on 2/3rds, but I was half done before I realized the problem. And when the PVC cement sets after 10 minutes, there is NO undoing it.
It sets in just several minutes. So when it is put anywhere, it STAYS there!
So I had to figure out another adjustment...
Doing some dry-fitting experiments, I figured out could I place one snap tee over another. In effect, all I accomplished in 2 days was attach 7 PVC pipes with steel conduits in them along all the bottom of most of the structure. My guess before would have been 1 hour at worst. It took 4. O the hottest day of the year so far... 90 degrees and 90 humidity. ARGH!!!
But like every other problem, its done! Another unexpected problem solved...
At least I can next attach the chicken wire at the bottom tightly tomorrow! Unless I discover some NEW problem to solve.
Next will be installing the screen door.. That's going to take more hole-digging, but at least I know how slowly that goes into the dry gravel/rock/clay soil. I've been delaying that, seeing forecasts of rain to soften the soil a bit. But it hasn't rained (naturally) so I'll have to do it the hard way like I did for all the upright pipes.
I have the screen door framed with 2x4"s. The holes I dig will hold 4x4" posts set 2' deep. The door frame holding the screen door will attach to the 4x4 posts.
And I bet something will just NOT work about that. What would this project BE without one more surprise...
Then a day to dig holes for the new frame (15 minutes each, right?), and the rest of the day to construct the basic frame (just "tinkertoy" stuff, right?) Another day to toss chicken wire over the frame. Then a day to tighten the chicken wire all around. And then a day to build a screen door into the structure.
Oh what fools we mortals be...
I keep finding problems to solve. Now, I'll grant that solving problems is an enjoyable challenge. But "2 weeks" has turned into "2 months" (given a break over Winter), and it's not finished YET! I am both HORRIBLE at foreseeing problems AND estimating time to do work.
In my defense, doing things you have never done before in any way is difficult. But I PLANNED this and had a pretty good idea of the work. Sort of... Well, I didn't expect digging a simple 2' deep hole wouldn't take just 15 minutes, but 30, and after several I was worn out for the day. I bet my estimate of the total time is only 1/2 was it was, but what I didn't realize was that I couldn't keep at it 6 hours a day.
I then there were surprises. Who knew chicken wire was so heavy and resisted being pulled tight? Who knew that tolerances for fitting PVC pipes (with steel conduit inserted in the PVC pipes for rigidity) would be so important? Who knew that making the tops of the frame would be so tricky on ground that sloped East/West AND North/South. And I assumed the hanging chicken wire would be easily attached to the ground with 6" landscaping staples.
So today, I decided I needed to attach steel conduit reinforced PVC pipe at the bottom of the frame (to attach the bottom of the chicken wire). I went to the local big-box DIY store to buy them.
The idea was to use something called a "snap-tee" to attach the PVC pipes at the bottom of the frame to attach the chicken wire using nylon cable ties.
It fits over existing PVC pipes by friction, but can also be cemented. So I bought more PVC pipes and the snap tees and conduit steel pipe, and got them home. Brought out my can of PVC cement and read the instructions. The instructions mentioned that if the cement was "jellylike", DO NOT USE .
So I opened the can of cement and of course, it was "jellylike". Well, it WAS 10 years old. So back to the DIY store for fresh PVC cement. Everything takes more time than you expect...
OK, I had the cement, the PVC pipes, and the steel conduit rods for rigidity. I was confident the rest would go well today and quickly. I had set the upright frame VERY carefully, so the PVC pipes at the bottom HAD to fit perfectly, right?
Of course not! So much as a 1/4" off and each cross pipe at the bottom required cutting to size. And with the fitting, the steel conduit pipes had to be 1 1/4" shorter. Argh! I had to cut each steel conduit pipe shorter and the PVC pipes shorter by varying amounts (they are NOT all exactly the same lengths, varying by as much as 1/2").
There was a lot of cutting involved...

It's all maddening, sometimes!
So, I was ready to use the snap tees and cut-to-length between each individual set of uprights pipes. That should be all that was required, right? No.
The snap tees weren't exactly what I thought. I thought they fit over half the pipe, so that another could be placed opposite each on the other side of the pipe. But they fit 2/3ds over a pipe. So you can't put one opposite the other on the same pipe.

If I had it to do over again, I would have made a jig to cut the snap tees to fit half the pipe instead on 2/3rds, but I was half done before I realized the problem. And when the PVC cement sets after 10 minutes, there is NO undoing it.
It sets in just several minutes. So when it is put anywhere, it STAYS there!

So I had to figure out another adjustment...
Doing some dry-fitting experiments, I figured out could I place one snap tee over another. In effect, all I accomplished in 2 days was attach 7 PVC pipes with steel conduits in them along all the bottom of most of the structure. My guess before would have been 1 hour at worst. It took 4. O the hottest day of the year so far... 90 degrees and 90 humidity. ARGH!!!
But like every other problem, its done! Another unexpected problem solved...
At least I can next attach the chicken wire at the bottom tightly tomorrow! Unless I discover some NEW problem to solve.
Next will be installing the screen door.. That's going to take more hole-digging, but at least I know how slowly that goes into the dry gravel/rock/clay soil. I've been delaying that, seeing forecasts of rain to soften the soil a bit. But it hasn't rained (naturally) so I'll have to do it the hard way like I did for all the upright pipes.
I have the screen door framed with 2x4"s. The holes I dig will hold 4x4" posts set 2' deep. The door frame holding the screen door will attach to the 4x4 posts.
And I bet something will just NOT work about that. What would this project BE without one more surprise...
Saturday, May 9, 2015
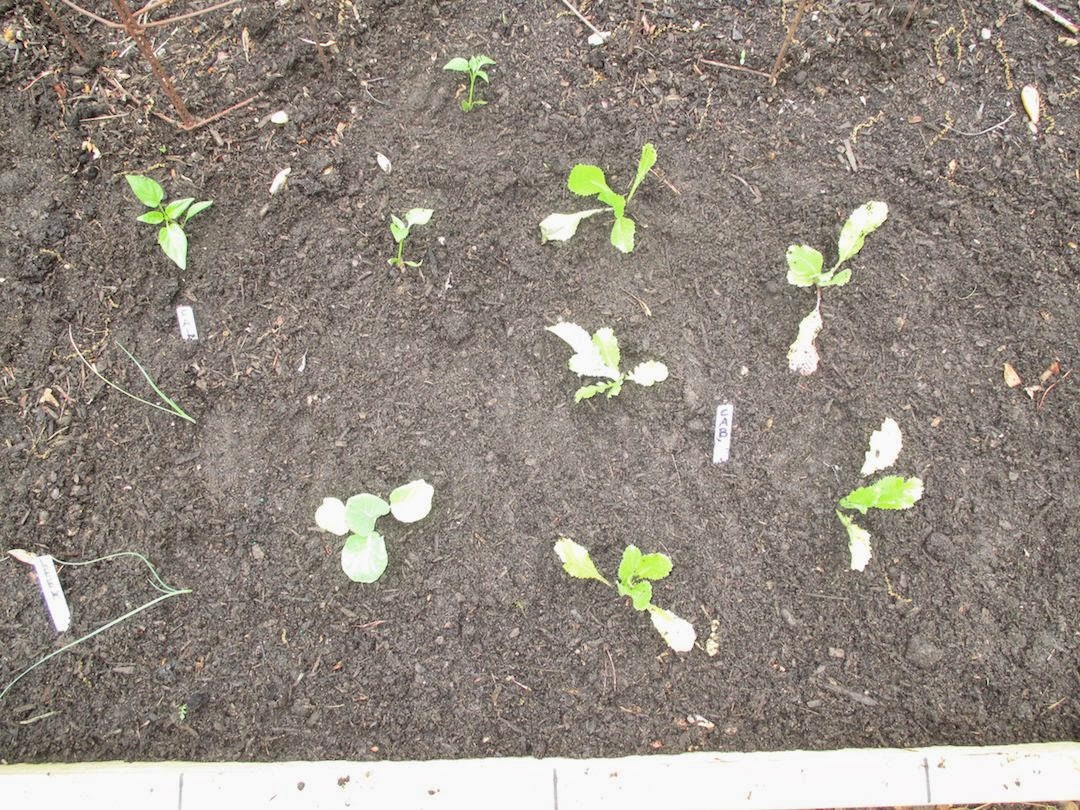
A Brief Planting Interlude
With the chicken wire overhung on the PVC frames, I realized I was able to do some planting in the beds below without worrying the draping of the chicken wire would rip them up. HURRAY, I can start the garden in the new beds! I had lots of home-grown seedlings waiting to go in the ground.
Here are broccoli, celery, leeks, and bell peppers... I can't get full celery stalks here, but I prefer the leaves anyway for the stronger flavor in salads.
 And some cabbages...
 I have 9 heirloom tomatoes planted in large sturdy remesh cages. 2 Brandywines, 2 Cherokee Purple (my favorites),

1 Aunt Gerties Gold, 1 Striped German ...
 1 Prudens Purple, 1 Ponderosa Pink, and 1 Big Beef (a decent-tasting hybrid for backup)
 Tomorrow, I'll be planting seeds in the other beds. Spinach, radishes, carrots, scallions, beets, etc.
And one bed is reserved for the "3 sisters". That's corn, pole beans, and melons. The corn is a bi-color type (love bi-color corn for the combination of flavor and sweetness), the pole beans should climb the corn stalks, and the melons should cover the soil and shade out the weeds. It's an American Native pre-Columbian practice. We'll see how it works...
Here are broccoli, celery, leeks, and bell peppers... I can't get full celery stalks here, but I prefer the leaves anyway for the stronger flavor in salads.


And one bed is reserved for the "3 sisters". That's corn, pole beans, and melons. The corn is a bi-color type (love bi-color corn for the combination of flavor and sweetness), the pole beans should climb the corn stalks, and the melons should cover the soil and shade out the weeds. It's an American Native pre-Columbian practice. We'll see how it works...
Thursday, May 7, 2015
The Chicken Wire
So I finally got 8' wide (two 4' widths) of the chicken wire over the top of the garden enclosure frame... It looked like this...
Up the side, across the top, and down the other side is about 45'. Some there is some left over from the 50' roll.
 The black vinyl-coated wire looks good. It's not tight yet. That part will come later. For now, it is just attached enough so as to not sag onto the garden.
 It is temporarily affixed to the side PVC pipes with some overlap. And the final steps will be to thread 100s of feet of galvanized wire sewing the edges of the rolls of chicken wire together tightly. Otherwise the Evil Squirrels would wiggle in between.
 The chicken wire rolls hang a foot or so long to spread out on the ground. That will prevent groundhogs and rabbits from going up the the chicken wire wall and digging in underneath. If they manage that, I will just put down heavier mesh wire at ground level.
 But I don't think that will be necessary. When critters decide on a place to dig at an edge, it seldom occurs to them to back off 2 feet and try again.
After I have all the tops of the enclosure covered and tightened (and I have the frame supported in all directions by unstretchable nylon ropes until the wire is all installed - at which point the wire attached to the pipes will strngthen the structure sufficiently).
The next part will be to construct the door. I think I have arranged that rather well. I've built a 2x4" frame around the door that fits the hinge side and the door lock side and the top. I will set 4x4" posts around where the door will attach. And because the 2x4" door frame allows several inches of attachment "wiggle room", it should fit perfectly.
Not to say attaching the screen door will be simple. Its heavy with the 2x4" boards surrounding it, and there will be some shimming required to make the door frame fit to the 4x4" posts so the door is level and swings easily not hitting the ground. But I have some ideas on that too.
So many of the ideas for this project have come to me as I was trying to fall asleep. I should try sleeping more often, LOL!
Next time: The door installation...
Up the side, across the top, and down the other side is about 45'. Some there is some left over from the 50' roll.
After I have all the tops of the enclosure covered and tightened (and I have the frame supported in all directions by unstretchable nylon ropes until the wire is all installed - at which point the wire attached to the pipes will strngthen the structure sufficiently).
The next part will be to construct the door. I think I have arranged that rather well. I've built a 2x4" frame around the door that fits the hinge side and the door lock side and the top. I will set 4x4" posts around where the door will attach. And because the 2x4" door frame allows several inches of attachment "wiggle room", it should fit perfectly.
Not to say attaching the screen door will be simple. Its heavy with the 2x4" boards surrounding it, and there will be some shimming required to make the door frame fit to the 4x4" posts so the door is level and swings easily not hitting the ground. But I have some ideas on that too.
So many of the ideas for this project have come to me as I was trying to fall asleep. I should try sleeping more often, LOL!
Next time: The door installation...
Tuesday, May 5, 2015
And Yet More Garden Enclosure
OK, I've been making progress on the enclosure. I built the frame around the screen door. I wanted to make tenon joints because that means twice the glue surface. But the the tenoning gadget has to have the boards straight up from the table saw, and there isn't 8' above the table saw to the ceiling. So I went with half-lap joints. With glue/screws/corner braces, that ought to last as long as the preservative-treated wood itself. Which is about 25 years. And in 25 years, I'll be 90 and probably won't care.
So I did the half-lap joints...


 Don't worry, the joints fit better than it looks. The pictures were taken before the glue/screw.
So the idea was to have 2x4 boards attached to the door, and then attach the 2x4s to 4x4" posts set in the ground. A couple days work, and the exact placement depended slightly on matching the chicken wire.
But I was getting anxious to plant my tomatos. I couldn't do it before I had the chicken wire overhanging the garden frame. The chicken wire was going to drag along the raised beds as I installed it and that would rip up any tomato seedlings. What to do, what to do?
 And building the door itself would take days. So I was looking at a delay of planting the tomatoes (and some other stuff) almost 3 weeks after the proper planting time after all this work was done.
Ah blessed non-sleep! I sometimes do my best thinking lying in bed trying to go to sleep. And yesterday was no exception. As I lay there, turning over the problem in my mind, a solution struck me. I could lay the chicken wire over the frames of the closest 2 beds without doing the final tight attachment work! As long as it was generally up on the frames, I was home free to plant in the 2 left beds...
Hurray!
I did that today. The chicken wire is hard stuff to handle. It comes wrapped tightly coiled.
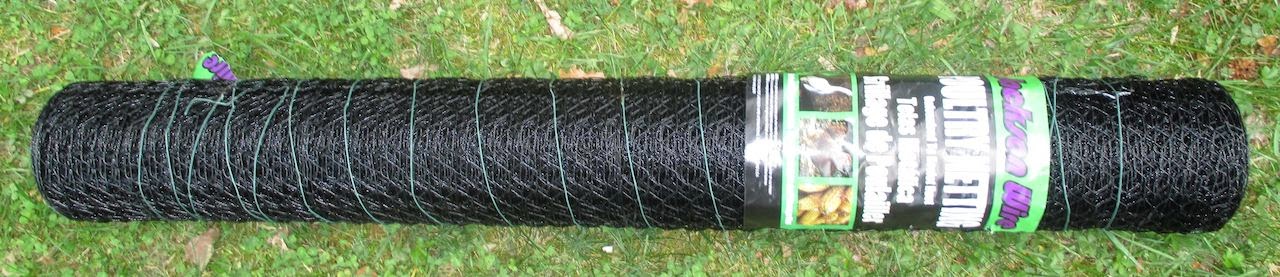 The coil has a memory. It has to be unwound, turned over, and rewound the opposite way for an hour or so before it lays flat. THAT is an adventure in itself! I start by unrolling a foot and putting a cinder block on it to hold it in place. Then unroll the 50" length. It gets harder to unroll toward the end, being tighter and smaller roll.
At the end, you are fighting tight wire in a 2" roll. But placing a board on the unrolled part prevents rerolling. And the last foot is straightened by hand.
Chicken wire usually has sharp wire edges. Fortunately, this stuff I bought (Jackson Wire, and it is a personal unpaid recommendation)
 is black vinyl-coated galvanized wire with (mostly) no sharp edges! It is unusually easy-to-handle chicken wire!
So I spread the first roll out the 50' length in the direction it wanted to roll up. Then I turned it over and re-rolled it up the opposite way.
 After an hour, the wire memory was neutral! It laid FLAT!
I was able to drag the 4' wide 50' length over the top of the frame. Not easily. I had to do it 10' at a time. It worked. Not like sliding a tablecloth over a table, but sure well enough.
So I did that that and with the wire overhanging, was able to plant tomato seedlings safely just as the rain started at 6pm. And into the house I went to make myself a fine steak dinner with asparagus in cheese sauce, a tossed salad, and home-fried potatoes...
Next time: The draping-the-chicken-wire-over-the-PVC frame-process...
So I did the half-lap joints...
So the idea was to have 2x4 boards attached to the door, and then attach the 2x4s to 4x4" posts set in the ground. A couple days work, and the exact placement depended slightly on matching the chicken wire.
But I was getting anxious to plant my tomatos. I couldn't do it before I had the chicken wire overhanging the garden frame. The chicken wire was going to drag along the raised beds as I installed it and that would rip up any tomato seedlings. What to do, what to do?
Ah blessed non-sleep! I sometimes do my best thinking lying in bed trying to go to sleep. And yesterday was no exception. As I lay there, turning over the problem in my mind, a solution struck me. I could lay the chicken wire over the frames of the closest 2 beds without doing the final tight attachment work! As long as it was generally up on the frames, I was home free to plant in the 2 left beds...
Hurray!
I did that today. The chicken wire is hard stuff to handle. It comes wrapped tightly coiled.
At the end, you are fighting tight wire in a 2" roll. But placing a board on the unrolled part prevents rerolling. And the last foot is straightened by hand.
Chicken wire usually has sharp wire edges. Fortunately, this stuff I bought (Jackson Wire, and it is a personal unpaid recommendation)
So I spread the first roll out the 50' length in the direction it wanted to roll up. Then I turned it over and re-rolled it up the opposite way.
I was able to drag the 4' wide 50' length over the top of the frame. Not easily. I had to do it 10' at a time. It worked. Not like sliding a tablecloth over a table, but sure well enough.
So I did that that and with the wire overhanging, was able to plant tomato seedlings safely just as the rain started at 6pm. And into the house I went to make myself a fine steak dinner with asparagus in cheese sauce, a tossed salad, and home-fried potatoes...
Next time: The draping-the-chicken-wire-over-the-PVC frame-process...
Friday, May 1, 2015
More Garden Enclosure - The Door
This may be a bit long...
Well, I was ready to start draping the chicken wire over the conduit-reinforced PVC framework around the new raised frame garden beds, when it occurred to me that it might be a better idea to make a door first. No sense in wasting chicken wire by covering a spot and then having to cut it out later. And a lot easier to work in an open space than a close one cut to size.

Not that I didn't expect to need a door, but the order of construction matters. I'd considered the door before, but kept putting it off because I wasn't sure exactly how to do it. How do you build a screen door into a chicken wire wall? I HAD a screen door. In fact, I've had it for 25 years. And thereby hangs a tale...
Not long after a neighbor moved in, he came over asking if I wanted to buy a lightly used screen door. He was replacing his front door for a fancier kind that came with a front door and screen door together as a unit. Well, I didn't have one on MY front door, and assumed I should. So I bought it cheap. And then, being busy, let it sit for a year in my garage. When I finally went to install it, I discovered it was larger than my front door.
It was a surprise to me. Being new to owning a house, I assumed all front doors were the same size. I considered building a slightly larger frame around the front door, but decided that would look dumb. And then I wondered why I need a screen door at all. So it sat in the garage...
Well, I decided to see what I needed to do to use the darn thing in the garden enclosure. It didn't seem promising. There were some side attachments, there was actually acrylic panels covering the screen, and I couldn't even find places for hinges. There were even medieval-looking point bars on the front. But knowing that there HAD to be some way it worked, I backed the car out of the garage and spread the pieces down on the garage floor.

After some examining, moderate enlightenment arrived. The medieval bars could be removed! That done, the whole door was lighter and easier to handle. Then I examined the 2 thin strips of unattached molded metal that came with the door.

AHA! there were 3 hidden hinges folded into them. Shifting each around in various ways, I discovered one side of the hinges fitted into a slot in the door opposite the handles. Well, that's where the hinged SHOULD be, of course.

I tried to slide the molded metal strip along the track the hinges belonged, but it was blocked by screwheads. Damn! Hmmm, when I removed the screws, I saw the holes matched other holes in the door. Hurray, that was how the thin metal strip attached to the door.
Some of this may be obvious to any Do-It-Yourselfer, but as many projects I have done and things I've built, I'm not really mechanically-inclined. Each project is a new experience in re-inventing the wheel. I have to figure out everything as if for the first time, every time! If you have a job that involves building or fixing things, you gain experience through repetition. I, on the other hand, seldom have cause to do ANYTHING twice. So its always something new to me. Fortunately, I am persistent. And if something has been built to go together, I know there ought to be a way to put it BACK together.
Sooo, I finally figured out how the thin molded metal strips attached to the door and then a frame around a door opening. Still didn't have a frame to put the door INTO, though. I dreaded the idea of constructing a frame solid enough to hold the door in the enclosure, yet precise enough to fit the hinges and door lock to close firmly.
Discouraged, I went to Home Depot (a local Big Hardware Store) to see if there was a decent screen door already built into a frame to make it easier to install. I bought in interior wood door like that years ago when I built a "powder room" in the basement. No luck. But I DID notice that the display doors were built into wood frames that were then attached to metal frames.
EUREKA! If I built a 2"x4" frame around the door using the metal strip attachments I had now attached to the doors, I would have a frame I could attach to posts in the ground with a couple of inches of adjustment ("wiggle") room. THAT I know how to do!
I haven't decided whether to just half-lap the corners of the wood frame and attach corner braces, or make a tenon and glue-and-screw, but at least I know a way to attach a door to the garden enclosure tightly enough to keep squirrels out.
Half-lap :

Tenon:

The construction and connection of the frame will take a whole day. Digging holes for 4"x4" posts at the enclosure and squaring them up, etc, will take another. The attaching of the framed screen door to the posts afterwards should only take an hour, but I will want to give the 4"x4" posts a day to set in the tamped ground to be solid enough for some weight, and I'll brace everything for a few extra days.
I won't need to use the door until I'm done covering the framework with the chicken wire and I expect that will take a couple days itself.
But the result will be that there is a sturdy frame with 4"x4" preservative-treated posts set 2' deep in the ground with a similar top and base at ground level about an inch wider than the frame of the door. To which I can easily screw the door frame into the posts having inches to spare in all directions to make the door straight up and easy to open and latch.
Whew! That is one big worry off my mind. In this project that threatens to never end (but will), there are solutions...
I can start work on that tomorrow after I go to Home Depot and buy three 2"x4"x8' preservative-treated boards . One 8' board for each side and one to cut in half for 4' pieces. After some hesitation about how to proceed with the door, I'M ON MY WAY AGAIN! YAY...
Well, I was ready to start draping the chicken wire over the conduit-reinforced PVC framework around the new raised frame garden beds, when it occurred to me that it might be a better idea to make a door first. No sense in wasting chicken wire by covering a spot and then having to cut it out later. And a lot easier to work in an open space than a close one cut to size.
Not that I didn't expect to need a door, but the order of construction matters. I'd considered the door before, but kept putting it off because I wasn't sure exactly how to do it. How do you build a screen door into a chicken wire wall? I HAD a screen door. In fact, I've had it for 25 years. And thereby hangs a tale...
Not long after a neighbor moved in, he came over asking if I wanted to buy a lightly used screen door. He was replacing his front door for a fancier kind that came with a front door and screen door together as a unit. Well, I didn't have one on MY front door, and assumed I should. So I bought it cheap. And then, being busy, let it sit for a year in my garage. When I finally went to install it, I discovered it was larger than my front door.
It was a surprise to me. Being new to owning a house, I assumed all front doors were the same size. I considered building a slightly larger frame around the front door, but decided that would look dumb. And then I wondered why I need a screen door at all. So it sat in the garage...
Well, I decided to see what I needed to do to use the darn thing in the garden enclosure. It didn't seem promising. There were some side attachments, there was actually acrylic panels covering the screen, and I couldn't even find places for hinges. There were even medieval-looking point bars on the front. But knowing that there HAD to be some way it worked, I backed the car out of the garage and spread the pieces down on the garage floor.
After some examining, moderate enlightenment arrived. The medieval bars could be removed! That done, the whole door was lighter and easier to handle. Then I examined the 2 thin strips of unattached molded metal that came with the door.
AHA! there were 3 hidden hinges folded into them. Shifting each around in various ways, I discovered one side of the hinges fitted into a slot in the door opposite the handles. Well, that's where the hinged SHOULD be, of course.
I tried to slide the molded metal strip along the track the hinges belonged, but it was blocked by screwheads. Damn! Hmmm, when I removed the screws, I saw the holes matched other holes in the door. Hurray, that was how the thin metal strip attached to the door.
Some of this may be obvious to any Do-It-Yourselfer, but as many projects I have done and things I've built, I'm not really mechanically-inclined. Each project is a new experience in re-inventing the wheel. I have to figure out everything as if for the first time, every time! If you have a job that involves building or fixing things, you gain experience through repetition. I, on the other hand, seldom have cause to do ANYTHING twice. So its always something new to me. Fortunately, I am persistent. And if something has been built to go together, I know there ought to be a way to put it BACK together.
Sooo, I finally figured out how the thin molded metal strips attached to the door and then a frame around a door opening. Still didn't have a frame to put the door INTO, though. I dreaded the idea of constructing a frame solid enough to hold the door in the enclosure, yet precise enough to fit the hinges and door lock to close firmly.
Discouraged, I went to Home Depot (a local Big Hardware Store) to see if there was a decent screen door already built into a frame to make it easier to install. I bought in interior wood door like that years ago when I built a "powder room" in the basement. No luck. But I DID notice that the display doors were built into wood frames that were then attached to metal frames.
EUREKA! If I built a 2"x4" frame around the door using the metal strip attachments I had now attached to the doors, I would have a frame I could attach to posts in the ground with a couple of inches of adjustment ("wiggle") room. THAT I know how to do!
I haven't decided whether to just half-lap the corners of the wood frame and attach corner braces, or make a tenon and glue-and-screw, but at least I know a way to attach a door to the garden enclosure tightly enough to keep squirrels out.
Half-lap :
Tenon:
The construction and connection of the frame will take a whole day. Digging holes for 4"x4" posts at the enclosure and squaring them up, etc, will take another. The attaching of the framed screen door to the posts afterwards should only take an hour, but I will want to give the 4"x4" posts a day to set in the tamped ground to be solid enough for some weight, and I'll brace everything for a few extra days.
I won't need to use the door until I'm done covering the framework with the chicken wire and I expect that will take a couple days itself.
But the result will be that there is a sturdy frame with 4"x4" preservative-treated posts set 2' deep in the ground with a similar top and base at ground level about an inch wider than the frame of the door. To which I can easily screw the door frame into the posts having inches to spare in all directions to make the door straight up and easy to open and latch.
Whew! That is one big worry off my mind. In this project that threatens to never end (but will), there are solutions...
I can start work on that tomorrow after I go to Home Depot and buy three 2"x4"x8' preservative-treated boards . One 8' board for each side and one to cut in half for 4' pieces. After some hesitation about how to proceed with the door, I'M ON MY WAY AGAIN! YAY...
Subscribe to:
Posts (Atom)
Landscaping, Part 2
So there I was without a garden. At the time, the neighborhood was mostly treeless except my West neighbor's yard. So I had a lot of s...