Saturday, May 9, 2015

A Brief Planting Interlude

With the chicken wire overhung on the PVC frames, I realized I was able to do some planting in the beds below without worrying the draping of the chicken wire would rip them up.  HURRAY, I can start the garden in the new beds!  I had lots of home-grown seedlings waiting to go in the ground.

Here are broccoli, celery, leeks, and bell peppers...  I can't get full celery stalks here, but I prefer the leaves anyway for the stronger flavor in salads.
And some cabbages...
I have 9 heirloom tomatoes planted in large sturdy remesh cages.   2 Brandywines, 2 Cherokee Purple (my favorites),

1 Aunt Gerties Gold, 1 Striped German ...
 1 Prudens Purple, 1 Ponderosa Pink, and 1 Big Beef (a decent-tasting hybrid for backup)
Tomorrow, I'll be planting seeds in the other beds.  Spinach, radishes, carrots, scallions, beets, etc.

And one bed is reserved for the "3 sisters".  That's corn, pole beans, and melons.  The corn is a bi-color type (love bi-color corn for the combination of flavor and sweetness), the pole beans should climb the corn stalks, and the melons should cover the soil and shade out the weeds.  It's an American Native pre-Columbian practice.  We'll see how it works...

Thursday, May 7, 2015

The Chicken Wire

So I finally got 8' wide (two 4' widths) of the chicken wire over the top of the garden enclosure frame...  It looked like this...

Up the side, across the top, and down the other side is about 45'.  Some there is some left over from the 50' roll.
 The black vinyl-coated wire looks good.   It's not tight yet.  That part will come later.  For now, it is just attached enough so as to not sag onto the garden.
It is temporarily affixed to the side PVC pipes with some overlap.  And the final steps will be to thread 100s of feet of galvanized wire sewing the edges of the rolls of chicken wire together tightly.  Otherwise the Evil Squirrels would wiggle in between.
The chicken wire rolls hang a foot or so long to spread out on the ground.  That will prevent groundhogs  and rabbits from going up the the chicken wire wall and digging in underneath.  If they manage that, I will just put down heavier mesh wire at ground level. 
But I don't think that will be necessary.  When critters decide on a place to dig at an edge, it seldom occurs to them to back off 2 feet and try again. 

After I have all the tops of the enclosure covered and tightened (and I have the frame supported in all directions by unstretchable nylon ropes until the wire is all installed - at which point the wire attached to the pipes will strngthen the structure sufficiently).

The next part will be to construct the door.  I think I have arranged that rather well.  I've built a 2x4" frame around the door that fits the hinge side and the door lock side and the top.  I will set 4x4" posts around where the door will attach.  And because the 2x4" door frame allows several inches of attachment "wiggle room", it should fit perfectly.

Not to say attaching the screen door will be simple.  Its heavy with the 2x4" boards surrounding it, and there will be some shimming required to make the door frame fit to the 4x4" posts so the door is level and swings easily not hitting the ground.  But I have some ideas on that too.

So many of the ideas for this project have come to me as I was trying to fall asleep.  I should try sleeping more often, LOL!

Next time:  The door installation...


Tuesday, May 5, 2015

And Yet More Garden Enclosure

OK, I've been making progress on the enclosure.  I built the frame around the screen door.  I wanted to make tenon joints because that means twice the glue surface.  But the the tenoning gadget has to have the boards straight up from the table saw, and there isn't 8' above the table saw to the ceiling.  So I went with half-lap joints.  With glue/screws/corner braces, that ought to last as long as the preservative-treated wood itself.  Which is about 25 years.  And in 25 years, I'll be 90 and probably won't care.

So I did the half-lap joints...


Don't worry, the joints fit better than it looks.  The pictures were taken before the glue/screw.

So the idea was to have 2x4 boards attached to the door, and then attach the 2x4s to 4x4" posts set in the ground.  A couple days work, and the exact placement depended slightly on matching the chicken wire.

But I was getting anxious to plant my tomatos.  I couldn't do it before I had the chicken wire overhanging the garden frame.  The chicken wire was going to drag along the raised beds as I installed it and that would rip up any tomato seedlings.  What to do, what to do?
And building the door itself would take days.  So I was looking at a delay of planting the tomatoes (and some other stuff) almost 3 weeks after the proper planting time after all this work was done. 

Ah blessed non-sleep!  I sometimes do my best thinking lying in bed trying to go to sleep.  And yesterday was no exception.  As I lay there, turning over the problem in my mind, a solution struck me.  I could lay the chicken wire over the frames of the closest 2 beds without doing the final tight attachment work!  As long as it was generally up on the frames, I was home free to plant in the 2 left beds...

Hurray!

I did that today.  The chicken wire is hard stuff to handle.  It comes wrapped tightly coiled.
The coil has a memory.  It has to be unwound, turned over, and rewound the opposite way for an hour or so before it lays flat.  THAT is an adventure in itself!  I start by unrolling a foot and putting a cinder block on it to hold it in place.  Then unroll the 50" length.  It gets harder to unroll toward the end, being tighter and smaller roll.

At the end, you are fighting tight wire in a 2" roll.  But placing a board on the unrolled part prevents rerolling.  And the last foot is straightened by hand.

Chicken wire usually has sharp wire edges.  Fortunately, this stuff I bought (Jackson Wire, and it is a personal unpaid recommendation)
is black vinyl-coated galvanized wire with (mostly) no sharp edges!  It is unusually easy-to-handle chicken wire!

So I spread the first roll out the 50' length in the direction it wanted to roll up.  Then I turned it over and re-rolled it up the opposite way.

After an hour, the wire memory was neutral!  It laid FLAT!


I was able to drag the 4' wide 50' length over the top of the frame.  Not easily.  I had to do it 10' at a time.  It worked.  Not like sliding a tablecloth over a table, but sure well enough.


So I did that that and with the wire overhanging, was able to plant tomato seedlings safely just as the rain started at 6pm.  And into the house I went to make myself a fine steak dinner with asparagus in cheese sauce, a tossed salad, and home-fried potatoes...

Next time:  The draping-the-chicken-wire-over-the-PVC frame-process...


Friday, May 1, 2015

More Garden Enclosure - The Door

This may be a bit long...

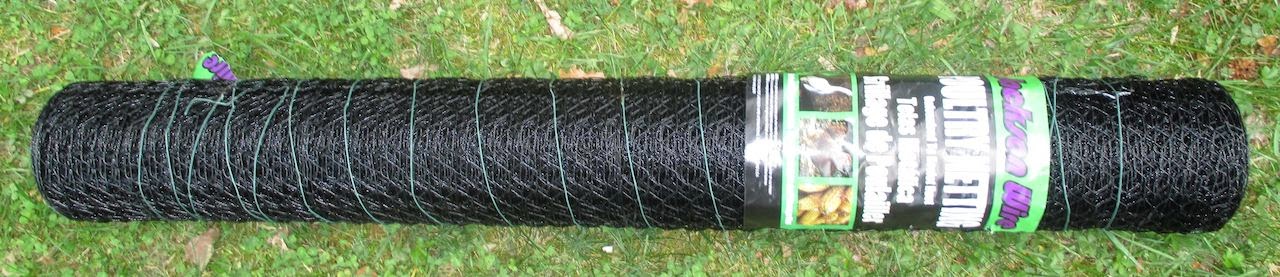
Well, I was ready to start draping the chicken wire over the conduit-reinforced PVC framework around the new raised frame garden beds, when it occurred to me that it might be a better idea to make a door first.  No sense in wasting chicken wire by covering a spot and then having to cut it out later.  And a lot easier to work in an open space than a close one cut to size.


Not that I didn't expect to need a door, but the order of construction matters.  I'd considered the door before, but kept putting it off because I wasn't sure exactly how to do it.  How do you build a screen door into a chicken wire wall?  I HAD a screen door.  In fact, I've had it for 25 years.  And thereby hangs a tale...

Not long after a neighbor moved in, he came over asking if I wanted to buy a lightly used screen door.  He was replacing his front door for a fancier kind that came with a front door and screen door together as a unit.  Well, I didn't have one on MY front door, and assumed I should.  So I bought it cheap.  And then, being busy, let it sit for a year in my garage.  When I finally went to install it, I discovered it was larger than my front door.

It was a surprise to me.  Being new to owning a house, I assumed all front doors were the same size.  I considered building a slightly larger frame around the front door, but decided that would look dumb.  And then I wondered why I need a screen door at all.  So it sat in the garage...

Well, I decided to see what I needed to do to use the darn thing in the garden enclosure.  It didn't seem promising.  There were some side attachments, there was actually acrylic panels covering the screen, and I couldn't even find places for hinges.  There were even medieval-looking point bars on the front.  But knowing that there HAD to be some way it worked, I backed the car out of the garage and spread the pieces down on the garage floor.


After some examining, moderate enlightenment arrived.   The medieval bars could be removed!  That done, the whole door was lighter and easier to handle.  Then I examined the 2 thin strips of unattached molded metal that came with the door.

AHA!  there were 3 hidden hinges folded into them.  Shifting each around in various ways, I discovered one side of the hinges fitted into a slot in the door opposite the handles.  Well, that's where the hinged SHOULD be, of course.


I tried to slide the molded metal strip along the track the hinges belonged, but it was blocked by screwheads.  Damn!  Hmmm, when I removed the screws, I saw the holes matched other holes in the door.  Hurray, that was how the thin metal strip attached to the door.

Some of this may be obvious to any Do-It-Yourselfer, but as many projects I have done and things I've built, I'm not really mechanically-inclined.  Each project is a new experience in re-inventing the wheel.  I have to figure out everything as if for the first time, every time!  If you have a job that involves building or fixing things, you gain experience through repetition.  I, on the other hand, seldom have cause to do ANYTHING twice.  So its always something new to me.  Fortunately, I am persistent.  And if something has been built to go together, I know there ought to be a way to put it BACK together.

Sooo, I finally figured out how the thin molded metal strips attached to the door and then a frame around a door opening.  Still didn't have a frame to put the door INTO, though.  I dreaded the idea of constructing a frame solid enough to hold the door in the enclosure, yet precise enough to fit the hinges and door lock to close firmly.

Discouraged, I went to Home Depot (a local Big Hardware Store) to see if there was a decent screen door already built into a frame to make it easier to install.  I bought in interior wood door like that years ago when I built a "powder room" in the basement.  No luck.  But I DID notice that the display doors were built into wood frames that were then attached to metal frames.

EUREKA!  If I built a 2"x4" frame around the door using the metal strip attachments I had now attached to the doors, I would have a frame I could attach to posts in the ground with a couple of inches of adjustment ("wiggle") room.  THAT I know how to do!

I haven't decided whether to just half-lap the corners of the wood frame and attach corner braces, or make a tenon and glue-and-screw, but at least I know a way to attach a door to the garden enclosure tightly enough to keep squirrels out.

Half-lap :

Tenon:


The construction and connection of the frame will take a whole day.  Digging holes for 4"x4" posts at the enclosure and squaring them up, etc, will take another.  The attaching of the framed screen door to the posts afterwards should only take an hour, but I will want to give the 4"x4" posts a day to set in the tamped ground to be solid enough for some weight, and I'll brace everything for a few extra days.

I won't need to use the door until I'm done covering the framework with the chicken wire and I expect that will take a couple days itself.

But the result will be that there is a sturdy frame with 4"x4" preservative-treated posts set 2' deep in the ground  with a similar top and base at ground level about an inch wider than the frame of the door.  To which I can easily screw the door frame into the posts having inches to spare in all directions to make the door straight up and easy to open and latch.

Whew!  That is one big worry off my mind.  In this project that threatens to never end (but will), there are solutions...

I can start work on that tomorrow after I go to Home Depot and buy three 2"x4"x8' preservative-treated boards .  One 8' board for each side and one to cut in half for 4' pieces.  After some hesitation about how to proceed with the door, I'M ON MY WAY AGAIN!  YAY...


Monday, April 27, 2015

An Award

I've never gotten an award for this blog before.  It comes and goes.  Its random.  I always hope some people like what they read of course, but I don't think I have much of a regular following.

But I was given an award.  And with so many kind words, I blushed reading them.

Its the Very Inspiring Blogger Award...
Pretty Fancy, huh?

I'd say I don't really deserve it, but that would suggest that Ramblingon made a mistake, and I don't want to suggest that.  No one ever knows how one appears to others, you know?

Thank you Ramblingon!  I don't read many blogs other than cat ones, so I think I will just hold on to this award for a few days until I look around a bit and find one I think is "inspiring".  I WILL, just need to expand my reading.  And maybe that's the point of these awards.  To make you think about other blogs.

But I do want to say that receiving this award makes me feel like the best tree in my back yard at full bloom...
I will sleep happy tonight!

Thursday, April 23, 2015

Garden Enclosure Again

I'm pleased to say that I set the last post and cross-piece of the garden enclosure frame yesterday.  Most of the posts are set 2' deep in clay and gravel (and the soil around them is tamped down hard), so they should stay secure.
The ground slopes both ways, but the top is level, which was more complicated to construct but will look better.  One thing I've learned over the years as that a couple days extra work makes things better forever.

The framing is 1" PVC pipe, but I put metal conduit pipes inside them for strength. 
Note that the upper cross-pieces don't sag...

I got the basic structure from a website HERE but I had to make some improvements.  First, there are some parts of the site's plans that seem to require at least 2 people.  Second, mine is larger.  Third (and forgive me) but I couldn't make PVC connectors fit onto metal conduit like the site suggested. Fourth, the site hung the chicken wire horizontally and that seems harder.  I am draping the chicken wire over the top and down the sides to use the frame as a support while I work.

Yes, I could hire someone to help, but part of the point of doing this is doing it myself.  I could have just hired a crew to build the whole thing.  A big part of my life has been "Mark Do", LOL!*

Today I made sure all the posts were as level as possible as I tamped the clay soil around the posts with a piece of 4"x4" post (checking with a post level all the way around).   

JOHNSON - Post Level, 3 Vials
BTW, I just grabbed that image now.  I had had some difficulty attaching the level to the PVC pipes conveniently with a bungee cord.  When I saw the rubber band in the image it was "slap forehead time".  DOH!  Live and learn...

So today I went and checked the posts for solid footings.  They CAN move; it will take weeks for the clay soil to settle and harden.  I've done that with other uprights (like birdfeeder poles and trellis support 4"x4"s) and it is strong/solid eventually.  But I'm going to be throwing and dragging heavy rolls of 4'x5-' chicken wire over the tops and pulling it tight, so I wanted some temporary bracing.

I considered screwing some 12' boards diagonal across the posts (leftovers from building the fence years ago), but decided rope would do.  Pounding some 3' metal bars into the corners, I tied ropes along all the diagonals until the whole structure seemed solid enough for some pushing.

I'd show a picture of that, but my long ropes are camo colored and simply don't show up.  So just trust me they are there.

But before I can cover the structure completely with the chicken wire, I have to build a door.  The website I based the design on was going for "cheap" (under $100) and used gifted old window screens.  I'm not trying to waste money, but "better" is more important that "cheap".  The original design site is several years old; I wonder how solid the structure is now?  I need this to last 20 years. 

Instead, I think I will buy a good screen door, build a frame for it, then mount that in line with one of the paths between the framed beds.  That way I can get a wheelbarrow inside the enclosure.

I haven't decided on how to build the screen door frame and attach it to the general structure, so I will probably over-build it so it can stand on its own.  "Over-building" is my fall-back position when I'm not sure how well things will work out.  I'm thinking a frame of 4"x4" posts to attach the screen door with 8" flat metal braces on all corners and on both sides and some 8" lag screws in each corner both ways for peace of mind.
Product Details


Did I mention I "over-build"?  Well, it's better than "under-building".  Have you ever heard a bridge-builder say "I think I'll under-build this one?  Would you want one to?  LOL!

Getting the rolls of chicken wire over the structure is going to be a bit tricky.  I have 3 stepladders (8', 6', and 4'**), so I  can set one up at each post across the frame.  The balancing of them across the top baffled me for days, but last night I envisioned laying some of those old 12' boards across the 10' spans like railroads.  Is THAT cool or what?

So the chicken wire rolls will unroll across the top on the boards and down both sides.  And I will leave an extra foot of chicken wire at the bottoms to fold outwards to thwart squirrels or groundhogs digging under the edges to get into the garden.

I am slightly dreading the effort to cover the whole structure with the chicken wire.  It isn't going to be easy.  I expect some frustrating moments.  But I expected (and had) some frustrating moments setting the posts in place and getting the cross pieces attached.  So I'll get the chicken wire rolls laid across one way or another.

Pictures of that as it goes next time...

* "Mark Do" comes from childhood where I demanded to tie my own shoes when Mom tried to do it for me.  I didn't do it well at first (she told me years later), but my shoelaces were never loose.  My adult guess is that Mom had a challenging and independent child.  I don't remember it.

**  My box black oil sunflowers seed bird-feeder is up on an 8' pole.  The 8' stepladder is heavy and awkward.  So I bought a 4' one.  It was too short to reach above the box for refilling.  So I bought a 6' one.  As Goldilocks might have said: "Ah, just right"!  So I have 3 stepladders...


Sunday, April 19, 2015

The Garden Enclosure

It progresses.  I discovered some real problems as I went recently.  I want the top of the enclosure to be level.  But the ground slopes front to back and right to left.  That makes digging the holes for the frame real tricky.

I tried to measure the slope of the ground first.  That got me a general idea that is dropped 1.5' in both directions, but it wasn't very exact.  I suppose I could have lived with that, but my Dad was always one to point out minor flaws in anything I ever built (no matter how well built), so I have a reaction to that even though he is gone now.  Old habits die hard.  And there IS a point to seeking perfection in any project, Dad criticisms or not.  A few extra days work means years of admiring work well done.

So I wanted to make sure that, even though the ground was sloped, the top of the frame should be level.  If I had surveyor's equipment, that would have been easy.  But I don't.  So I thought about it a few days.  With some complicated ways that seemed really awkward in reality.

As I was trying to get to sleep the previous night (and I did the construction yesterday, so that was 2 nights ago), I kept turning the problem over in my mind.  It finally struck me...  A water level!  I would build the enclosure from the top down!!!

For those of you not familiar with the idea, water in a bucket with a long tube attached will stay at the same level as the bucket even when you move the tube around.  It's not a new invention, but it was a new thought to me.  I found a nice (free I hope) picture to describe it...

Well, saved me the effort of drawing and scanning it myself.  And I wasn't cutting off the tops of the PVC pipes, I just dug my holes a bit deeper to make them match at the top.  I marked each PVC pipe 8" down from the top and made the water level match it THERE.  So the tops of all my PVC frame uprights are level.

The garden enclosure is 20' by 20'   with the raised framed beds I built, that gives me 2' between each bed and 2' around the outside of them (inside the enclosure).  I hope that makes sense.  When I post this in a few weeks as an instructional post, I'll add diagrams.

But the point is that it finally solved my difficulties with the sloped ground.  Some pictures of the general steps...

The holes dug.  The digging was horrible.  The basic soil in the back yard is gravel, clay, and more gravel.  A post hole digger wasn't sufficient.  I had to use a breaker bar.  That's a 5' solid iron rod about 1.5" in diameter, with a chisel point at the bottom.  It weighes 12-15 pounds.  You lift it, you pound it down, you swivel it about.  Its the "breaker bar 2-step dance".  LOL!  THEN you use the post hole digger to scoop the loosen debris out.  It's great (but unwanted) exercise.  Good for causing hand blisters too.

This is the lowest end of the yard.  The higher end holes got to 2.5' deep
Here are the PVC pipes sitting in the holes at one end.  They may not look all in a row, but they are.
As each one was individually set at the proper depth so that the top was level, I shoveled dirt back in and stomped it down hard.  There is still some "wiggle" room to allow for attaching more pipes at the tops.
 Here is a corner, showing the connections.  It's not easy, being just me to be at both ends of the pipes, but I set up ladders to hold one end of each pipe while I set the other end in tightly.  I'm used to having to construct "helper" supports on projects.  A 6" spring clamp atached to a ladder makes a nice "V" shape to hold the far end of a pipe temporarily...
I initially thought it would be easiest to start at one corner and work my way around the perimeter, but it  wasn't.  Doing all the north/south first was easier for supporting the pipes!  BTW, see the spring clamp attached to the ladder there?  It was a very good "third hand".
And a secret.  The PVC pipe is too flexible for a good solid structure.  Metal is better.  But I couldn't find the kind of connectors I needed that fit the metal conduit pipe (unlike a site I found about building such a structure said I could).  So to get the rigidity of metal conduit pipe AND the connections that fit PVC Pipe, I put metal conduit pipe into each PVC pipe! 
THAT solution took a few days thought last Winter...  And metal conduit pipe is inexpensive, so that was not a concern.

I have most of the uprights and half the crossbeams in place.  Took two days but it will be worth it.

Why am I doing this?  Well, the squirrels and groundhogs developed a taste for my garden seedlings a few years ago and basically ruined my garden 3 years in a row.  When I cover this frame with chicken wire, they won't be able to get in.  And I will place bent chicken wire at the bottom to stick out 2' to prevent any tunneling.   Bwa-Ha-Ha!

I will have a garden yet...

Friday, April 17, 2015

A Daffodil Tour

Well, I decided that for once I would just get the small camera tripod, set the camera on "macro" and take a picture of all the different daffodils in the back yard.  I know that most people would choose a couple and plant lots of those.

But I wasn't sure which I preferred and I figured some would thrive and spread and some would just not.  Apparently not.  Most just stay politely where they are and keep going.  So maybe I should just add more of the various kinds to make larger patches.

But let me show you the various ones.  I don't know their names, though I'm sure I could identify most in a catalog...  Ad there are a few surviving hyacinths that the voles have not yet found and a wild columbine too.


The better of the remaining Hyacinths.  The flowers generally get smaller every year here, but some seem to do well.

These were an accidental overplanting of a previous different one.  Apparently, I had a very firm opinion that there should be daffodils THERE more than one time!  LOL...

Another Hyacinth.  Originally I had 50 each of red, yellow, blue, and purple.  But there aren't many left.


 Another Hyacinth...  There WERE a dozen here, just a few years ago.


Among the 100 yellow Daffodils I planted in this spot, one white was mixed in.  I keep thinking I should pull it out, but somehow I never can get myself to do it.  There is a certain orneryness that I like about that misfit...
The wild Columbine...
Another Hyacinth...  All alone now.
The nice thing about having all these different Daffodils is that everytime I think I have a favorite one, I turn around and "oops look at THAT one".  LOL!

BTW, a co-worker friend and I tried once to figure out the differences between daffodils, narcissus, and jonquils.  Don't try.  Even the experts disagree.  So in the same way my cats call all small rodents "mousies", I call all these "daffodils". 

Like I suppose the dinosaurs called all mammals "things I can step on".  "Or "snacks".  ;)

Adventures In Driving

 Last month, my cable box partially died, so they sent a replacement.  But they wanted the old one back anyway.  The store in town only hand...