It progresses. I discovered some real problems as I went recently. I want the top of the enclosure to be level. But the ground slopes front to back and right to left. That makes digging the holes for the frame real tricky.
I tried to measure the slope of the ground first. That got me a general idea that is dropped 1.5' in both directions, but it wasn't very exact. I suppose I could have lived with that, but my Dad was always one to point out minor flaws in anything I ever built (no matter how well built), so I have a reaction to that even though he is gone now. Old habits die hard. And there IS a point to seeking perfection in any project, Dad criticisms or not. A few extra days work means years of admiring work well done.
So I wanted to make sure that, even though the ground was sloped, the top of the frame should be level. If I had surveyor's equipment, that would have been easy. But I don't. So I thought about it a few days. With some complicated ways that seemed really awkward in reality.
As I was trying to get to sleep the previous night (and I did the construction yesterday, so that was 2 nights ago), I kept turning the problem over in my mind. It finally struck me... A water level! I would build the enclosure from the top down!!!
For those of you not familiar with the idea, water in a bucket with a long tube attached will stay at the same level as the bucket even when you move the tube around. It's not a new invention, but it was a new thought to me. I found a nice (free I hope) picture to describe it...
Well, saved me the effort of drawing and scanning it myself. And I wasn't cutting off the tops of the PVC pipes, I just dug my holes a bit deeper to make them match at the top. I marked each PVC pipe 8" down from the top and made the water level match it THERE. So the tops of all my PVC frame uprights are level.
The garden enclosure is 20' by 20' with the raised framed beds I built, that gives me 2' between each bed and 2' around the outside of them (inside the enclosure). I hope that makes sense. When I post this in a few weeks as an instructional post, I'll add diagrams.
But the point is that it finally solved my difficulties with the sloped ground. Some pictures of the general steps...
The holes dug. The digging was horrible. The basic soil in the back yard is gravel, clay, and more gravel. A post hole digger wasn't sufficient. I had to use a breaker bar. That's a 5' solid iron rod about 1.5" in diameter, with a chisel point at the bottom. It weighes 12-15 pounds. You lift it, you pound it down, you swivel it about. Its the "breaker bar 2-step dance". LOL! THEN you use the post hole digger to scoop the loosen debris out. It's great (but unwanted) exercise. Good for causing hand blisters too.
This is the lowest end of the yard. The higher end holes got to 2.5' deep
Here are the PVC pipes sitting in the holes at one end. They may not look all in a row, but they are.
As each one was individually set at the proper depth so that the top was level, I shoveled dirt back in and stomped it down hard. There is still some "wiggle" room to allow for attaching more pipes at the tops.
Here is a corner, showing the connections. It's not easy, being just me to be at both ends of the pipes, but I set up ladders to hold one end of each pipe while I set the other end in tightly. I'm used to having to construct "helper" supports on projects. A 6" spring clamp atached to a ladder makes a nice "V" shape to hold the far end of a pipe temporarily...
I initially thought it would be easiest to start at one corner and work my way around the perimeter, but it wasn't. Doing all the north/south first was easier for supporting the pipes! BTW, see the spring clamp attached to the ladder there? It was a very good "third hand".
And a secret. The PVC pipe is too flexible for a good solid structure. Metal is better. But I couldn't find the kind of connectors I needed that fit the metal conduit pipe (unlike a site I found about building such a structure said I could). So to get the rigidity of metal conduit pipe AND the connections that fit PVC Pipe, I put metal conduit pipe into each PVC pipe!
THAT solution took a few days thought last Winter... And metal conduit pipe is inexpensive, so that was not a concern.
I have most of the uprights and half the crossbeams in place. Took two days but it will be worth it.
Why am I doing this? Well, the squirrels and groundhogs developed a taste for my garden seedlings a few years ago and basically ruined my garden 3 years in a row. When I cover this frame with chicken wire, they won't be able to get in. And I will place bent chicken wire at the bottom to stick out 2' to prevent any tunneling. Bwa-Ha-Ha!
I will have a garden yet...
Sunday, April 19, 2015
Friday, April 17, 2015
A Daffodil Tour
Well, I decided that for once I would just get the small camera tripod, set the camera on "macro" and take a picture of all the different daffodils in the back yard. I know that most people would choose a couple and plant lots of those.
But I wasn't sure which I preferred and I figured some would thrive and spread and some would just not. Apparently not. Most just stay politely where they are and keep going. So maybe I should just add more of the various kinds to make larger patches.
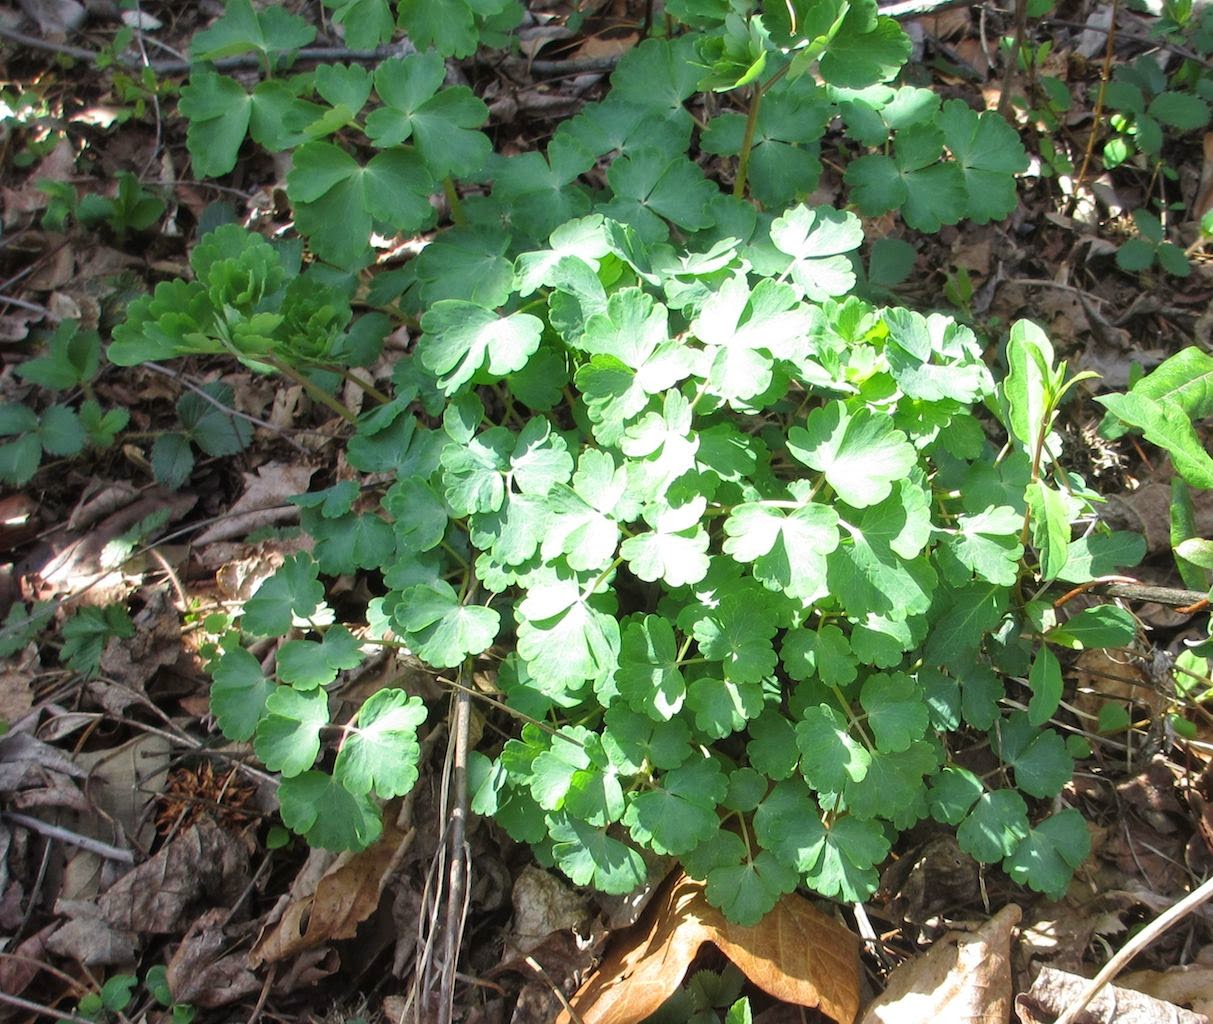
But let me show you the various ones. I don't know their names, though I'm sure I could identify most in a catalog... Ad there are a few surviving hyacinths that the voles have not yet found and a wild columbine too.
The better of the remaining Hyacinths. The flowers generally get smaller every year here, but some seem to do well.
These were an accidental overplanting of a previous different one. Apparently, I had a very firm opinion that there should be daffodils THERE more than one time! LOL...
Another Hyacinth. Originally I had 50 each of red, yellow, blue, and purple. But there aren't many left.
Another Hyacinth... There WERE a dozen here, just a few years ago.
Among the 100 yellow Daffodils I planted in this spot, one white was mixed in. I keep thinking I should pull it out, but somehow I never can get myself to do it. There is a certain orneryness that I like about that misfit...
The wild Columbine...
Another Hyacinth... All alone now.
The nice thing about having all these different Daffodils is that everytime I think I have a favorite one, I turn around and "oops look at THAT one". LOL!
BTW, a co-worker friend and I tried once to figure out the differences between daffodils, narcissus, and jonquils. Don't try. Even the experts disagree. So in the same way my cats call all small rodents "mousies", I call all these "daffodils".
Like I suppose the dinosaurs called all mammals "things I can step on". "Or "snacks". ;)
Thursday, April 16, 2015
Garden Enclosure
Is starting to get built, FINALLY! I have to dig 9 holes 2' deep. And there's a reason I don't just grow my garden on the soil. Its AWFUL!!!
I could have sold the soil to a gravel company. Its rocks and clay a foot deep and after that its sand. The sand is OK to dig through; the rocks and clay is the hard part. It takes a breaker bar.
I can't even find a picture of what I have to show. But imagine a 5' iron bar about 1.5" around with a chisel point. You lift it and pound it down into the hole and you loosen the rocks and soil. Then you use a post-hole-digger to grab the loosened soil and pull it out.
≈
The breaker bar weighes about 20 pounds. And you have to pound it down about 30 times per hole. Good exercise... But it DOES loosen rocks and hard soil.
I dug 6 of the required 9 holes today. I stopped when I sensed a blister coming... But tomorrow needs only 3 more holes.
The holes are to support PVC pipes that will form a grid to support 1" chicken wire to keep out the varmints. A lot of work, yeah. But when the squirrels and groundhogs are unstoppable otherwise and you want a garden, you do what you have to do.
And I'll certainly show the garden enclosure pictures as it is built!
But the main thing is that I did the really hard holes today. I think the best way to do any project is to do the hardest part first. It only gets easier after that. Besides, if the hard part is TOO hard and you have to give up, then you haven't wasted time on the easier parts that will be of no use.
The garden enclosure is surrounding 6 raised framed beds filled with 1/2 topsoil and 1/2 leaf compost. It's going to be a great new garden, replacing the poorer ones I built 25 years ago which finally rotted out.
The new ones are larger and deeper. And level!
The enclosure will be 20' by 20' by 8' high. I still have to figure out how to attach a walk-in screen door..
Saturday, April 11, 2015
The New Garden Beds
Pictures at the end...
They are finally all built and filled! I started last Fall to tear out the old 25 year old ones (and which were not my best work (being unlevel and too shallow). I bought wood to construct more and larger and taller ones. I got 5 of 6 finished before the ground froze and it was too cold to work outside.
So the first thing was to build the 6th bed, then move all the remaining good soil from the old ones. That took some time. The ground stayed frozen well after the air warmed up in March. Then I had to wait for the yard to dry enough to bring in more topsoil and compost.
I waited because there were 2 ways to do that. First (because the lawn was soft from thawing) was I could get the soil and compost from a landscape supply place in the hauling trailer, park it in the front yard at the street, bring the lawn mower with the yard trailer (3x4 feet) to the hauling trailer, shovel it full from the hauling trailer, drive it around back to the garden, and unshovel it into the beds. I've done that before and its a lot of shoveling!
Second, I could wait for the lawn to dry enough to drive the hauling trailer straight back to the garden and unshovel the load once (and right next to it). That's an iffy trick of getting between Spring rains and not wanting to wait too long to get it done.
Now, the new beds had some decent soil from the old beds, and I wanted to mix compost (a lovely black and crumbly local leaf compost called "Leaf-Gro") into the existing soil. I did that 2 weeks ago. That got most of the beds half-filled. But the last bed had little good soil and the rest had settled about 4" down.
I went back to the landscaping supply yard expecting to have to get more topsoil on one trip and then more compost on a second. But Wonder of Wonders, they had something NEW. A thoroughly mixed 50-50 blend on the Leaf-Gro and topsoil.
I examined each of the 3 carefully, crumbling handfuls, smelling it, and looking at the color. Their pure topsoil is very good stuff, the Leaf-Gro is very good stuff, and the 50-50 mix seemed to really be 50-50. To explain how I knew, I found clods in the 50-50 mix and crushed them. Half were topsoil and half were Leaf-Gro. And the color of the really sifted parts (99% of the mix) was right between them in color.
Sure beats mixing the individual parts together with a spading fork one forkful at a time over 160 square feet of beds!
I got two front-loader buckets of the mix (about 2 cubic yards or a bit over 1.5 cubic meters) according to the landscape place. I think they underestimate the front-loader; I think I got 2 cubic meters (from measuring the volume in the trailer.
But having the trailer right at the garden SURE made things easier. Sure, shoveling is tedious. But straight off the back of the trailer into a wheelbarrow once and dumping it only 10' away into the beds was shoveling it once rather than twice. And I had EXACTLY enough to fill ALL the beds to the top (the soil will settle a bit).
Pictures...
Half-done last Fall. There is JUST enough space between the beds for my wheelbarrow.
More done last Fall. BTW, you can see how I attached the lower and upper frames. The dark wood on the inside is a 1"x6" pressure-treated board that attaches the 2 together. There is one on each long side of each bed.
All built by this Spring.
The tarp-covered trailer of 50-50 topsoil and compost mix. Oops, didn't get a picture with the tarp off... But you can see it was nearly filled. 5'x8' trailer filled 1.5 feet high = 60 cubic feet = 2+ cubic yards).
Filled all the beds to top (it will settle a bit). The beds are 4' wide, 3' and 4'. With 2' between them and allowing 2' on the outsides, it is a perfect 20' square for the framed chicken wire and pipe enclosure!
Did all the emptying/shoveling in 2 hours! And had to slather muscle-rub on my hands when I went to make dinner later when the muscle cramps started. OUCH! Its been a long un-excerising Winter... But I recover fast. Oh, and just how did I scrape the trailer so clean, you ask? Two words. Snow Shovel!
And I have 2 trash barrels full of leftover pure Leaf-Gro compost to use on the flowerbeds!
Now I just have to build the PVC pipe and chicken wire enclosure to protect the magnificent new garden from the Evil Squirrels, Evil Rabbits, and Evil Goundhogs.
Well, what is life without the next project? LOL! And I have plenty of them on my list...
Wednesday, April 8, 2015
Renovating The Flowerbed
They HAD to go! Two Eunonymous shrubs I've had for 20 years... I liked them, but what was "supposed" to be "5 feet high and 3 feet wide" was 8 feet high and 6 feet wide. And started to get invasively sending up shoots all around the flowerbed.
The remaining parts will get chainsawed soon and the shoots dug out.
They were evergreen and variegated, which was nice, but there comes a time when too much is just too much. They will be replaced with Butterfly Bushes and Nandina. And space for annual Sunflowers.
They will add to my compost pile. But it does give a chance to redo the fence background.
I have several in other spots. They are "polite" neighbors there either. They will go soon too. But on the chance that I will find a good spot for cuttings, they will stay for now. I'm thinking they would be a VERY good privacy border along the drainage easement in the front yard. And since they are nearly impossible to kill (but don't spread much unless pruned), they may find that a wonderful permanent spot.
Everything has a place, even if not where originally placed.
Tuesday, April 7, 2015
Taxes
Oh man, do I LOVE tax software! Been using H&R Block a few years and I couldn't manage the damn forms without it. Seriously, I'm intelligent enough to discuss several science subjects, gardening fertilizers with professionals, and the history of Europe. But tax forms just baffle me.
I can't tell a dividend from a capitalization or where a foreign stock byback goes. Even donations can get tricky. But the H&R software knows. I love just "filling in the blanks" to the questions. I don't know where that information is supposed to go! But they do...
Took 10 minutes to download the software, 2 hours to answer the questions, and when I hit PRINT, out came all the nice pages, ready for mailing (and backups for saving)...
I reviewed it all of course. Even I can tell if some number is "generally" right or wrong. It all looks good.
The whole process from start to finish was 2 hours. Without the software, it would have been 2 DAYS!
Been Gone
But for reasons. Being on the computer makes me smoke, and I have been fighting that by restricting my computer time. The Mark's Mews blog is primary, so I manage to do that. Emails came second, and that has been difficult. I've had to write them in increments. This blog seems least important...
Not that I don't enjoy writing on it. Just that my non-smoking willpower gets worn out fast and by the time I get to THIS blog, I need a cig.
WELL... The computer crashed. Sort of. More accurately, an upgrade to Mac Yosemite (OSX 10.10.2) crashed my iPhoto. Don't know why, but some internet search showed a LOT of unhappy upgraders. I spent a couple of hours a day for a week trying to get at my photos with no success. Tried un-upgrading, and other stuff too. No luck.
Apple doesn't LIKE un-upgrading!!! It offends them that you don't like the new stuff.
I could have lived with the new "Yosemite" operating system if it allowed me access to the old photograghs, but there was an endless loop of "fixes" with no end. I finally had to do the serious thing.
Thank goodness for "Time Machine". It stores my previous versions of the hard drive. You would think that makes it easy to just copy back the previous old version. You would be right. And you would be wrong.
Its possible. But not easy, they say. I know because I read all kinds of internet searches about doing it (and some said it worked and some said it failed. I knew it COULD work, because I had done it once before. It took the help of a Verizon IT tech (2 years ago I think). Not his job, but he helped me. And I wrote down the steps on some scrap paper. A foot-high stack of which is always on the corner of my computer desk
I went through the stack and actually found the scrap!
It worked. Two hours for restoring the older OSX version, 30 minutes for "repairing" the iPhotos Library, 30 minutes for repairing my emails (and I had to endure 15 minutes of re-receiving 200 emails and deleting them as they were all duplicates).
But everything seems to be working last lat month again, and I am greatly relieved.
All that sitting around and watching the s-l-o-w progress made me get more cigs. Damn! Well, one night in 3 weeks isn't too bad.
I've been busy. But that's the next posts...
Thanks for visiting after 6 weeks of no posts...
Monday, February 23, 2015
Complaining
Have you ever felt you were cheated at a store? And didn’t know what to do about it? I did today, and I did something about it.
I shop at a particular grocery store. I normally don’t question the weights of the fresh fruits and veggies. I mean, how can I tell the difference between 2 pounds and 2.5 pounds of apples?
But I CAN tell that a small handful of snow peas ISN’T .85 pound! But that is what the register scale said. When I challenged that as “ridiculous”, the cashier re-weighed it as .5 pounds. THAT was still ridiculous, but several re-weighings got the same weight. So I paid and went home.
I have a good quality Salter digital kitchen scale. I checked the accuracy by carefully measuring a pint of water (minus the container weight) and it showed PRECISELY 16 ounces (to the nearest 1/8 ounce). So my digital scale was VERY accurate.
The .5 pound (8 ounces) of snow peas (according to the store receipt) actually weighed only 1 7/8 ounces according to my verified kitchen scale. That’s a bit of a difference.
So I weighed most of the other fresh produce. Same over-weight charge pattern! I was annoyed. But it would be my home scale against the store’s certified scales. Of course they wouldn’t admit any error, and if I brought stuff back to the store for a reweigh, how could I prove I hadn’t removed some of the produce?
Ah, but there was the scale in the store.
I called them. I told them I suspected they had an inaccurate #4 register scale. It took a while to get to the store manager... First was the customer service desk. They insisted the scales are accurate because they are checked every 2 weeks. Then I got to the cashier, who remembered me because of the snow pea reweigh.
When she couldn’t explain a way where the scale would be examined AND I would be advised about the result, I got to the store manager. HE took it seriously. I explained why I was sure my scale was accurate. He agreed to check the scale immediately and call me back in 10 minutes.
I assume he simply grabbed a large can and compared the weights on different register scales. I doubt he had a certified test weight on hand. I expected a callback saying that the scales are tested regularly and were accurate.
I was wrong (which means I was right). He reported that the #4 register scale had some produce debris in it that caused inaccurate readings. HE AGREED I WAS RIGHT! So I asked about getting an adjustment to my bill on the percentage of inaccuracy.
He immediately assured me that I should come back soon with the receipt and he would refund 100% of the cost of all my weighed produce. Wow, that was almost everything I bought.
I also asked “what about all the other customers who went through that register and were overcharged?” He said they had no way to identify those customers.
They do. I studied my receipt, and the register number is identified there. There is a data string in the receipt, and I’m good at figuring those things out. Date/time/store#/register/etc/etc.
AFTER I get my refund, I will point that out to him, and “suggest” he have the IT department arrange for similar refunds to those customers (via shopper club numbers). But if they don’t I’ll never know.
I did my part by checking something suspicious and questioning the store.
You know what ELSE I did? I decided to make a scale-tester for future use. I took my bowls of accumulated coins (who uses coins anymore?) and scooped out about a pound of pennies. I found the smallest lidded container that would hold them and even cut off enough duct tape to seal it. Then I weighed the container, tape and pennies on my verified accurate digital scale, taking out pennies until the container and all weighed PRECISELY 16 ounces.
I’ll bring that to the store from now on, first to show to the manager, and for verifying the register scales in the future.
It pays to be willing to check on things you doubt.
Monday, February 9, 2015
Pizza
OK, I have a bread machine. So that's basic to me.
Use bread machine to make dough. Let sit in covered oiled bowl overnight in the fridge.
Slice up peperoni stick, green pepper, mushrooms, and onion to taste. Set them all on a late an M/V them 1 full minute.
Preheat oven to 500F
Open can of crushed tomatoes and simmer til thick. Or use jarred spaghetti sauce.
When oven is at temp, sprinkle flour on clean flat surface and drop dough on it. Sprinkle a little flour on top. Mangle dough until it is "handleable". Flatten it by hand or rolling pin until it is thin. Turn the dough over several times in that process.
When you can pick up the dough, curl up the edges by hand, wipe some olive oil on the dough, and transfer it to a pizza paddle sprinkled well with cornmeal (for sliding later).
On the pizza paddle, spread tomato sauce, add toppings, and cheese if desired.
Slide pizza onto cooking surface (pizza stone, baking tray, whatever).
At 12 minutes, lift a corner of the crust to look for toasting marks. If none, leave for 3 minutes.
Use pizza paddle and something to keep the pizza from being pushed off the baking surface to lift it out of oven.
Set on LARGE cutting board to rest 3 minutes. Cheese needs to set, and crust rest.
Cut with biggest knife (those round pizza cutters never work).
Voila'!
Chicken Cordon Blue
You need:
Preheat oven to 350F. Make shallow cuts on chicken breast. Cover with plastic and pound heartily to about 1/4 inch. Rolling pin works too. Place layer of cheese, ham, cheese, ham on chicken breast. Sprinkle with garlic and onion powder. Add oregano.
Roll up chicken breast as well as possible (sometimes it ain't easy). Roll rolled up chicken in bread crumbs. Stab chicken with 2 metal skewers to hold it together (toothpicks burn). Set on baking tray, seam side down. Bake 15 minutes. Turn chicken roll over. Bake 15 minutes or until interior is 165F.
See? Not that tricky...
Next time, Pizza!
Sunday, February 8, 2015
An Interesting Week
I don't do well in the shortest darkest days of the year, but with the lengthening days, I have gotten more active. It's nice to start accomplishing things again.
1. I got The Salvation Army out here to pick up stuff I never used or no longer needed. Mainly, I had a dining room table and chairs that I bought at their local showcase store 8 years ago. It had some dings and scrapes, and I intended to completely refinish it as a Winter project. Realizing I would never get around to doing that, I wanted to give it back. I was also cleaning out closets and accumulated 8 boxes of miscellaneous household goods in good condition, a telescope (I have a newer better one now), an unopened flat screen wall mount (I decided to use a TV table instead), a nearly unused upright vacuum cleaner (I have wood floors now), etc.
It was all picked up last Wensday (I have decided to change the spelling; "Wednesday" is just medieval). The new open space in my basement workshop is appreciated.
2. I decided my cooking habits were in a rut. 20 years ago, I used to make pizzas from scratch. I relearned how. The first was bad. The 2nd and 3rd were very good. A pizza stone helps. So does a bread machine with a pizza dough setting. And leaving the dough sit overnight in a covered bowl helps. I made my own sauce from crushed canned tomatoes too. I do that for my spaghetti sauce anyway, just let it get a bit thicker. Sliced commercial pepperoni, hot italian sausage, green bell peppers, mushrooms, and onions.
And I made chicken cordon blue, my own breaded chicken nuggets, ground hamburger from top sirloin (I have a manual grinder), pancakes from scratch, and egg rolls.
My efforts to make decent hamburger buns continue to fail, though.
3. Rearranged and vacuumed the entire basement wall-to-wall and floor-to-ceiling. The guys who filled the walls with insulation last September left such a mess (even though they did a lot of cleaning). But I moved EVERYTHING and vacuumed. I vacuumed some spots that may have never been vacuumed in 28 years. When's the last time you pulled out the washer and dryer and cleaned behind there? LOL!
4. Reorganized all the stuff from the attic that I had to move down into the cats' room and stored them for returning to the attic when I replace the flooring up there. The cats are thrilled to have more space for toys, exploring, and scratchers.
5. Took almost everything out of the computer room, threw away lots of old stuff, and returned little. And there is more to get rid of. Why should I keep the boxes and disks from the apps from Windows 98?
6. Emptied out 3 closets and most of the stuff went to a new pile of stuff to go to charity. It is amazing how much unneeded "stuff" ends up on closet floors. "Out of sight, out of mind". For example, 30 years ago, I became the manager of an office softball team. I had bases, gloves and balls in a box. I'm keeping the ball and gloves, but the bases can go. One thing charities can't say is that I have boring stuff to give.
7. I had boxes of newspaper articles clipped out for "information". Computer articles, gardening articles, cooking articles. That stuff is all on the internet now. So those are going into the recycling bin.
8. One box was half full on fanfold perforated-edge computer paper! That goes back to the days of dot-matrix printers. But I'm not recycling THAT. I now have a lifetime supply of note-taking paper! Some old stuff is worth keeping.
9. The weather today was GREAT. It reached 67F! I went outside to do some gardening work. Mostly, I needed to dig level spots for the 6th of 6 framed garden beds. Unfortunately, the ground was still frozen 2' down, so I did some work, but not as much as I hoped. Still I did some work and the next warm day I can get another 2' deep. That will be enough to build that 6th bed before Spring arrives.
10. Haircut time! Ever 2 months. And I love the feel of heated shaving cream around my ears and neck when the barber does that razor cut!
11. Visited the bank. Got 6x higher interest rates on my savings with some creative transfers. 3% interest is better than .5%
I may have had a more productive week sometime, but I can't recall when exactly. LOL!
Subscribe to:
Posts (Atom)
Daffodils, Trash, And Old Electronics
I finally got about 3/4 of the daffodils planted. I have a front yard island bed surrounding the Saucer Magnolia tree and a 3' boulder ...