My back yard is semi-wild. I like it that way. I hate removing trees, though I have removed a lot of them over the years. When I moved here 29 years ago, the backyard was mostly filled with too many junk trees, too closely spaced for their own health. I thinned out the smaller junkiest ones (especially a type of locust tree with thorns like needles all around the trunk).
At the same time, I looked at the drainage easement along the property line. For those of you not familiar with a "drainage easement", it is an artificial rainfall control channel that leads to a natural body of water (in my case a swamp across the street). But the drainage easement wasn't the natural drainage. There is a 3' deep ravine that cuts across the neighbor's back yard and used to cut across the side of my front yard. The county-mandated artificial drainage easement that goes between our property lines cut my part off.
So I first just wanted to fill in my ravine, and I did so with a full dump trick load of average fill soil. I spread it all out myself. It was some bit of work, all with rake and shovel. But there were 2 fully mature oak trees right next to the new drainage easement, and I realized that the roots had been entirely sheared away on one side. I had them removed so they wouldn't fall over on the house. I left the 3rd oak tree standing because it was farther from the drainage easement and I wanted the shade on the roof (passive cooling was a big idea at the time).
Then I thinned out some that were just too shaded by larger trees to ever thrive. That still left a complete deep shade canopy across most of the back yard.
But even the larger trees were still "youngish", and didn't stop growing. 10 years later, I had about half of them professionally removed. Later, one of the larger trees leaned over enough to fall in a windstorm and the top half of another snapped off and a 3rd one was starting to lean, so they had to go.
But lately, I've become obsessed with the idea that the remaining massive oak
will fall on the house. The past 5 years, it has been dropping 6"
diameter branches and I doubt its health. It's only 20' from the house, and the prevailing winds would push it in that direction. Given the estimated weight of the tree is at least 3,000 lbs (6,600 kilos), it would pretty much crush the entire house (and likely myself as well). I can imagine the newspaper headlines. "Local man has tree fall on house, drowns in his own waterbed"...
I'm having it removed tomorrow along with a large sweetgum tree that has been leaning over slightly. I talked to my home insurance agent about it. He admitted that should the tree fall onto the house, I was 100% replacement-covered, but it could take months of reconstruction and I would probably need to move out during the reconstruction.
It seemed like a great property when I chose it 29 years ago. But having lots of mature trees near your house is over-rated.
It will be an adventure watching this oak removed. I wasn't at home to see it's 2 siblings removed ( I was supposed to, but they arrived a day early and when I got home from work that day, they were just GONE! The other trees I've had removed have been nowhere near as large as this one.
The tree guy says that the upper branches will be removed first by a combination of a crane and tree-climbers, and lowered by rope for eliminating collateral damage to other trees (and the house and deck). The massive trunk itself will be cut off (lowered) 8-10' at a time and will be carried off by some sort of "grabber" to a flatbed truck. I hope that's not "hype". I will be taking pictures all the way and will post them.
The good news is that they will be taking down the sweetgum tree first. It's small than the oak, and I will see how carefully they do that job. If they seem careless or find that tree difficult, I can tell them to stop before they start on the much larger oak tree. They have a "A" rating on Angie's List, but not a LOT of reviews. It's possible they got their "A" rating from smaller simpler jobs. I'm being careful.
There is some deconstruction work involved at getting at the massive oak tree, too. At the least, 2 sections of my 6' shadowbox wood fence have to be removed (the tree is just inside my fence), and it is possible a gate and a concrete-set fence post will have to be removed (they suspect not, but if so, their "grabber" can just pull the 6"x6" fence post right up out of the ground without even damaging it and it can be set back down into the hole afterwards as sturdy as before.
I actually believe that last part. I've set enough posts into the ground without concrete myself to know how well clay soil hardens around any bare post in plain clay. One with an 12" cylinder of concrete around it should settle in better. And it might be an improvement. That post leaned slightly after being installed 25 years ago and the connections to the fence sections are loose anyway.
For generally useful information for anyone considering this kind of work themselves, the quote is $5,500. As I understand it in very general terms, $500 is just for bringing all their equipment (a crane, a "grabber", and 2 flatbed trucks) and crew from 15 miles away to the worksite, $4000 is for the massive oak tree, and $1000 is for the sweetgum tree. The cost includes detailed cleaning of all debris, removal and replacement of fence, and grinding both stumps 2' below ground level. It seems worth it...
So anyway, tomorrow is going to be VERY interesting.
I will be watching them through the entire process of course. Partly for knowing what happened if there is some accident, partly just out of fascination for a process I can hardly imagine, and partly because it is a rare opportunity to take some really interesting pictures (for my scrapbook and for blogging - one never wants to miss a chance at great pictures to blog about, LOL!).
But one can't spend the entire day taking pictures and hoping no one falls out of the trees. So I have saved some yardwork for myself to do while the tree guys are doing their thing. It is all stuff I can do while keeping an eye of the tree-work while being safely out of the way. I have the garden to water, some trellises and screen door supports to install in the garden enclosure, and if that takes less time than I expect, part of the far backyard is getting overgrown with blackberries, thistles, and and I have a gas-powered weed-whacker with a steel blade I need to start using.
And after that is done, I have excavation work to be done in the backyard! The ridge in the middle of the backyard is going away and the sunken area of the front yard (that gets flooded every thunderstorm) will be raised 18"! That's to be scheduled after the trees are gone.
Showing posts with label Outdoors. Show all posts
Showing posts with label Outdoors. Show all posts
Sunday, August 9, 2015
Monday, July 13, 2015
The Garden Enclosure
Its not finished, but I did finally get the door set in properly today. It doesn't sound like That Big A Deal, but it drove me crazy to the point where I just stopped about it for several weeks (and did other useful stuff).
But I went back at it 2 days ago. It not elegant. The half-lap joints that fit so well on the basement floor didn't fit well out in the garden. I'm guessing that there were fitting options that options that "from basement floor to reality" were not right. Putting posts into holes in the ground is not quite like the frames sitting on a nice level basement floor.
But with enough support (uprights, cross, and sideways), I got the door to close smoothly and the lath to connect. I bet any professional would cringe at the work I've done. But as long as it latches closed, it doesn't really matter. All it has to do is stay solid.
And then its worth finishing the chicken wire. All I have left of that is wrapping some corners where the 4' rolls didn't quite reach. That involves some cutting and pacthing using leftovers, but I have enough of those.
It will be SO great to have this completed. Pictures when it is really completely done. But the "damn door" was 90% of the unfinished work, so I am about there.
Tuesday, June 9, 2015
The Garden Enclosure
I finally got the tightening on the chicken wire right. It wasn't easy. With new things, sometimes you gotta do it wrong a few times before you get it right. But I did. Now I have the tops as tight as is possible. The two other sides will be easy. The chicken wire there will just hang.
And because I have the top complete, it means I don't have to worry about dragging wire across the beds so I can finish planting corn and beans and cukes. A bit late for this year but I'll get some harvest. Next year will be the real start under the enclosure.
My tomatoes are doing very well. I have 8 heirloom tomato plants in cages, one hybrid Big Beef (for backup if diseases hit) and a cherry tomato for snacking. The bell peppers are growing well. And I have 2 whole beds now for Fall crops of Bok Choy, Leafy Celery, Radishes, Spinach, etc. I'll plant some garlic in a back row for harvest next Summer.
The screen door to the enclosure still needs adjustment, but it is closable enough to keep varmints out. The last remaining chicken wire is just going to be hung from the sides, and after all the exoerience of the top and other sides THAT will be a piece of cake. It is SO good to be nearly done with this project. I've had mostly better ones and this was about the worst.
Relining the pond will be simpler and I will be glad to get at that.
There is always SOMETHING.
I think that if I didn't have something to look forward to doing, I would just fold my cards and die.
But not today.
The hardest part of this projects has been the exteme physical work. Not general hard work, but the specific work my body isn't used to. Like pulling the chicken wire real tight by hand. It didn't seem all that bad at the time, but my hands cramped up seriously afterwards. I could barely prepare dinner later!
I m sure that if I did the same work daily, it would be just fine. But doing unusual things on an irregular basis is brutal. It was so, bad that I couldn't hold a kitchen knife. And since I was preparing a stir fry, there was a lot of knife-work. I had to take 2 ibuprofen and smear my left hand with a muscle relaxing cream. And even that took an hour to take effect.
Nothing like hand cramps to make preparing dinner hard...
Thursday, May 7, 2015
The Chicken Wire
So I finally got 8' wide (two 4' widths) of the chicken wire over the top of the garden enclosure frame... It looked like this...
Up the side, across the top, and down the other side is about 45'. Some there is some left over from the 50' roll.
 The black vinyl-coated wire looks good. It's not tight yet. That part will come later. For now, it is just attached enough so as to not sag onto the garden.
 It is temporarily affixed to the side PVC pipes with some overlap. And the final steps will be to thread 100s of feet of galvanized wire sewing the edges of the rolls of chicken wire together tightly. Otherwise the Evil Squirrels would wiggle in between.
 The chicken wire rolls hang a foot or so long to spread out on the ground. That will prevent groundhogs and rabbits from going up the the chicken wire wall and digging in underneath. If they manage that, I will just put down heavier mesh wire at ground level.
 But I don't think that will be necessary. When critters decide on a place to dig at an edge, it seldom occurs to them to back off 2 feet and try again.
After I have all the tops of the enclosure covered and tightened (and I have the frame supported in all directions by unstretchable nylon ropes until the wire is all installed - at which point the wire attached to the pipes will strngthen the structure sufficiently).
The next part will be to construct the door. I think I have arranged that rather well. I've built a 2x4" frame around the door that fits the hinge side and the door lock side and the top. I will set 4x4" posts around where the door will attach. And because the 2x4" door frame allows several inches of attachment "wiggle room", it should fit perfectly.
Not to say attaching the screen door will be simple. Its heavy with the 2x4" boards surrounding it, and there will be some shimming required to make the door frame fit to the 4x4" posts so the door is level and swings easily not hitting the ground. But I have some ideas on that too.
So many of the ideas for this project have come to me as I was trying to fall asleep. I should try sleeping more often, LOL!
Next time: The door installation...
Up the side, across the top, and down the other side is about 45'. Some there is some left over from the 50' roll.
After I have all the tops of the enclosure covered and tightened (and I have the frame supported in all directions by unstretchable nylon ropes until the wire is all installed - at which point the wire attached to the pipes will strngthen the structure sufficiently).
The next part will be to construct the door. I think I have arranged that rather well. I've built a 2x4" frame around the door that fits the hinge side and the door lock side and the top. I will set 4x4" posts around where the door will attach. And because the 2x4" door frame allows several inches of attachment "wiggle room", it should fit perfectly.
Not to say attaching the screen door will be simple. Its heavy with the 2x4" boards surrounding it, and there will be some shimming required to make the door frame fit to the 4x4" posts so the door is level and swings easily not hitting the ground. But I have some ideas on that too.
So many of the ideas for this project have come to me as I was trying to fall asleep. I should try sleeping more often, LOL!
Next time: The door installation...
Tuesday, May 5, 2015
And Yet More Garden Enclosure
OK, I've been making progress on the enclosure. I built the frame around the screen door. I wanted to make tenon joints because that means twice the glue surface. But the the tenoning gadget has to have the boards straight up from the table saw, and there isn't 8' above the table saw to the ceiling. So I went with half-lap joints. With glue/screws/corner braces, that ought to last as long as the preservative-treated wood itself. Which is about 25 years. And in 25 years, I'll be 90 and probably won't care.
So I did the half-lap joints...


 Don't worry, the joints fit better than it looks. The pictures were taken before the glue/screw.
So the idea was to have 2x4 boards attached to the door, and then attach the 2x4s to 4x4" posts set in the ground. A couple days work, and the exact placement depended slightly on matching the chicken wire.
But I was getting anxious to plant my tomatos. I couldn't do it before I had the chicken wire overhanging the garden frame. The chicken wire was going to drag along the raised beds as I installed it and that would rip up any tomato seedlings. What to do, what to do?
 And building the door itself would take days. So I was looking at a delay of planting the tomatoes (and some other stuff) almost 3 weeks after the proper planting time after all this work was done.
Ah blessed non-sleep! I sometimes do my best thinking lying in bed trying to go to sleep. And yesterday was no exception. As I lay there, turning over the problem in my mind, a solution struck me. I could lay the chicken wire over the frames of the closest 2 beds without doing the final tight attachment work! As long as it was generally up on the frames, I was home free to plant in the 2 left beds...
Hurray!
I did that today. The chicken wire is hard stuff to handle. It comes wrapped tightly coiled.
 The coil has a memory. It has to be unwound, turned over, and rewound the opposite way for an hour or so before it lays flat. THAT is an adventure in itself! I start by unrolling a foot and putting a cinder block on it to hold it in place. Then unroll the 50" length. It gets harder to unroll toward the end, being tighter and smaller roll.
At the end, you are fighting tight wire in a 2" roll. But placing a board on the unrolled part prevents rerolling. And the last foot is straightened by hand.
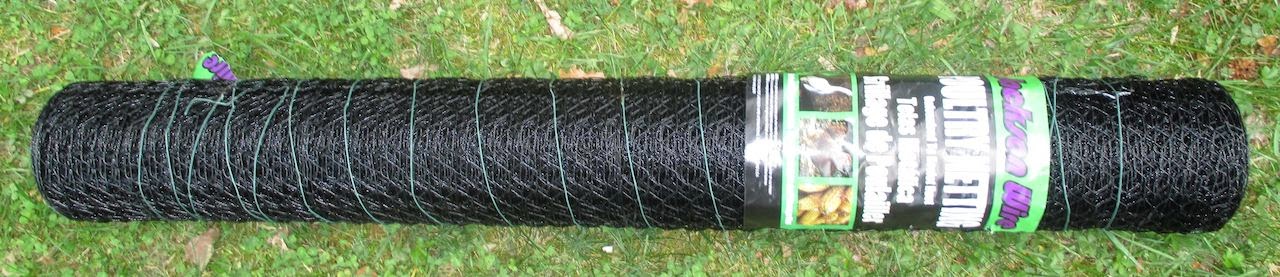
Chicken wire usually has sharp wire edges. Fortunately, this stuff I bought (Jackson Wire, and it is a personal unpaid recommendation)
 is black vinyl-coated galvanized wire with (mostly) no sharp edges! It is unusually easy-to-handle chicken wire!
So I spread the first roll out the 50' length in the direction it wanted to roll up. Then I turned it over and re-rolled it up the opposite way.
 After an hour, the wire memory was neutral! It laid FLAT!
I was able to drag the 4' wide 50' length over the top of the frame. Not easily. I had to do it 10' at a time. It worked. Not like sliding a tablecloth over a table, but sure well enough.
So I did that that and with the wire overhanging, was able to plant tomato seedlings safely just as the rain started at 6pm. And into the house I went to make myself a fine steak dinner with asparagus in cheese sauce, a tossed salad, and home-fried potatoes...
Next time: The draping-the-chicken-wire-over-the-PVC frame-process...
So I did the half-lap joints...
So the idea was to have 2x4 boards attached to the door, and then attach the 2x4s to 4x4" posts set in the ground. A couple days work, and the exact placement depended slightly on matching the chicken wire.
But I was getting anxious to plant my tomatos. I couldn't do it before I had the chicken wire overhanging the garden frame. The chicken wire was going to drag along the raised beds as I installed it and that would rip up any tomato seedlings. What to do, what to do?
Ah blessed non-sleep! I sometimes do my best thinking lying in bed trying to go to sleep. And yesterday was no exception. As I lay there, turning over the problem in my mind, a solution struck me. I could lay the chicken wire over the frames of the closest 2 beds without doing the final tight attachment work! As long as it was generally up on the frames, I was home free to plant in the 2 left beds...
Hurray!
I did that today. The chicken wire is hard stuff to handle. It comes wrapped tightly coiled.
At the end, you are fighting tight wire in a 2" roll. But placing a board on the unrolled part prevents rerolling. And the last foot is straightened by hand.
Chicken wire usually has sharp wire edges. Fortunately, this stuff I bought (Jackson Wire, and it is a personal unpaid recommendation)
So I spread the first roll out the 50' length in the direction it wanted to roll up. Then I turned it over and re-rolled it up the opposite way.
I was able to drag the 4' wide 50' length over the top of the frame. Not easily. I had to do it 10' at a time. It worked. Not like sliding a tablecloth over a table, but sure well enough.
So I did that that and with the wire overhanging, was able to plant tomato seedlings safely just as the rain started at 6pm. And into the house I went to make myself a fine steak dinner with asparagus in cheese sauce, a tossed salad, and home-fried potatoes...
Next time: The draping-the-chicken-wire-over-the-PVC frame-process...
Friday, October 31, 2014
Garden Enclosure Again
Got back to work on the framed beds. Bought twelve 2"x8"x8' pressure-treated boards yesterday morning and cut up half of them in the afternoon. Half because I bought boards for 2 beds and decided to do them one at a time.
First, I discovered why the first set of boards I bought a few weeks ago for the first 2 beds were hard to get squared in construction. I had the store staff cut them on their huge fancy saw. Silly me! I assumed the boards were the lengths the labels said (like 8' long). The length didnt matter for the long sides of the beds, but it did for the widths because I simply said "ct them in half".
"Half" isn't a measurement...
Only after constructing the first 2 beds did I realize that all the boards were not equal. Not exactly a functional disaster for a garden bed, but it vaguely offended me. I should have been forewarned by the very surly male store person who was talking to the female cashiers when I made him do some work.
So this time I simply took all the boards home to cut myself. It was a revelation! The boards varied in length from barely 8' to 8' 1"!!! End the ends were NOT square by as much as 1/4" over the widt. No WONDER I had had so much trouble getting the first set to match up square!
I have a radial saw to cut long boards to length easily. I have a good table saw too, but you can't slide an 8' board on it. Radial saws work best for that. So first, I measured a board and found it was long and not square at the end.

I have it next to an 8' workbench at the same level height, so I can handle 10' long boards. The radial saw is great for long boards because the saw moves, not the long boards. I bought it when I built the fence because I had to cut about 1500 long boards (yes 1500) for that project. It paid for itself just for that and I've probably cut almost as many more since then.
But back to the odd lengths and unsquareness of the boards... I first shaved 1/4" off one end of each, then stacked them to the side. When all were done, I clamped down a board at 8' from the saw blade (as a positive "stop"" and cut them to exact length. Perfect length and all square ends!
Two of the 8' boards were WAY heavier than the others (I could barely lift them), so I kept them aside to cut into the smaller widths for the bed ends of 3'. Like the longer boards, I shaved off the ends to get them squared.
Nothing ever works out as planned. I set up another positive stop (meaning a clamped board away from the saw blade an exact repeatable distance). And clamped the board against the saw fence so that there could be NO errors.
There was an error on the very first one. I screamed in frustration!!! How could it have been wrong? Oops, the edges of preservative treated lumber are not "perfectly" straight along the long edges. I had chosen the straightest ones I could find, but flat straight ones vary along their length. So, as I kept adjusting the clamping to get them as straight as possible, the board slipped away 1/4 inch from the positive stop...
You can't win sometimes! So this bed isn't 8' long; it is 7' 11 and 3/4" long. *sigh* It why I don't try to build furniture. I'm cursed with minor errors. OK, in the garden framed beds, it doesn't really matter much. But it still ticks me off!
So, this early afternoon, I went out to construct the 3rd bed. I have the digging routine down pat. The yard is sloped, so I have to dig a trench for each bed to make it level. I set the lower end of the long boards on a brick and raise it until it is level. Then I dig down the upper end by that much. It works. Then I level the end board and clamp the long boards to it.
Making the end board fit even with the long boards, I drive in three 3" screws on each side, then raise the other narrow end up onto a board to keep them even. Drive three 3" screws into each side there. Then remove the support boards and settle the completed frame into the shallow trench.
If it isn't level, I lift the frame and push dirt under it until it is level. Not usually required, but I did have to once. Then I make sure the frame is really square. You do that by measuring both opposite corners. When I tap them a bit so the opposite dimensions are the same, I know it is really square.
It started to rain slightly after I got the first layer of frame for the 3rd frame in place this afternoon, so I had to stop and put all the tools away. But at least that was done. Putting the 2nd layer of boards on the top of the 1st level is always easy. You just match the tops to the bottoms.

I cut a scrap board into two 2' pieces to space the beds apart for walkable/wheelbarrowable paths. The upper left is the bottom of newer box...
But the rain stopped. I didn't want to haul all the tools out of the shed in case the rain started again, but I did have time to haul all the boards for the 4th bed out of the trailer and into the garage. At least I know how to do the cutting better than the first time, LOL!
That will be tomorrow's start.
First, I discovered why the first set of boards I bought a few weeks ago for the first 2 beds were hard to get squared in construction. I had the store staff cut them on their huge fancy saw. Silly me! I assumed the boards were the lengths the labels said (like 8' long). The length didnt matter for the long sides of the beds, but it did for the widths because I simply said "ct them in half".
"Half" isn't a measurement...
Only after constructing the first 2 beds did I realize that all the boards were not equal. Not exactly a functional disaster for a garden bed, but it vaguely offended me. I should have been forewarned by the very surly male store person who was talking to the female cashiers when I made him do some work.
So this time I simply took all the boards home to cut myself. It was a revelation! The boards varied in length from barely 8' to 8' 1"!!! End the ends were NOT square by as much as 1/4" over the widt. No WONDER I had had so much trouble getting the first set to match up square!
I have a radial saw to cut long boards to length easily. I have a good table saw too, but you can't slide an 8' board on it. Radial saws work best for that. So first, I measured a board and found it was long and not square at the end.
I have it next to an 8' workbench at the same level height, so I can handle 10' long boards. The radial saw is great for long boards because the saw moves, not the long boards. I bought it when I built the fence because I had to cut about 1500 long boards (yes 1500) for that project. It paid for itself just for that and I've probably cut almost as many more since then.
But back to the odd lengths and unsquareness of the boards... I first shaved 1/4" off one end of each, then stacked them to the side. When all were done, I clamped down a board at 8' from the saw blade (as a positive "stop"" and cut them to exact length. Perfect length and all square ends!
Two of the 8' boards were WAY heavier than the others (I could barely lift them), so I kept them aside to cut into the smaller widths for the bed ends of 3'. Like the longer boards, I shaved off the ends to get them squared.
Nothing ever works out as planned. I set up another positive stop (meaning a clamped board away from the saw blade an exact repeatable distance). And clamped the board against the saw fence so that there could be NO errors.
There was an error on the very first one. I screamed in frustration!!! How could it have been wrong? Oops, the edges of preservative treated lumber are not "perfectly" straight along the long edges. I had chosen the straightest ones I could find, but flat straight ones vary along their length. So, as I kept adjusting the clamping to get them as straight as possible, the board slipped away 1/4 inch from the positive stop...
You can't win sometimes! So this bed isn't 8' long; it is 7' 11 and 3/4" long. *sigh* It why I don't try to build furniture. I'm cursed with minor errors. OK, in the garden framed beds, it doesn't really matter much. But it still ticks me off!
So, this early afternoon, I went out to construct the 3rd bed. I have the digging routine down pat. The yard is sloped, so I have to dig a trench for each bed to make it level. I set the lower end of the long boards on a brick and raise it until it is level. Then I dig down the upper end by that much. It works. Then I level the end board and clamp the long boards to it.
Making the end board fit even with the long boards, I drive in three 3" screws on each side, then raise the other narrow end up onto a board to keep them even. Drive three 3" screws into each side there. Then remove the support boards and settle the completed frame into the shallow trench.
If it isn't level, I lift the frame and push dirt under it until it is level. Not usually required, but I did have to once. Then I make sure the frame is really square. You do that by measuring both opposite corners. When I tap them a bit so the opposite dimensions are the same, I know it is really square.
It started to rain slightly after I got the first layer of frame for the 3rd frame in place this afternoon, so I had to stop and put all the tools away. But at least that was done. Putting the 2nd layer of boards on the top of the 1st level is always easy. You just match the tops to the bottoms.
I cut a scrap board into two 2' pieces to space the beds apart for walkable/wheelbarrowable paths. The upper left is the bottom of newer box...
But the rain stopped. I didn't want to haul all the tools out of the shed in case the rain started again, but I did have time to haul all the boards for the 4th bed out of the trailer and into the garage. At least I know how to do the cutting better than the first time, LOL!
That will be tomorrow's start.
Thursday, July 24, 2014
Next Project
I haven't forgotten about the chicken wire garden enclosure, but I'm trying to find a rentable trencher machine to do the hard work. Now rush now; its late in the garden season, so anything I built will be for next year. And I've adjusted so that I have some veggies growing in the flowerbed areas usually reserved for flowers.
I'm calling it a semi-lost season. I do have some nice tomatoes growing.

 And I dug out an old flowerbed where nothing much was growing to plant cukes and flat italian beans. I've stuck 4 bell peppers around too. I'll get by this year.
But since I have to wait a week for the quote of the house air leakage job, I'm on to a new project that I can do fast.
The sunken patio has walls (duh, "sunken") but the lawn slopes sideways to it. And the new deck posts are 3' beyond the patio walls. Looks like a great place to plant shade-loving plants if I frame it so that it is leveled.
That's one reason I took pieces of "junk" deck wood aside. There are 3' pieces of 2"x12" boards which can frame the lowest end and 2"x6" boards that will work the long ways. Don't worry about the details, just accept it means I can box a sloped area with free leftovers.
And since the deer have discovered my front yard hostas (after almost 10 years) and eaten all the leaves, it is time to change them out for deer-resistant plants (and I have a perfect one - more below). So where do the front yard hostas go? Well, in the new framed area I am making, shaded by the deck of course! Every problem has an elegant solution waiting to be discovered.
The front yard box will become Snow On The Mountain (a variegated 12" tall foliage groundcover that loves shade) and daffodils (neither of which deer eat). The hostas will be moved to the back yard which has a 6' fence the local deer have never jumped over.
Pictures later as I assemble the framed bed and move the hostas.
Always try to do something useful every day...
I'm calling it a semi-lost season. I do have some nice tomatoes growing.
But since I have to wait a week for the quote of the house air leakage job, I'm on to a new project that I can do fast.
The sunken patio has walls (duh, "sunken") but the lawn slopes sideways to it. And the new deck posts are 3' beyond the patio walls. Looks like a great place to plant shade-loving plants if I frame it so that it is leveled.
That's one reason I took pieces of "junk" deck wood aside. There are 3' pieces of 2"x12" boards which can frame the lowest end and 2"x6" boards that will work the long ways. Don't worry about the details, just accept it means I can box a sloped area with free leftovers.
And since the deer have discovered my front yard hostas (after almost 10 years) and eaten all the leaves, it is time to change them out for deer-resistant plants (and I have a perfect one - more below). So where do the front yard hostas go? Well, in the new framed area I am making, shaded by the deck of course! Every problem has an elegant solution waiting to be discovered.
The front yard box will become Snow On The Mountain (a variegated 12" tall foliage groundcover that loves shade) and daffodils (neither of which deer eat). The hostas will be moved to the back yard which has a 6' fence the local deer have never jumped over.
Pictures later as I assemble the framed bed and move the hostas.
Always try to do something useful every day...
Tuesday, July 1, 2014
New Deck, Part 2
What a couple of days! Pictures at the end as a reward to those who read this whole chapter (or you can just skip down, LOL).
YESTERDAY:
First, the foreman of the team that will actually build the deck was to arrive between 7 and 8 am to mark the spots for the posts. I had barely gotten dressed (and all that routine morning stuff) when the doorbell rang promptly at 7. I was shocked, but pleased not to have to wait.
The first surprise was that he went to mark a spot on my patio. I stopped him to ask "why so close to the ledger board"? Ledger board is a support attached to the house to support joists. Turns out that ledger boards are no longer used so that decks are technically "free-standing". Why? So that if the house falls down while people are on the deck, they will be safe.
WHAT? Well, it's The County Code and you can't argue with it. That was my first big laugh of the day.
So he sprayed an orange paint X on one spot and measured 6' further and was about to paint another X when I stopped him again. "Thats directly in front on the sliding glass door. I won't be able to move anything in or out of the basement. Safety exit, too". So he called someone and told me it can be 8'. Just past the door. OK, but 2nd big laugh of the day.
Then he went to where the posts had to go in the lawn. I thought those were fine, so "no comment". If it seems like I watch contractors carefully, you're right! They do the damndest silly things sometimes. I learned a lot from when the house was built almost 28 years ago. I lived 60 miles away, so I visited every weekend to see how things were going. Afterwards, I wished I had set up a big tent in the backyard and just lived there for 6 months so I could check on things every evening. Utterly impractical of course, but I would have had a better house.
So then the guy tells me the hole digging team would be there "After Noon". Not "This Afternoon", "After Noon". They arrived at 3 pm. But they said it would only take 2 hours to "punch out" the holes. Fine. They had a gas-powered auger and some 5' breaker bars (aka crowbars) and a post hole digger, and the 2 guys looked like former football players. I figured there would be no problem.
The first 2 holes in the soil near the house went fine, about 30 minutes each. The holes have to be 2' square and 2' deep. The hole inspector (yes, the County must approve the holes for the main posts - "Code").
The 3 lawn holes farther from the house were a different matter. After the 4" of topsoil I'm built up over the years, they hit rock-hard clay and sand that their auger would not dig into. They were "upset" (If I could understand most of what they were saying, I probably would have learned some VERY interesting new phrases *Coff, Coff*).
They alternated between hand and power tools after that, completed 1 and 1/2 of the 3 farther holes by quitting time (5 pm on the dot). I pointed out that the hole inspector was scheduled to arrive between 9 and 10 am the next morning. I thought that was cutting it close...
But just before they left, they drew a 2' square around the 2 painted Xs on the cement patio. So I asked about that. "THAT" led to my third big laugh of the day. They have to cut holes in the cement to make holes just like in the lawn! "Why can't you just put the posts on the cement patio"? "CODE" again!
Apparently, they have a huge circular saw that cuts "right through" cement, but not to worry, the soil under the patio was certain to be looser and would "take no time". And they would be back at 7 am "plenty of time".
So it took them 2 hours to dig 1.5 of the 3 farther lawn holes. Then it should take them another 2 hours to dig the remaining 1.5 lawn holes. AND they had to cut through a cement patio, bust of the cement, remove it, and dig 2 more 2' deep holes in the dirt underneath in then "zero to 1 hours time" depending on when the inspector arrived.
I apologize for the length of this, but more will be happening tomorrow, so I need to get through "yesterday and today" now.
TODAY:
One digger arrived promptly a 7 am. One thing I will say is that these people ARE punctual! He went right to work struggling to auger, chop, and dig his way to the 2' depth required. With no better success than yesterday! The other guy arrived at 8 with a helper. And while one guy and the helper went at the lawn holes, the other guy went at the cement patio with the huge circular saw.
OK, progress...
The contractor himself showed up at 8:30 am to make sure the holes were finished pre-inspection. What a surprise he had! He watched them work and than looked at his watch. I casually mentioned that there was no chance of them finishing the holes before 11 am at best.
So the inspector arrived at 9:15. Failed them, of course. Rescheduled for tomorrow morning.
It took til Noon before they got all the holes "done". They just disappeared while I was in the house. I measured all the holes, and they were at 22", not 2" full feet. I hope they don't get failed again and need a 3rd inspection Thursday morning. The deck will take 2 days to build, and it hadn't occured to me that Friday is the Independence day holiday, they don't work on weekends and that would mean until Monday before the new deck is finished!
Now, for some pictures and comments:
One of the Big Red Xs.
 And on the cement patio. Little did I realize that meant cutting into the cement. I assumed at first it was just for post anchor bolts.
 The auger they used for drilling holes in the soil. Carefully cropped for my more sensitive readers. The guy on the right had his pants and underpants halfway his butt most of the time. There is a REASON that careless fat guys should wear suspenders!
 One of the lawn holes they dug.
 Cutting the square hole in the cement patio was dusty work. I offerred him a workshop dust mask, but he declined.
 Their assumption was that the cut cement would be easily broken up with a sledgehammer. RIIIGHT! They had to get a jackhammer. And that took them forever.
 They finally managed to complete all the post holes.
 All this, and the actual building of the deck is yet to start. This preparatory rough work is (finally I hope) OK. But the work I care about is the new construction. I bet I experience more "fun" while that goes on tomorrow and Thursday.
YESTERDAY:
First, the foreman of the team that will actually build the deck was to arrive between 7 and 8 am to mark the spots for the posts. I had barely gotten dressed (and all that routine morning stuff) when the doorbell rang promptly at 7. I was shocked, but pleased not to have to wait.
The first surprise was that he went to mark a spot on my patio. I stopped him to ask "why so close to the ledger board"? Ledger board is a support attached to the house to support joists. Turns out that ledger boards are no longer used so that decks are technically "free-standing". Why? So that if the house falls down while people are on the deck, they will be safe.
WHAT? Well, it's The County Code and you can't argue with it. That was my first big laugh of the day.
So he sprayed an orange paint X on one spot and measured 6' further and was about to paint another X when I stopped him again. "Thats directly in front on the sliding glass door. I won't be able to move anything in or out of the basement. Safety exit, too". So he called someone and told me it can be 8'. Just past the door. OK, but 2nd big laugh of the day.
Then he went to where the posts had to go in the lawn. I thought those were fine, so "no comment". If it seems like I watch contractors carefully, you're right! They do the damndest silly things sometimes. I learned a lot from when the house was built almost 28 years ago. I lived 60 miles away, so I visited every weekend to see how things were going. Afterwards, I wished I had set up a big tent in the backyard and just lived there for 6 months so I could check on things every evening. Utterly impractical of course, but I would have had a better house.
So then the guy tells me the hole digging team would be there "After Noon". Not "This Afternoon", "After Noon". They arrived at 3 pm. But they said it would only take 2 hours to "punch out" the holes. Fine. They had a gas-powered auger and some 5' breaker bars (aka crowbars) and a post hole digger, and the 2 guys looked like former football players. I figured there would be no problem.
The first 2 holes in the soil near the house went fine, about 30 minutes each. The holes have to be 2' square and 2' deep. The hole inspector (yes, the County must approve the holes for the main posts - "Code").
The 3 lawn holes farther from the house were a different matter. After the 4" of topsoil I'm built up over the years, they hit rock-hard clay and sand that their auger would not dig into. They were "upset" (If I could understand most of what they were saying, I probably would have learned some VERY interesting new phrases *Coff, Coff*).
They alternated between hand and power tools after that, completed 1 and 1/2 of the 3 farther holes by quitting time (5 pm on the dot). I pointed out that the hole inspector was scheduled to arrive between 9 and 10 am the next morning. I thought that was cutting it close...
But just before they left, they drew a 2' square around the 2 painted Xs on the cement patio. So I asked about that. "THAT" led to my third big laugh of the day. They have to cut holes in the cement to make holes just like in the lawn! "Why can't you just put the posts on the cement patio"? "CODE" again!
Apparently, they have a huge circular saw that cuts "right through" cement, but not to worry, the soil under the patio was certain to be looser and would "take no time". And they would be back at 7 am "plenty of time".
So it took them 2 hours to dig 1.5 of the 3 farther lawn holes. Then it should take them another 2 hours to dig the remaining 1.5 lawn holes. AND they had to cut through a cement patio, bust of the cement, remove it, and dig 2 more 2' deep holes in the dirt underneath in then "zero to 1 hours time" depending on when the inspector arrived.
I apologize for the length of this, but more will be happening tomorrow, so I need to get through "yesterday and today" now.
TODAY:
One digger arrived promptly a 7 am. One thing I will say is that these people ARE punctual! He went right to work struggling to auger, chop, and dig his way to the 2' depth required. With no better success than yesterday! The other guy arrived at 8 with a helper. And while one guy and the helper went at the lawn holes, the other guy went at the cement patio with the huge circular saw.
OK, progress...
The contractor himself showed up at 8:30 am to make sure the holes were finished pre-inspection. What a surprise he had! He watched them work and than looked at his watch. I casually mentioned that there was no chance of them finishing the holes before 11 am at best.
So the inspector arrived at 9:15. Failed them, of course. Rescheduled for tomorrow morning.
It took til Noon before they got all the holes "done". They just disappeared while I was in the house. I measured all the holes, and they were at 22", not 2" full feet. I hope they don't get failed again and need a 3rd inspection Thursday morning. The deck will take 2 days to build, and it hadn't occured to me that Friday is the Independence day holiday, they don't work on weekends and that would mean until Monday before the new deck is finished!
Now, for some pictures and comments:
One of the Big Red Xs.
Sunday, June 29, 2014
Another Good Workout In The Yard
While I'm waiting for The Next Step on the new deck (Monday), I spent almost all day outside. No one particular project, but a little of everything.
First was watering the plants. We've had more rain than average since last Fall, but it hasn't rained much for 2 weeks, so that was a priority. I built a tripod watering stand a few years ago and improved it last Fall (changed the nozzle from a shower wand type to a fan type) and used it today. Much better coverage in my long but narrow beds. I use a cheap digital kitchen timer than resets to the previous time after running down. Great for repetitive waterings as I move the tripod along the beds. The fan spreads out about 9' wide and 6'deep, which is perfect.
And in each 6 minute I can do other things until the timer beeps in my pocket. I had noticed poison ivy under the old deck after it was removed, so I dug that up. That took one watering spot cycle. On the next, I started cutting down junk tree saplings .
I should explain that. I've left some of the back yard "wildish". Meaning its not lawn, but not "woods" either. Its awkward to mow, so ivy, native vines and trees keep trying to grow there. After the deck is done, I think I will arrange to have it leveled. I don't mind the ridge itself, but it is a never-ending source of weed-seeds that find their way into my flowerbeds.
I don't love great expanses of lawn (I never saw much lawn I didn't want to plant something more interesting in), but if I could use the riding lawn mower to keep the brush down, that would be nice.
Anyone want to take away 1200 square feet of very healthy english ivy? Free?
But for now, I was just cutting down the 3" to 5' unwanted tree saplings. I cut them down 2 years ago and applied Roundup to the stumps. I think most of those died, but there are always new ones ready to take their place. So I would like to end that cycle.
Then after the timed watering cycles were done, there were individual spots that needed hand-held watering. That took a half hour, but I was in the shade by then and it wasn't too bad. Plus there was a Washington Nationals baseball game on the radio and they were winning.
Not to say that I didn't stop each hour for 15 minutes inside to cool down and relax a bit...
I finished the day with the boat. Its not much of a boat. Its a 16' aluminum shell jon boat that I haven't used for 5 years. It was full of leaves. But one of the crew that demolished the deck Friday expressed an interest in buying it as he was about to retire and just wanted a small boat he could fish from. Said he had always wanted a small boat but couldn't afford one.
I suggested that, if I cleaned it up, I could get $1,000 (with the trailer). He offerred $500, as is. And I have to admit the "as is" was not very impressive. It was full of leaves and there was even a plant growing up from the leaf compost. And "as is" meant it might even leak.
I'm a softy. I agreed to $600 "as is". He said he would come by next week.
Well Gee, I couldn't just let the boat be driven away with leaves blowing out of it, so I decided to scrape them out. And then old habits of cleaning the boat out took over. After 21 years, I know the ins and outs of cleaning this boat, so I just did it! Wearing heavy rubber gloves and using a wide push-broom, I went after the leaves. And in a selfish sense, I coveted the 1" thick layer of leaf-compost covering the inside.
So I scooped it all out as best I could. Well, after that, it seemed only reasonable to use a hose on "jet" to beat off the remaining debris off the floors. Then there was all the planty debris floating around inside and I decided to remove that as best I could.
It became "A Project"!
I ended up cleaning the boat. I don't mean scrubbing the benches and floors to get rid on mold or mildew. But in a macro sense, I cleaned the boat. Wearing rubber gloves, I scooped out all the large debris and powered the smaller remaining compost to the back where there is a drain hole. That got clogged a lot, so I found a bit of tree branch that fit the hole and unblocked it frequently.
All the while, listening to the baseball game then classic music while having a couple beers. I was actually enjoying cleaning the boat! Until...
In the middle bench, there is fillable compartment for keeping bait or storing caught fish. When I opened the hinged lid on the top, a wasp flew out. I have a bad history with wasps. I ran half the yard away until I could see it left the area (yes, I'm far-sighted, I could see the wasp 20 yards away).
When I got close again, I saw there were wasp nests all around the inside of the bait well. I don't like to use poisons, but I cannot work around wasps or hornets. So I searched deep into my under-the-kitchen-sink-cabinet and found some wasp spray. I committed waspicide...
Even with heavy rubber gloves, I was twitchy about picking off the wasp nests and stomping on them. Please know that I understand wasps are beneficial and I try to leave them alone. They are good for my gardens. But they can be in the wrong place at the wrong time.
Can you imagine what might have happened to the guy who is buying the boat and after driving the boat for miles opened that bait door cover? The wasps would have been in a REALLY bad mood.
So I killed the wasps and gingerly poking around in the bait well, found the drainage hole. It took a while to get myself to pick out the dead wasps and nests blocking the drainage hole, but I did it. And got the bait well cleaned and draining free.
Then I realized there is another great place for wasp nests under the raised area at the front of the boat, so I sprayed into there too.
So much for wasps...
After having pretty much gotten rid of all reachable leaf debris, I needed to know if the boat leacked. After 5 unused years, who knows. So I propped up a shovel under one side of the boat to make it perfectly level from port to stern (sideways). Then I lowered the front so that water would fill it up evenly stem to stern (front to back).
That took a half hour, while I went around the yard digging up all the poison ivy plants I could find.
Finally, I got it up to an exact point toward the front I can use as a guide. If the water level in the boat drops any below that (and after 6 hours it hasn't) and if I see no drips from the boat, I know it is still waterproof.
The guy buying the boat is getting a real deal. Did I mention that aluminum Jon boats have only a 1/16th thick aluminum shell and bottom? Well, I bought 3/32nds aluminum plate to put on top of that. Over a cover of outdoor carpet to deaden the sounds transmitted through metal as you fish? And more outdoor carpet on the top of the aluminum plate so it doesn't get hot in the Summer?
But so am I (getting a good deal). What value is something you have stopped using? I'm going to get another boat soon. It might be a smaller Jon boat (easier to manage as one person). Or It might be a fancier one I can take out on Potomac River waters. I'll decide that after I am rid of the old one which is neither.
And I had a WONDERFUL time working outside today!
Monday, June 23, 2014
Flowerbed Work
Well, while I'm working on the veggie garden, I can't ignore needing to plant the annual flowers I've raised indoors starting late January. So I took out the leverage fork ( wonderful tool) and turned over all the soil in the large annual flower area of the flowerbed.
I like to listen to classical music while working, so I brought out an old (small) boom box and plugged it in with the outdoor extention cord I keep on the deck. Got all the tools I needed fron the shed. Ready to do some serious hard digging work (the bed was infested by some spreading grass weed years ago, and I've been eliminating it rather successfully over the past few years.
But just as I turned on my radio, the neighbor decided to mow his lawn. So much for music...
SO, I started at the back and used the leverage fork (best invention since the shovel).
 I went along the back row and did the same after stepping back 8" all the way to the front of the bed. Then went and pulled out all the regular weeds but shoved my hands into the loosened soil to get those DAMN spreading grass runners from under the soil. And I took the time to crush the hard clumps of soil as I went.
Well, you can't plant in hard clumps of soil, and breaking them up by hand is great finger-exercise! I accumulated quite a pile of weeds and grass roots too. I'll spread them out on a tarp in the sunlight to kill them before I add them to my compost pile.
I didn't plant the flowers there today. For one thing, I want the soil to dry at the surface so I can rake it more easily, second, it is easier to see lines I draw in the soil to mark where where the new flowers go, and 3rd, it is easier to find and crush any remaining clumps of soil when they are dry.
Resting after the digging, I diagrammed my planting pattern. I planted 36 each of a white and 36 of an orange zinnia and (by random happenstance) got 27 healthy plants of each. So that suggested some designing. They both grow to the same size, so I could have planted a few rows of one in the back and the rest in the front in big blocks (as usual), but I came up with something different.
The area is wide in the back and narrower in the front, so there were lots of odd patterns I could try. Alternating the colors could be good, but as the rows got narrower towards the front, I couldn't keep thew pattern going.
I'm SO pleased with myself (yes, I admire my creative thinking often), but it took an hour of drawing rows of dots on scrap paper before I hit a pattern that used my 27 white zinnias and my 27 orange ones.
The bed will be outlined in orange zinnias and the center will be filled with white ones this year. Hey, some people like the same patterns every year; I don't. Last year, I did blocks.
I like to listen to classical music while working, so I brought out an old (small) boom box and plugged it in with the outdoor extention cord I keep on the deck. Got all the tools I needed fron the shed. Ready to do some serious hard digging work (the bed was infested by some spreading grass weed years ago, and I've been eliminating it rather successfully over the past few years.
But just as I turned on my radio, the neighbor decided to mow his lawn. So much for music...
SO, I started at the back and used the leverage fork (best invention since the shovel).
Well, you can't plant in hard clumps of soil, and breaking them up by hand is great finger-exercise! I accumulated quite a pile of weeds and grass roots too. I'll spread them out on a tarp in the sunlight to kill them before I add them to my compost pile.
I didn't plant the flowers there today. For one thing, I want the soil to dry at the surface so I can rake it more easily, second, it is easier to see lines I draw in the soil to mark where where the new flowers go, and 3rd, it is easier to find and crush any remaining clumps of soil when they are dry.
Resting after the digging, I diagrammed my planting pattern. I planted 36 each of a white and 36 of an orange zinnia and (by random happenstance) got 27 healthy plants of each. So that suggested some designing. They both grow to the same size, so I could have planted a few rows of one in the back and the rest in the front in big blocks (as usual), but I came up with something different.
The area is wide in the back and narrower in the front, so there were lots of odd patterns I could try. Alternating the colors could be good, but as the rows got narrower towards the front, I couldn't keep thew pattern going.
I'm SO pleased with myself (yes, I admire my creative thinking often), but it took an hour of drawing rows of dots on scrap paper before I hit a pattern that used my 27 white zinnias and my 27 orange ones.
The bed will be outlined in orange zinnias and the center will be filled with white ones this year. Hey, some people like the same patterns every year; I don't. Last year, I did blocks.
Sunday, March 16, 2014
Deer Ate A Shrub
Well, OK, that's not all that uncommon. But it has been for me.
The very first landscaping I did when I moved in here 27 years ago (new house so no initial landscaping) was plant a few shrubs on the east side of the house. It was a Korean Dogwood tree with 2 Euonymus shrubs, several Nandina (false bamboo) plants, and some spreading evergreen.
Well, nothing bothered the shrubs in all that time. Until last week! But as I walked around that side of the yard (a least-visited side), "something" just looked odd. It took a few minutes, but I realized all the bottom halves of the Euonymus shrubs looked "wrong". It hit me suddenly that all the leaves on the bottom half of the 8' high Euonymus shrubs were GONE!
Well, sometimes it takes a few minutes for the brain to "see" the difference between what it is looking at and what the memory says was there before. So many possibilities came to mind. Insect damage? Not in Winter. Fungal disease? Ditto about Winter. Natural leaf fall? No, it's an evergreen.
DEER!
When I moved into to this newly-built neighborhood, there were deer around. There was a swamp across the street and deer love wetland edges. I almost got trampled by 2 panicked deer while I was mowing the lawn my first Fall. I used to see deerprints in the lawn at first. That all stopped after a few years as the street filled with new houses.
Last year, I had some hostas eaten for the first time in 15 years. This Winter, shrubs for the very first time.
 And they even left me a "gift"...
 THEY'RE BAAAACCCKK...
The very first landscaping I did when I moved in here 27 years ago (new house so no initial landscaping) was plant a few shrubs on the east side of the house. It was a Korean Dogwood tree with 2 Euonymus shrubs, several Nandina (false bamboo) plants, and some spreading evergreen.
Well, nothing bothered the shrubs in all that time. Until last week! But as I walked around that side of the yard (a least-visited side), "something" just looked odd. It took a few minutes, but I realized all the bottom halves of the Euonymus shrubs looked "wrong". It hit me suddenly that all the leaves on the bottom half of the 8' high Euonymus shrubs were GONE!
Well, sometimes it takes a few minutes for the brain to "see" the difference between what it is looking at and what the memory says was there before. So many possibilities came to mind. Insect damage? Not in Winter. Fungal disease? Ditto about Winter. Natural leaf fall? No, it's an evergreen.
DEER!
When I moved into to this newly-built neighborhood, there were deer around. There was a swamp across the street and deer love wetland edges. I almost got trampled by 2 panicked deer while I was mowing the lawn my first Fall. I used to see deerprints in the lawn at first. That all stopped after a few years as the street filled with new houses.
Last year, I had some hostas eaten for the first time in 15 years. This Winter, shrubs for the very first time.
Saturday, October 20, 2012
Not About Dad
Well, I don't want to go on and on about Dad. He still asks strange questions and makes no sense sometimes, but let me leave that alone for today.
I DO still have a life, and things to do all my own. Projects especially. The house is 26 years old, and now that some things like roof and siding have just been replaced, I can go on to other maintenance issues.
The framed raised garden beds are 20+ years old and are falling apart. The deck is 20+ years old and, well "not falling apart", but was never great or "to code". I started flooring the attic 15 years ago and only did half of it (the other half had electric wires resting on the joists and I never could quite decide what to do about that). My utility trailer has exterior plywood sides but they are rotting.
So there are those things that I have put off in favor of the larger needs. Now it is time for those smaller ones.
I've designed new framed garden beds. They will be wider and higher (15' H x 4' x 8' instead of 10" H x 3' x 8'), have 6" of sheet metal flat on the bottom to stop grass growing up against them (for easier mowing), and have boards on the top edges for sitting. With 4" x 4" posts along the outsides to suport the board on the sides and on the top.And I will be cutting down some trees to allow for more sunlight on the garden. I regret losing the trees, but I have too much shade as the trees have grown taller for 26 years.
The trailer will get higher sides, and a solid bottom. And of ACQ treated plywood. The previous plywood rotted to fast and the bottom was boards with gaps. I had to keep using tarps to keep compost and sand from falling through.
The attic came back to my attention when I had to "duck walk" across 30' of joists when the roof started leaking to place collection pans under the leaks. I've figured out how to avoid the electrical wires of the joists without making them inaccessible for repairs. I have 1" x 2" x 8' boards that I will cut into 6" lengths. I'll screw those on top on the joists next to the wires and along the outer edges of where plywood can be screwed in place on top. That may not be clear... I'm raising the plywood just above the wires on the joists, but using screws so the plywood can be removed if there is a need to get at the electrical wires.
I need a new compost bin, too. The old one is in shade (it wasn't in the shade when I built it), was too small, has no top to keep varmints out, and leans over badly. It wasn't my best design... So I am designing a better one. Larger, more air circulation, tops, in sunlight. I drew up a framed hardware screen panel 4' x 4', and I will just make 6 of them to attach to sturdy 4" x 4" posts set in the ground, hinged on the front and top.
There are other projects too, but those should take a few months, LOL!
Wednesday, May 2, 2012
Doing Useful Stuff, 5
The trees drop branches, I cut down weedy saplings, I trim desirable trees, some shrubs need severe pruning each year. It adds up to a large brushpile.
So I finally piled all the debris into the hauling trailer and brought it to the County landfill. It was 8 feet high in the trailer. After tying it down tight with ropes, I crushed it down to 6' high. And delivered it. Not as trash, but as compostable material. You see, the County here has a huge composting area. They pile all the organic debris into rows 20 feet high and a football field long.
In return, County residents can obtain "mulch" (more like halfway between shredded bark and compost) for free). They will even use a bucketloader to fill trailers or pickup trucks for residents for free on Saturdays. Its not quite either, but it IS free.
I usually shovel it out of the trailer into a pile, use a mulch-fork to take out the large parts to use as real mulch, then let the smaller stuff compost (covered by a tarp) to become soil amendment. Between moisture, time, ants, worms, heat, and microbes, it is really good stuff after a full year.
So it is really a "give raw material this year" and "get back a useful product the next". And free, did I mention that? LOL! Free is good...
Friday, April 27, 2012
That Collapsed Storm Drain
Well darn, I thought I had posted this 2 weeks ago, but I saw it was just sitting in "draft" mode...
It lasted 25 years with flood waters pounding it from almost ALL of the rainwater that ran down from the upslope neighborhood of about 1 square mile.
It finally fell apart.
Well, there it was all fallen down. "Help, I've fallen and I can't get up". So I called it into the County Maintenance office as a safety hazard that children might fall into. They came RIGHT out and surrounded by this "child-proof safety fence", LOL! Yeah, THAT will keep the kids away for SURE.
 Well, better than nothing, I suppose. More impressive, they returned in only 3 weeks to do the actual full repair. I was expecting more like 4-6 months. My County is not rich, and I'm sure scattered odd repairs are not their favorite ways to spend tax money. But they did a really good job.
The first person examined the entire structure. He decided it needed complete rebuilding. I asked him about that and he pulled out 1 brick and broke it in half with his bare hands. Yup, it needed new (and better) brickwork. And he said he didn't get any extra money for recommending full rebuilds.
Here is the finished product. I asked the guys rebuilding it if I could take a picture of them, and they said they would rather I didn't. So OK. Its not like taking pictures of my cats, who don't have a choice.
 But they did good work!
 They said the bricks were stronger and the morter more waterproof, so the storm drain might outlast me.
It lasted 25 years with flood waters pounding it from almost ALL of the rainwater that ran down from the upslope neighborhood of about 1 square mile.
It finally fell apart.
Well, there it was all fallen down. "Help, I've fallen and I can't get up". So I called it into the County Maintenance office as a safety hazard that children might fall into. They came RIGHT out and surrounded by this "child-proof safety fence", LOL! Yeah, THAT will keep the kids away for SURE.

The first person examined the entire structure. He decided it needed complete rebuilding. I asked him about that and he pulled out 1 brick and broke it in half with his bare hands. Yup, it needed new (and better) brickwork. And he said he didn't get any extra money for recommending full rebuilds.
Here is the finished product. I asked the guys rebuilding it if I could take a picture of them, and they said they would rather I didn't. So OK. Its not like taking pictures of my cats, who don't have a choice.


Wednesday, April 25, 2012
Doing Useful Stuff 2, Planting Tomatoes
Planted tomatoes. Heirlooms. Can't wait for the ripe ones.
First, dug nice wide holes with a post-hole digger... 4 per box.
 The hole is deeper than it looks. They are a foot deep.
 Scatter some 2-6-6 organic slow release fertilizer and some pulverized eggshells (for calcium) in the bottom. Lay the rootball in, add soil and some more fertilizer and eggshell. Fill it up
 Tomato seedling looks happy but floppy from the handling (yes they react to handling).
 Add a short stake and a plant clip to hold it upright.
 Put a 5 gallon bucket over the seedling...
 Put a Wall O' Waters around the bucket...
 Put the pointy nozzle on the hose...
 And fill up the tubes. 1/2 at first for balance, then 2/3 to hold the teepee upright on its own after you pull the bucket up and out....
 Strange as it may seem, the cooling water at night actually releases heat into the center. The inside is 20F warmer than outside. I've measured it! That's great on the occasionally cool nights that drop to 40sF, but the main advantage is that it keeps the soil around the roots warm. That really matters more. The soil temperature stays around 60F.
First, dug nice wide holes with a post-hole digger... 4 per box.


Wednesday, October 19, 2011
Sometimes I am REALLY Dense
Recently, I posted about my frustrations in trying to repair the drip irrigation hoses. I had 4 of them mounted to a 4 gang valve on a 12" post. Two winters ago, the heavy snow broke the drip hoses off the couplings at the gang valve. I became obsessed trying to find an internal connection (like a stent, I suppose) to reattach the hoses to the couplings. I wasn't having any luck, because I needed 7/16" tubing and couldn't find that size anywhere.
One person, seybernetx, suggested standard garden hose repair kits. I dismissed the idea because, well, it wasn't a standard garden hose. Have you ever dismissed an idea because it didn't fit the way you were thinking of a problem? Yeah, me too!
Well, I was walking past the broken drip hoses today, and the old LIGHT BULB OVER THE HEAD lit up! A hose is a hose is a hose... WHY was I caring about the existing brass hose couplings? A standard hose repair kit would work just fine. I had simply assumed the drip hoses were some odd size that wouldn't work with standard hose repair kits!
Dumb, dumb, dumb, dumb, dumb, dumb, dumb, dumb, dumb, dumb, dumb, dumb, dumb, dumb!!!
The hard part is that I am usually quite resourceful about fixing things, using odd unrelated objects to make repairs... I guess this is one of the top 10 list of THINGS I FLUBBED! I even had one of the right size repair kits sitting around. It worked just fine. I just need 3 more from the hardware store tomorrow.
Thank you, seybernetx. And my cats say "hello" to your cats...
Friday, September 30, 2011
Garden Watering Stand
I like to keep the garden watered, but it's boring. It's wasteful to use an oscillating sprinkler on the raised veggie beds because of the walkways between them, and the flowerbeds are too narrow for one. It is too boring to just stand there and water all the beds by hand. I have drip irrigation hoses, but they all broke off at the raised brass couplings under the weight of the snow 2 winters ago (haven't quite figured out how to repair them).
I had developed a rather convenient way to water them all a patch at a time using a fat hose nozzle and a spading fork. I stabbed the fork in the ground abut 10' away and nestled the fat hose nozzle (shower setting) in the fork's D handle. But that required getting the garden fork firmly in the ground at each 6' section or raised bed. Naturally, if I needed to water the beds, the lawn soil was rather hard to penetrate with the fork.
I needed a better way. My first thought was a pole with a clamp on top and a flat "X" at the bottom with spikes to "step" into the lawn. I couldn't find any parts like that, and I'm not a welder. Then I looked at my camera tripod. It looked a bit flimsy, needed some kind of attachment at the top, and I wasn't sure how waterproof it was. But a tripod seemed the way to go.
I built one using pressure treated wood and stainless steel hardware. The PT wood is 2x2"deck balusters. The tripod is designed with 1 forward and 2 back legs. It is 2 back legs to resist the backwards force of the water and the weight of the hose.
The balusters come with pointed ends. I wanted the points for the bottoms, but I wanted flat tops to attach a nozzle platform. So I cut off the tops of each of the 3 balusters. Then I cut 3" off the 2 back legs to use to widen the attachment surface. Two pieces of scrap wood added some width. It was all glued and screwed to the front leg.
 Next, I used a tapering jig on the tablesaw to cut angles for the 2 back legs to attach to the front leg. They are shorter because I used 3" to make the top attachment surfaces, but also because the front needs to be longer to create an upwards angle for the nozzle platform. That will make more sense in the last pictures. I can't give an exact angle for the cut (I really just overlayed one on the other and eyeballed the "right" spread). It looks about 30 degrees though.
 I needed to drill a hole through the 3 legs for an axle bolt. I rigged up some stops and supports on my drill press for the 2 angled back legs. The front leg just needed a spacer to account for the platform support.
 It looks like this when the bolt and nut is put through all 3 legs. This holds the legs all at the angles. But I also wanted to be able to store it easily for the winter. That meant being able to collapse it. So I took the back legs back to the drill press and lifted them up slightly to angle the holes.
 I may not be explaining that well. To store it, I wanted the 3 legs to compress flat to each other, and the lengthened hole allowed that. And so that the bolthead and wing nut (for tightening securely on a flat surface, I used a forstener bit to make an angled hole the size of the flat washers. I don't have a picture of that, but it will be obvious when/if you make one of these yourself.
Notes: 1, The washers between the legs were removed later. I realized I DIDN'T want the legs to slide easily when being set up. 2, The spacer washers below the wing nut are there because the wing nut catches on the wood before the bolt is tight. 3, Use a bolt with threads the whole length. The bolts with about 1" of threads don't have enough thread length.
 Here is the tripod in the storage position. That's what I mean by "compressing flat" and why the back legs have elongated holes.
 Here is the tripod set up, minus the hose nozzle platform on top... You can see that with the front leg longer, it creates an upwards angle.
 Here is the finished tripod. A piece of PT board is glued an screwed to the platform support on the front leg (the screws are countersunk under the wand nozzle). Copper clamp-downs hold the wand in place with pan-head exterior screws. A wand nozzle is much easier to attach than a standard nozzle. The wand, BTW, has the most uniform spray of any nozzle I have ever tried. This brand is Melcor; others may be just as good.
 To relieve hose-weight pressure on the wand, I attached an angled hose connector. I have quick-connect attachments on all my hoses and attachments.
 And here is the watering tripod in action! Adjusting the angle of the front leg easily adjusts the angle of spray.
 It's easy to move from spot to spot, stores nicely, and should last decades!
I had developed a rather convenient way to water them all a patch at a time using a fat hose nozzle and a spading fork. I stabbed the fork in the ground abut 10' away and nestled the fat hose nozzle (shower setting) in the fork's D handle. But that required getting the garden fork firmly in the ground at each 6' section or raised bed. Naturally, if I needed to water the beds, the lawn soil was rather hard to penetrate with the fork.
I needed a better way. My first thought was a pole with a clamp on top and a flat "X" at the bottom with spikes to "step" into the lawn. I couldn't find any parts like that, and I'm not a welder. Then I looked at my camera tripod. It looked a bit flimsy, needed some kind of attachment at the top, and I wasn't sure how waterproof it was. But a tripod seemed the way to go.
I built one using pressure treated wood and stainless steel hardware. The PT wood is 2x2"deck balusters. The tripod is designed with 1 forward and 2 back legs. It is 2 back legs to resist the backwards force of the water and the weight of the hose.
The balusters come with pointed ends. I wanted the points for the bottoms, but I wanted flat tops to attach a nozzle platform. So I cut off the tops of each of the 3 balusters. Then I cut 3" off the 2 back legs to use to widen the attachment surface. Two pieces of scrap wood added some width. It was all glued and screwed to the front leg.


Notes: 1, The washers between the legs were removed later. I realized I DIDN'T want the legs to slide easily when being set up. 2, The spacer washers below the wing nut are there because the wing nut catches on the wood before the bolt is tight. 3, Use a bolt with threads the whole length. The bolts with about 1" of threads don't have enough thread length.


Wednesday, September 28, 2011
Pictures Again!
I've been a bit frustrated lately, often not being able to get pictures into the posts. They would upload in the Choose Files box, but would not transfer to the post. I even posted a question on the Blogger Help forum (no replies). So, today I tried the new Blogger interface, and pictures load properly.
Hurray!
I am showing the pictures of the "Poor Old Storm Drain" to add to THIS POST today...
The overview... Yes, believe it or not there is a 4x4x4 foot brick well and heavy metal grate under there!
 At first, I tried to pull the debris off.
 Most of it was too entangled. I wasn't surprised. The last time the drain was like this, the County needed power equipment!
 But I stopped trying as soon as I saw that the brick structure was broken! You can see part of the brick wall is at an angle.

I also noticed that the metal grate on top is actually shoved OFF the brick structure! You can also see that the woody debris is packed so tightly that stones washed over the top and wouldn't fall through.
 I called County Maintenance and reported the problem. They politely took all the information, but wouldn't suggest a repair date. I'll be happy to see them out here by next Spring. That's about how long it took the last time. However, I will say that they do good work when they come.
Hurray!
I am showing the pictures of the "Poor Old Storm Drain" to add to THIS POST today...
The overview... Yes, believe it or not there is a 4x4x4 foot brick well and heavy metal grate under there!


I also noticed that the metal grate on top is actually shoved OFF the brick structure! You can also see that the woody debris is packed so tightly that stones washed over the top and wouldn't fall through.

Subscribe to:
Posts (Atom)
-
 I think I have it figured out now. I needed basic frame strength (cubes) plus top support (arches with a ridgepole) for shedding rain and s...
 -
I like to plant Pansies in the Fall. I replace the dead Tomatos and deck pot flowers with them most years. Best deal I found was 12-packs ...