Part B) of the projects this past week... The PVC pipe frames for the concrete 6" mesh wire...
It was an adventure cutting, drilling, and marking the 1" PVC pipe for the trelises. The cucumbers and pole beans are wandering around the garden surface looking for something to climb. I thought the pole beans would climb the cornstalks happily, but the corn is a short bicolor variety and the pole beans need higher supports.
So I'm late in adding the trellises to the enclosed garden. But maybe not TOO late. I tested a pole bean and it can be unwound from the corn stalks. I'm barely getting to the trellises in time!
My delay was due to the difficulty in getting at the concrete mesh. I stacked in against the fence last Fall to get it out of the way, and the Evil Vines from the neighbor's yard have entirely taken them over.
It took several hours to rip the D*** vines loose from the wire mesh 2 days ago. And things are so tight between the new garden enclosure and the fence that I cant just pull out the 30' of concrete mesh to cut it apart on the open lawn. I'll have to do it where it is.
Fortunately, I have a saws-all. The metal blade cuts through even concrete mesh like a hot knife through butter. But I have to construct the PVC frames the comcrete mesh will be attched to first so that I know exactly what sizes to cut.
And that means making the PVC frames first. I have them in pieces. Tomorrow, I'll attach them to the framed garden beds. When the PVC frames are attached solidly, I'll cut the 30' of old trellis concrete remesh to size.
Pictures will follow...
Friday, August 7, 2015
Thursday, August 6, 2015
Been Busy, Part 1
Well, OK, I always TRY to stay busy doing something useful around the house each day, but some things aren't worth reporting on. I'm pretty sure no one cares that I mopped the floors, did laundry, paid bills, weeded gardens, cleaned litter boxes, etc. Not that those things don't take time and have to be done, but they aren't generally things I bother to post about.
So, having been busy with such routine things, I haven't posted for a week.
I am pleased to say that the last 3 days have been at least a bit more busy on interesting things. They fall into 3 categories: Garden, Clutter, and "Other Stuff". And because each part gets a bit long, I'm going to address one of the 3 parts in separate posts.
First (today) is the garden, and there are several parts to that work over the past week.
A) While I was pleased to announce that the free-standing screen door to the new garden enclosure was finally completed previously, it apparently wasn't quite. The posts have settled slightly, and even with metal corner braces, the door rubs on the top of the frame, and I can see that heavy rains will always make it a little bit loose. So I designed some support structures of PVC pipe braces that should help.
B) The climbing plants need trellises to, well, climb. Pole beans and cucumbers mostly. So I designed some basic PVC pipe frame that can support concrete mesh wire.
C) The vining crops like melons spread out in all directions and need to be constrained to their own framed beds.
D) Raising one side of the frame 1/4". That doesn't sound like much, but it is the difference between the door sticking and not.
So, a week ago, for part A) I went shopping at the Big D-I-Y stores looking for the parts that would brace the free-standing screen door. I don't want to get overly detailed, but the idea was to attach 2 PVC pipes from the door frame to the nearest upright PVC post on each side of the door, and 2 from the horizontal post above down to the top of the door frame. It was just a best guess of holding the free-standing door frame in place.
The D-I-Y stores didn't have the right attachments, so I improvised. That didn't work. Part involved cutting the upright posts to add a "tee", and I realized that the upright posts were so locked in place by the chicken wire enclosure that I couldn't get that tee installed. There is something called a "snap tee" that doesn't involve cutting the upright posts. Literally, you just cement and push the snap tee onto a pipe.

But that part that sticks up in the picture has to fit into another pipe, and somehow it just wont. I suppose it is designed for some other purpose. Then it struck me that a connector fitting (intended to attach 2 PVC pipes together) might work.

It wasn't tight as if designed for the purpose, but close enough to cement after several applications. And if the cement doesn't hold, I can put a bolt though it to get the same holding effect.
The trellis frames, part B) were a lot easier. They are just an upside-down "U" of PVC pipe with the bottoms attached to the outsides of the framed beds in the back of the garden (so as to not shade the other lower-growing plants).
"Easier" doesn't mean "easy" though. I still had problems. I wanted the PVC pipe uprights to be solidly attached to the framed beds so I could then attach 6" grid concrete mesh wire to them. I wanted them to be level up and sideways, and 2' below the top of the enclosure (so the vines wouldn't crawl up through the top).
So I made a cardboard template that was even to the top and side of the frames. Repeatability is wonderful. I used the cardboard template to mark drilling spots in the frames. I then used the template to mark drilling spots on the PVC upright pipes.
Since the uprights had to be 7' (from a 10" PVC pipe, they had to be cut. I tried clamping the pipes to 2 sawhorses, but the vibration from my saws-all

kept knocking the clamps loose. I had to bring the 6 pipes inside the clamp them to the sturdier workbench. Cut to 7' lengths, I then had to mark the spots to drill holes to match the pilot holes in the garden frames. That's where the cardboard template helped A LOT! The same holes in the cardboard HAVE to match up to the pilot holes in the garden frames, right?
We'll find out tomorrow...
Part C) was serendipitous. I needed a whole lot of small bamboo stakes to keep guiding my free-ranging melon vines back into the beds. Packs of 25 bamboo stakes cost about $7 and I need a few dozen. But I was shopping at Target today and found 12" kitchen bamboo skewers 80 for $1.27. That works for me!
One of the most useful discoveries I've made in life is that products meant for a purpose are expensive, but very similar things meant for another purpose can be quite cheap. My favorite example is a plastic scoop.

Not the exact product, but an example... In a pet store, it was $6. In a hardware store, it was $3. Same thing, different customer... *I* use the scoop to transfer the kitty litter in the 35# buckets into more wieldy smaller containers.
But back to the bamboo skewers... I want to guide the melon vines in circles to keep them in the beds and out of the paths. The 12" skewers will work just fine for that!
Part D), raising one side of the door frame 1/4" is a bit trickier. I've figured out a way to do it. I'm going to screw a short scrap of 2"x4" board near the bottom of the post I want to raise 1/4". I will put a brick on the ground and stomp on it hard to make sure it won't settle deeper. Then I'll use another 2x4 to use as a lever to pry the attached 2x4 1/4" higher. I'll clamp it temporarily until I can wedge shims between the brick and the screwed 2x4.
That will hold the post up the 1/4" I need. But it is going to have to stay there for months until routine ground expansion and rain fills in the spot. Bet it is still there several years from now, LOL!
Despite the 4x4 posts being set 2' deep in the soil, I bet I'll always have to adjust the screen door frame from year to year. Some things never stop needing attention.
I originally got the idea of building a chicken-wire-covered garden enclosure from a website HERE
But I found some problems with the design, and fixed them for myself. Well, I hope everyone improves on construction ideas they find on the internet or elsewhere, mine included.
You would be amazed at the way things travel around the internet.
Next posts: "Clutter" and "Other Stuff"...
So, having been busy with such routine things, I haven't posted for a week.
I am pleased to say that the last 3 days have been at least a bit more busy on interesting things. They fall into 3 categories: Garden, Clutter, and "Other Stuff". And because each part gets a bit long, I'm going to address one of the 3 parts in separate posts.
First (today) is the garden, and there are several parts to that work over the past week.
A) While I was pleased to announce that the free-standing screen door to the new garden enclosure was finally completed previously, it apparently wasn't quite. The posts have settled slightly, and even with metal corner braces, the door rubs on the top of the frame, and I can see that heavy rains will always make it a little bit loose. So I designed some support structures of PVC pipe braces that should help.
B) The climbing plants need trellises to, well, climb. Pole beans and cucumbers mostly. So I designed some basic PVC pipe frame that can support concrete mesh wire.
C) The vining crops like melons spread out in all directions and need to be constrained to their own framed beds.
D) Raising one side of the frame 1/4". That doesn't sound like much, but it is the difference between the door sticking and not.
So, a week ago, for part A) I went shopping at the Big D-I-Y stores looking for the parts that would brace the free-standing screen door. I don't want to get overly detailed, but the idea was to attach 2 PVC pipes from the door frame to the nearest upright PVC post on each side of the door, and 2 from the horizontal post above down to the top of the door frame. It was just a best guess of holding the free-standing door frame in place.
The D-I-Y stores didn't have the right attachments, so I improvised. That didn't work. Part involved cutting the upright posts to add a "tee", and I realized that the upright posts were so locked in place by the chicken wire enclosure that I couldn't get that tee installed. There is something called a "snap tee" that doesn't involve cutting the upright posts. Literally, you just cement and push the snap tee onto a pipe.
But that part that sticks up in the picture has to fit into another pipe, and somehow it just wont. I suppose it is designed for some other purpose. Then it struck me that a connector fitting (intended to attach 2 PVC pipes together) might work.
It wasn't tight as if designed for the purpose, but close enough to cement after several applications. And if the cement doesn't hold, I can put a bolt though it to get the same holding effect.
The trellis frames, part B) were a lot easier. They are just an upside-down "U" of PVC pipe with the bottoms attached to the outsides of the framed beds in the back of the garden (so as to not shade the other lower-growing plants).
"Easier" doesn't mean "easy" though. I still had problems. I wanted the PVC pipe uprights to be solidly attached to the framed beds so I could then attach 6" grid concrete mesh wire to them. I wanted them to be level up and sideways, and 2' below the top of the enclosure (so the vines wouldn't crawl up through the top).
So I made a cardboard template that was even to the top and side of the frames. Repeatability is wonderful. I used the cardboard template to mark drilling spots in the frames. I then used the template to mark drilling spots on the PVC upright pipes.
Since the uprights had to be 7' (from a 10" PVC pipe, they had to be cut. I tried clamping the pipes to 2 sawhorses, but the vibration from my saws-all
kept knocking the clamps loose. I had to bring the 6 pipes inside the clamp them to the sturdier workbench. Cut to 7' lengths, I then had to mark the spots to drill holes to match the pilot holes in the garden frames. That's where the cardboard template helped A LOT! The same holes in the cardboard HAVE to match up to the pilot holes in the garden frames, right?
We'll find out tomorrow...
Part C) was serendipitous. I needed a whole lot of small bamboo stakes to keep guiding my free-ranging melon vines back into the beds. Packs of 25 bamboo stakes cost about $7 and I need a few dozen. But I was shopping at Target today and found 12" kitchen bamboo skewers 80 for $1.27. That works for me!
One of the most useful discoveries I've made in life is that products meant for a purpose are expensive, but very similar things meant for another purpose can be quite cheap. My favorite example is a plastic scoop.
Not the exact product, but an example... In a pet store, it was $6. In a hardware store, it was $3. Same thing, different customer... *I* use the scoop to transfer the kitty litter in the 35# buckets into more wieldy smaller containers.
But back to the bamboo skewers... I want to guide the melon vines in circles to keep them in the beds and out of the paths. The 12" skewers will work just fine for that!
Part D), raising one side of the door frame 1/4" is a bit trickier. I've figured out a way to do it. I'm going to screw a short scrap of 2"x4" board near the bottom of the post I want to raise 1/4". I will put a brick on the ground and stomp on it hard to make sure it won't settle deeper. Then I'll use another 2x4 to use as a lever to pry the attached 2x4 1/4" higher. I'll clamp it temporarily until I can wedge shims between the brick and the screwed 2x4.
That will hold the post up the 1/4" I need. But it is going to have to stay there for months until routine ground expansion and rain fills in the spot. Bet it is still there several years from now, LOL!
Despite the 4x4 posts being set 2' deep in the soil, I bet I'll always have to adjust the screen door frame from year to year. Some things never stop needing attention.
I originally got the idea of building a chicken-wire-covered garden enclosure from a website HERE
But I found some problems with the design, and fixed them for myself. Well, I hope everyone improves on construction ideas they find on the internet or elsewhere, mine included.
You would be amazed at the way things travel around the internet.
Next posts: "Clutter" and "Other Stuff"...
Wednesday, July 29, 2015
Banks and Money
I almost hesitate to post about this. It involves moving money around and, if you don't have it, reading about it is probably awkward and and annoying.
I have an account at a Credit Union from my career days. And I have an account at a regular commercial bank. I recently discovered that my Credit Union pays somewhat better interest on savings accounts than my commercial bank does. So it made sense to transfer money from my commercial bank savings account to my Credit Union savings account.
My point of writing about this is how HARD it is to transfer the savings and it doesn't mter how much is involved.
These days, you can do almost any financial transfer online. But apparently not between a commercial bank and a credit union! There is some barrier between them.
I called the credit union first. I assumed there was some information about them I needed to enter into the commercial bank website. They disabused me of that notion real fast. "Can't be done online", even though I'm online with both the credit union and the commercial bank.
"Can only be done by 'wire transfer' ". And by the 10th piece of information, with more to come, I called a halt! I asked, what if I just gave you a check from my commercial bank? Couldn't you just deposit it in my credit union account?
"Sure", they said, "just mail it to us, but we need to look up how to receive a check and we'll call you back".
ARGGGGHHHH! "Dumber than a bag of sand" comes to mind.
It never occurred to my credit union "helper" to mention that to begin with?
Its not like I'm Donald Trump trying to send them a billion dollar check. I just would prefer to get .35% on my savings at the credit union as opposed to .01% at the commercial bank. Its not like the difference is going to get me a world cruise or anything, but why deliberately get less, right?
I'm only going through this because my credit union is an hour away now, and I'm beginning to wish I HAD just driven there and handed them a check.
No wonder that rich people have accountants to tell to do things like this. If I was Donald Trump, I'd have an specialist bank accountant too. Its maddening! You would think I was trying to convert Russian Rubles into Swiss Francs through some fly-by-night African bank.
And here I sit, waiting for some "expert" at the credit union to call me back with details on how to send them a simple check safely. Feeling like an idiot for causing a fuss...
I'm sure glad I didn't spend my working years involved in finances...
Tuesday, July 28, 2015
Ponderosa Pink Heirloom Tomato
I got my first ripe heirloom tomato today. It was a Ponderosa Pink. It wasn't great, well, the first ripe tomatoes of any kind usually aren't the best. But this one had a special meaning.
You see, my Dad (deceased 2014) loved them. I think that is what his Dad grew and to him, that was THE tomato. Dad used to save seeds from them and regrow them each year. Dad wasn't a very good gardener. He just planted stuff in bad soil and went full-out chemical on them. It was a very "modern" 1950s/1960s thing to do.
We kids hated his garden. He grew kale, for example, and we had to eat it. The kale was so "metalic" that a magnet might have stuck to it. The corn was always too startchy. The beans were OK.
But the tomatoes were pretty good, the few that grew. Ponderosa Pink. Dad saved the seeds in a paper bag in the garage. As the conditions were bad in the garage, I'm surprised that any sprouted at all. The year Dad and Mom left that house and moved north, the bag of seeds disappeared. Dad always said he gave me the seeds, but he didn't. The loss of the family Ponderosa seeds was a deep disappointment to him. I assume that the bag of seeds on the garage shelf just got left behind and the new occupants tossed them away.
I followed Grandad's gardening practices. He was organic, and his veggies always tasted good. I suppose he also had good Ponderosa Pink tomatoes, but I was too young to know about varieties then.
As years passed and I got my own space for gardening, I looked up some of the best heirloom varieties of tomatoes. I grew Brandywine, Cherokee Purple, Prudens Purple, Aunt Gerties Gold, and Cherry tomatoes. I didn't grow Ponderosa Pink.
But I got curious about Ponderosa Pink this year and found a place that sold it (It doesn't seem to be very popular). The shipping was more than the cost of the seeds, but, "well, what the heck".
So the first heirloom tomato I harvested this year was a Ponderosa Pink.
 Dad, this one is for you...
You see, my Dad (deceased 2014) loved them. I think that is what his Dad grew and to him, that was THE tomato. Dad used to save seeds from them and regrow them each year. Dad wasn't a very good gardener. He just planted stuff in bad soil and went full-out chemical on them. It was a very "modern" 1950s/1960s thing to do.
We kids hated his garden. He grew kale, for example, and we had to eat it. The kale was so "metalic" that a magnet might have stuck to it. The corn was always too startchy. The beans were OK.
But the tomatoes were pretty good, the few that grew. Ponderosa Pink. Dad saved the seeds in a paper bag in the garage. As the conditions were bad in the garage, I'm surprised that any sprouted at all. The year Dad and Mom left that house and moved north, the bag of seeds disappeared. Dad always said he gave me the seeds, but he didn't. The loss of the family Ponderosa seeds was a deep disappointment to him. I assume that the bag of seeds on the garage shelf just got left behind and the new occupants tossed them away.
I followed Grandad's gardening practices. He was organic, and his veggies always tasted good. I suppose he also had good Ponderosa Pink tomatoes, but I was too young to know about varieties then.
As years passed and I got my own space for gardening, I looked up some of the best heirloom varieties of tomatoes. I grew Brandywine, Cherokee Purple, Prudens Purple, Aunt Gerties Gold, and Cherry tomatoes. I didn't grow Ponderosa Pink.
But I got curious about Ponderosa Pink this year and found a place that sold it (It doesn't seem to be very popular). The shipping was more than the cost of the seeds, but, "well, what the heck".
So the first heirloom tomato I harvested this year was a Ponderosa Pink.

Saturday, July 25, 2015
A Surprise
Remember the "stick war" that seemed to be starting with a neighbor? They aren't those original neighbors. I looked up the property and it was sold 4 years ago to new people. I got fooled because the guy looked the same (tall, skinny, beard). The woman was different, but people change spouses, ya know?
They probably don't know they have any responsibility for the drainage easement and storm drain. So I'm just going to quietly pick up the branches for now. When I get a chance to meet them, I'll mention it and see how they react.
I hate being wrong...
They probably don't know they have any responsibility for the drainage easement and storm drain. So I'm just going to quietly pick up the branches for now. When I get a chance to meet them, I'll mention it and see how they react.
I hate being wrong...
Friday, July 24, 2015
Some Details
Yesterday, I referred to being in bed for 10 hours and a "poacher's shovel". It occurs to me that both could use some explanation...
FIRST, the 10 hours in bed (and sometimes it is more). As a child, I was an early riser. In college, I took early morning classes because I was up and ready to go. My 35 year career had me up at 5 am to leave the house by 6 am to meet a carpool at 6:15 to get to work by 7 am.
When I retired in 2006, I just collapsed and went to late mornings. At first, I assumed it was just a temporary reaction to all those years of getting up real early and that I would get "back to normal". I didn't. I can only get myself out of bed before 10 hours if some contractor just HAS to be here at 9 am. And I feel wrong the whole day after.
Well yesterday I read an article about sleep patterns. I forget which magazine (National Geographic, Scientific American, one of those), that said we modern people are off our traditional sleep schedules. Basically, we wake up to artificial lights, stay up late with artificial lights, and go suddenly to bed after 16-18 hours of bright lights. Practically every gadget we own emits some light, and that has some effects.
According to the article, sleep research and historical research suggests that, before artificial illumination, we were awake after dark for a while and we used to have a different pattern of sleeping that involved a period in the middle of the night akin to meditation. Something like 4 hours of regular sleep, 2 hours of general semiwakeful calmness, and then 4 more hours of regular sleep.
There were writings from less modern era people regarding things like "after my first sleep" and (paraphrasing) "then after some restful thought, I returned to sleep". And history is full of examples of people who had great insights in that "restful thought time".
My jobs+commutes used up from 5 am to 6 pm every workday. Gave me 3 hours to make dinner, clean house, play with cats, do yardwork, etc, and then it was back to bed again to get 8 hours maximum sleep (even if I fell asleep at once, which seldom happened).
And it struck me that that's what I've been doing ever since I was freed from the requirements of regular job hours! I've been going to bed after an hour of low light, sleeping about 4 hours, laying in bed lightly awake and contemplating things as I lay there, and then drifting off again for another 4 hours or so.
I think I have been getting into that pattern because I have the bedroom completely blacked out. I put acoustical tile in the bedroom window years ago because the *%#@ Spring Peepers used to keep me awake at night. But it also blocks out the morning sun. And I keep the door nearly closed. It stays dark in my bedroom.
I think they may be on to something that we have lost. And that I have fallen into by fortunate happenstance.
SECOND, I referred to a "poacher's shovel". It's a narrow shovel.

Apparently, it was originally designed to be assembled from pieces (blade and handle that could fit unobtrusively in a backpack) onto a shaft that looked like a simple walking stick, it was used for digging valuable plants out from rich folks' gardens at night and leaving a small hole that could be easily filled in with surrounding soil.
Today (hopefully), it is more a convenient "foot-powered trowel" for getting at deep-rooted weeds among flowerbeds. I love mine! Brambles are hard to dig up among my flowers and against the garden stone borders. This can get into the tighter spots, and it cuts fewer flower roots.
I just thought that was worth explaining...
FIRST, the 10 hours in bed (and sometimes it is more). As a child, I was an early riser. In college, I took early morning classes because I was up and ready to go. My 35 year career had me up at 5 am to leave the house by 6 am to meet a carpool at 6:15 to get to work by 7 am.
When I retired in 2006, I just collapsed and went to late mornings. At first, I assumed it was just a temporary reaction to all those years of getting up real early and that I would get "back to normal". I didn't. I can only get myself out of bed before 10 hours if some contractor just HAS to be here at 9 am. And I feel wrong the whole day after.
Well yesterday I read an article about sleep patterns. I forget which magazine (National Geographic, Scientific American, one of those), that said we modern people are off our traditional sleep schedules. Basically, we wake up to artificial lights, stay up late with artificial lights, and go suddenly to bed after 16-18 hours of bright lights. Practically every gadget we own emits some light, and that has some effects.
According to the article, sleep research and historical research suggests that, before artificial illumination, we were awake after dark for a while and we used to have a different pattern of sleeping that involved a period in the middle of the night akin to meditation. Something like 4 hours of regular sleep, 2 hours of general semiwakeful calmness, and then 4 more hours of regular sleep.
There were writings from less modern era people regarding things like "after my first sleep" and (paraphrasing) "then after some restful thought, I returned to sleep". And history is full of examples of people who had great insights in that "restful thought time".
My jobs+commutes used up from 5 am to 6 pm every workday. Gave me 3 hours to make dinner, clean house, play with cats, do yardwork, etc, and then it was back to bed again to get 8 hours maximum sleep (even if I fell asleep at once, which seldom happened).
And it struck me that that's what I've been doing ever since I was freed from the requirements of regular job hours! I've been going to bed after an hour of low light, sleeping about 4 hours, laying in bed lightly awake and contemplating things as I lay there, and then drifting off again for another 4 hours or so.
I think I have been getting into that pattern because I have the bedroom completely blacked out. I put acoustical tile in the bedroom window years ago because the *%#@ Spring Peepers used to keep me awake at night. But it also blocks out the morning sun. And I keep the door nearly closed. It stays dark in my bedroom.
I think they may be on to something that we have lost. And that I have fallen into by fortunate happenstance.
SECOND, I referred to a "poacher's shovel". It's a narrow shovel.
Apparently, it was originally designed to be assembled from pieces (blade and handle that could fit unobtrusively in a backpack) onto a shaft that looked like a simple walking stick, it was used for digging valuable plants out from rich folks' gardens at night and leaving a small hole that could be easily filled in with surrounding soil.
Today (hopefully), it is more a convenient "foot-powered trowel" for getting at deep-rooted weeds among flowerbeds. I love mine! Brambles are hard to dig up among my flowers and against the garden stone borders. This can get into the tighter spots, and it cuts fewer flower roots.
I just thought that was worth explaining...
Wednesday, July 22, 2015
Busy Day
It was unusually nice weather today (partly cloudy, dry, 30% humidity and 80F). I won't see many of those again until September. So I was up early, for me; 10:30 AM. I know many of you cringe to think of that as "early", but an advantage of being single and retired is setting your own hours.
So I started the day with an English Muffin and a cheese/bacon/bell pepper omelet, a glass of green tea, and a glass of V8. I've been cooking for so long now that all my cast iron pans are utterly non-stick. They are wonderful!
Fed The Mews first, of course. AND after. When they haven't eaten for 10 hours (because I've been in bed), they need a 2nd breakfast. I'd just give them more at first, but Iza can't keep it down all at once. And normally, I would let them out afterwards, but it was lawn-mowing day.
So I went out and mowed the lawn. Takes about an hour for mowing and 30 minutes trimming with the new string-trimmer. There are a lot of places I just can't mow closely, so I finally bought one of those new 18 volt lithium battery trimmers and it works GREAT! When they say "it's like a gas one", they are darn close! I need to get a shoulder strap though; its not one of those little 2 lb jobs...
I let The Mews out after the mowing was done and the fence gates were shut...
After that, I decided to attack some of the brambles that have been invading the more civilized part of by back yard. My "poacher's shovel" is great for that (think of an industrial-strength 18" trowel on a shovel handle). I need the narrow blade because the brambles are among plantings. I got about a dozen dug up.
Then I needed to do some watering. All you sufferring from drought, forgive me, but we have had unusually frequent rain here and I almost didn't notice we had finally gone a week without any rain. I started the watering because the annuals I still have in pots looked a bit wilted. And once I get a hose in my hand, EVERYTHING gets watered, LOL!
Not that I water everything by hand. I have a tripod with a fan-nozzle attached that I build a few years ago.
 This original had a shower spray nozzle, I replaced it with one that spreads more sideways. I use the shower head nozzle for hand-watering now.
And then I had to water the enclosed veggie garden. I'm not used to the tight spaces yet, so it is a bit awkward. I'll get the tricks for worked out this year. Watering the 6 new raised beds takes a good 30 minutes.
And THEN I had to water all the deck containers. I tried just filling and re-filling a watering can to water them, but that got pretty tedious. I thought I would try either one of those super limp hoses that collapse back into a small container, or one of those coiled types that stretch out and fit back in a metal holder. You've seen them on ads.
But I was at a D-I-Y store and I noticed they were using the coiled type themselves. So I figured they probably have some experience with their products, and bought the Melnor green coiled one.

So far, it is working very nicely and sure doesn't take up much space. I screwed the wire frame to a piece of exterior plywood and attached the plywood to the side of the deck. A short hose reaches to the multi-outlet water outlet.

For the record, I use one outlet for the hose to the deck, one for the hose to the nearby lawn, one to an industrial strength hose that goes 150' to the back veggie garden, and one for a jet nozzle right at the spigot that is useful for many things (cleaning buckets, hands, boots, etc). Dragging hoses all around the yard is both difficult and damaging to plants (I have the entire area around the spigot planted).
So I came back in at 6 PM and decided about dinner. I decided I'd earned a steak. I buy them in bulk from the local meat store, cut them in half, and freeze them in sandwich bags (wrapped in a bigger bag, wrapped in a heavier bag - no freezer burn). So I stuck one bag in a pan of hot water (gentle thawing), made a nice home-grown tomato salad (with some minced onion, chopped cucumber, and shaved carrot), sauted some wedges of red and green bell pepper, M/Vd a potatoe, and poured a glass of wine while I sauteed the steak (its more stovetop-roasting in the covered cast iron pan).
Dessert was cut-up fresh fruits (cantalope, green grapes, a plum, a navel orange, and some prunes).
Life is good...
Now I need to consult with The Mews about what they want to post for tomorrow.
So I started the day with an English Muffin and a cheese/bacon/bell pepper omelet, a glass of green tea, and a glass of V8. I've been cooking for so long now that all my cast iron pans are utterly non-stick. They are wonderful!
Fed The Mews first, of course. AND after. When they haven't eaten for 10 hours (because I've been in bed), they need a 2nd breakfast. I'd just give them more at first, but Iza can't keep it down all at once. And normally, I would let them out afterwards, but it was lawn-mowing day.
So I went out and mowed the lawn. Takes about an hour for mowing and 30 minutes trimming with the new string-trimmer. There are a lot of places I just can't mow closely, so I finally bought one of those new 18 volt lithium battery trimmers and it works GREAT! When they say "it's like a gas one", they are darn close! I need to get a shoulder strap though; its not one of those little 2 lb jobs...
I let The Mews out after the mowing was done and the fence gates were shut...
After that, I decided to attack some of the brambles that have been invading the more civilized part of by back yard. My "poacher's shovel" is great for that (think of an industrial-strength 18" trowel on a shovel handle). I need the narrow blade because the brambles are among plantings. I got about a dozen dug up.
Then I needed to do some watering. All you sufferring from drought, forgive me, but we have had unusually frequent rain here and I almost didn't notice we had finally gone a week without any rain. I started the watering because the annuals I still have in pots looked a bit wilted. And once I get a hose in my hand, EVERYTHING gets watered, LOL!
Not that I water everything by hand. I have a tripod with a fan-nozzle attached that I build a few years ago.

And then I had to water the enclosed veggie garden. I'm not used to the tight spaces yet, so it is a bit awkward. I'll get the tricks for worked out this year. Watering the 6 new raised beds takes a good 30 minutes.
And THEN I had to water all the deck containers. I tried just filling and re-filling a watering can to water them, but that got pretty tedious. I thought I would try either one of those super limp hoses that collapse back into a small container, or one of those coiled types that stretch out and fit back in a metal holder. You've seen them on ads.
But I was at a D-I-Y store and I noticed they were using the coiled type themselves. So I figured they probably have some experience with their products, and bought the Melnor green coiled one.
So far, it is working very nicely and sure doesn't take up much space. I screwed the wire frame to a piece of exterior plywood and attached the plywood to the side of the deck. A short hose reaches to the multi-outlet water outlet.
For the record, I use one outlet for the hose to the deck, one for the hose to the nearby lawn, one to an industrial strength hose that goes 150' to the back veggie garden, and one for a jet nozzle right at the spigot that is useful for many things (cleaning buckets, hands, boots, etc). Dragging hoses all around the yard is both difficult and damaging to plants (I have the entire area around the spigot planted).
So I came back in at 6 PM and decided about dinner. I decided I'd earned a steak. I buy them in bulk from the local meat store, cut them in half, and freeze them in sandwich bags (wrapped in a bigger bag, wrapped in a heavier bag - no freezer burn). So I stuck one bag in a pan of hot water (gentle thawing), made a nice home-grown tomato salad (with some minced onion, chopped cucumber, and shaved carrot), sauted some wedges of red and green bell pepper, M/Vd a potatoe, and poured a glass of wine while I sauteed the steak (its more stovetop-roasting in the covered cast iron pan).
Dessert was cut-up fresh fruits (cantalope, green grapes, a plum, a navel orange, and some prunes).
Life is good...
Now I need to consult with The Mews about what they want to post for tomorrow.
Tuesday, July 21, 2015
The Garden Inside
I have been planting while I built. I risked losing plants to the Evil Squirrels or Groundhogs, but I've managed to avoid them this year. I may have reduced the local population down to where they don't like getting into my space.
Which is good, because there are still gaps between the rolls of chicken wire I need to patch.
They great news is that my garden, while incomplete, is growing well.
First, I have my first main season tomato. It is a Big Beef, which is a hybrid and not my favorite, but it is still better than the store-bought ones. The heirlooms are just now fruiting and will take a couple weeks to ripen.
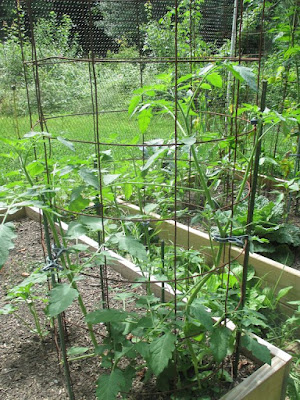
 I'm trying somehing in one bed based of the Three Sisters of Native America plantings. Thats growing corn, letting pole beans climb the cornstalks, and growing melons below to shade out weeds.
 I may have planted the corn late; the beans are growing faster. But I'll see what happens for this year. I can stick 8' posts in the ground between the corn plants to let the pole beans climb (and the pole beans are the flat italian kind which taste better than standard ones to my mind). The melons are honeydew.
 The heirloom tomatoes are growing unusually tall. New soil with good compost, I guess. But most have blossoms now. Below them are 2 green squash and 1 yellow squash.
 This bed has cantalope melons. I'm planting Fall crops around it. I'm off-schedule with most plantings this year because of the enclosure construction work. I should be back on schedule next year. But it is a rare opportunity for Fall crops that I usually don't get around to.
 This cherry tomato was planted late. It sat in a tiny 6-pack cell for months and I had about given it up for dead and/or stunted. But after being in ground for only 2 weeks, it went from a 8" sprig to this. Talk about GROWTH! I may harvest cherry tomatoes yet...
 This is more late plantings. Broccoli, Leeks, Cabbage, and Celery. All I can get from Celery around here is leaves, but they sure are strong-tasting! Which is exactly what I want in my salads.
And I have Brussels Sprouts, Radishes, Carrots,
Which is good, because there are still gaps between the rolls of chicken wire I need to patch.
They great news is that my garden, while incomplete, is growing well.
First, I have my first main season tomato. It is a Big Beef, which is a hybrid and not my favorite, but it is still better than the store-bought ones. The heirlooms are just now fruiting and will take a couple weeks to ripen.


And I have Brussels Sprouts, Radishes, Carrots,
Monday, July 20, 2015
The Garden Enclosure
The door is set in place. Finally. It was a struggle, and one I didn't expect. I originally laid the door on the basement place and build a frame around it that seems accurate and solid. The idea seemed so simple. Build a frame around the door, measure the distances between the frame parts, and dig holes in the ground to put 4x4 posts to match so that the door frame could be attached to the 4x4" posts.
HAHAHAHAHAHAHAHA!!!!!!!
Reality intruded... Even with screws every foot. the frame sagged as I tried to put it up to the posts. And even 4x4" posts move some even when set 2' deep. It's not like building a door into a house where everything is pretty solid.
I won't bore you with the details. No, wait, I will.
First, I tried to just attach the hinge side of the door frame to the 4x4" post that had been set into soil and rocks crushed as tightly as I could get it, for 2 weeks. Well, we've had a lot of rain lately and apparently the soil wouldn't dry deep. I tried everything I could to keep that post level and packed. I tamped the soil around it with a short 4' piece of 4x4" post, I stomped around, and I surrounded it with plastic sheeting to keep the rain away. I clamped other 4x4" posts to it in 3 directions to hold it in place. I gave it time to dry.
When I finally attached the door to the hinge-side post, I braced the door so it's weight wouldn't pull on it. It finally seemed to be set in place.
So then I worked on the latch side. I somehow had mis-measured the first time I dog the hole for the supporting 4x4" post on that side, so I pulled it loose and did it right. I got it right the 2nd time. Well, the "distance" was accurate. But the squareness of the door frame was off.
ARGGGH!
I did some annoying unsquare connections to make the door frame fit the posts. I had the door fitting properly, but the next day it wasn't. The latch-side 4x4" post has settled a bit. I wedged it up a bit with a board on the ground and shims pounded together using the ground board as a support) to raise that 4x4" post slightly (to square the frame). That worked. For 2 days...
Then it was out of square again!
There are times when I know I do not really have skills at this sort of thing. But I can be obnoxiously persistent. Sometimes dumb persistence and determination overcomes lacks of skills.
I FINALLY got the door frame solid with enough corner braces and screws so that, even if the posts shift slightly, they shift together as a unit. The door latched.
And then it DIDN'T!
It was REAL close, barely catching or not. Well, the latch may need some work. But it was mostly just a matter of 1/16" between "sometimes" and "always" latching. A professional would have taken some things loose and adjusted them to fit. But I was at the limit of adjustments and would have had to a lot of filling and redrilling. But I found some "give" around the metal door frame.
A shim stuck between the post and the metal door frame gained me that 16/th inch. Hurray, the latch clicks closed with a simple swing of the door. For now (after 2 weeks of fighting), it shuts and latches smoothly. And I have a couple ideas to connect the door frame more solidly.
If it shifts more and refuses to latch again on its own, I will just put a hook&eye to hold it shut.
But everything seems to be working on the door a week later now, and I'll declare victory on that part.

 It's not pretty, but it works... And sometimes, that's the best I can do.
Next time, the inside of the garden enclosure...
HAHAHAHAHAHAHAHA!!!!!!!
Reality intruded... Even with screws every foot. the frame sagged as I tried to put it up to the posts. And even 4x4" posts move some even when set 2' deep. It's not like building a door into a house where everything is pretty solid.
I won't bore you with the details. No, wait, I will.
First, I tried to just attach the hinge side of the door frame to the 4x4" post that had been set into soil and rocks crushed as tightly as I could get it, for 2 weeks. Well, we've had a lot of rain lately and apparently the soil wouldn't dry deep. I tried everything I could to keep that post level and packed. I tamped the soil around it with a short 4' piece of 4x4" post, I stomped around, and I surrounded it with plastic sheeting to keep the rain away. I clamped other 4x4" posts to it in 3 directions to hold it in place. I gave it time to dry.
When I finally attached the door to the hinge-side post, I braced the door so it's weight wouldn't pull on it. It finally seemed to be set in place.
So then I worked on the latch side. I somehow had mis-measured the first time I dog the hole for the supporting 4x4" post on that side, so I pulled it loose and did it right. I got it right the 2nd time. Well, the "distance" was accurate. But the squareness of the door frame was off.
ARGGGH!
I did some annoying unsquare connections to make the door frame fit the posts. I had the door fitting properly, but the next day it wasn't. The latch-side 4x4" post has settled a bit. I wedged it up a bit with a board on the ground and shims pounded together using the ground board as a support) to raise that 4x4" post slightly (to square the frame). That worked. For 2 days...
Then it was out of square again!
There are times when I know I do not really have skills at this sort of thing. But I can be obnoxiously persistent. Sometimes dumb persistence and determination overcomes lacks of skills.
I FINALLY got the door frame solid with enough corner braces and screws so that, even if the posts shift slightly, they shift together as a unit. The door latched.
And then it DIDN'T!
It was REAL close, barely catching or not. Well, the latch may need some work. But it was mostly just a matter of 1/16" between "sometimes" and "always" latching. A professional would have taken some things loose and adjusted them to fit. But I was at the limit of adjustments and would have had to a lot of filling and redrilling. But I found some "give" around the metal door frame.
A shim stuck between the post and the metal door frame gained me that 16/th inch. Hurray, the latch clicks closed with a simple swing of the door. For now (after 2 weeks of fighting), it shuts and latches smoothly. And I have a couple ideas to connect the door frame more solidly.
If it shifts more and refuses to latch again on its own, I will just put a hook&eye to hold it shut.
But everything seems to be working on the door a week later now, and I'll declare victory on that part.


Next time, the inside of the garden enclosure...
Tuesday, July 14, 2015
Headphones
I like to watch TV while I am am working in the kitchen. But I also make a lot of noise in there (running water, etc) which overwhelms the TV sound. And that's even with running the TV through the stereo speakers.
So I researched wireless headphones. Most got poor ratings, but mostly for not trnsmitting through rooms walls. Well, that wasn't my concern (I'm still in direct line-of-sight to the TV). So I bought a well-rated wireless headphone.
I couldn't get it to work. There were 2 ways to connect them. One was direct from the headphone plug to the back of the wireless headphone station. The other was from the back of the headphone station to the A/V controller unit (whatever you call the device that lets you select the various other devices like TV/Stereo, DVD player, etc).
The cable to plug into the device controller headphone unit was too small though the audio in/out fit perfectly. No arrangement of plugs allowed the audio-out connection to work. So I needed either an adapter plug to fit betwee the small plug and the headphone plug. I hope that makes sense. I assumed there was an adapter plug to fit from th small headphone plug to the larger one.
So I went to Radio Shack, of course. They opened and tried several adaptor plugs which didn't work. I suggested maybe there was a cable that matched all the plugs. The salesperson at Radio Shack didn't think so.
I found it on the shelves myself. Am I the only one how thinks Radio Shack personnel aren't as experienced as they used to be? I had to find a rather obvious cable MYSELF! At Radio Shack!
So back at home, I plugged it in. It worked perfectly. The wireless headphones work great. But nothing is perfect. Plugging the headset in cuts off the stereo speakers. Worse, my radio won't play whether the headphone plug is in or out. I'll have to explore that.
But I have to say that while the dishwasher is running and I an running sink water to clean dishes or get hot water, I CAN hear what is on the TV.
Small victory...
Monday, July 13, 2015
The Garden Enclosure
Its not finished, but I did finally get the door set in properly today. It doesn't sound like That Big A Deal, but it drove me crazy to the point where I just stopped about it for several weeks (and did other useful stuff).
But I went back at it 2 days ago. It not elegant. The half-lap joints that fit so well on the basement floor didn't fit well out in the garden. I'm guessing that there were fitting options that options that "from basement floor to reality" were not right. Putting posts into holes in the ground is not quite like the frames sitting on a nice level basement floor.
But with enough support (uprights, cross, and sideways), I got the door to close smoothly and the lath to connect. I bet any professional would cringe at the work I've done. But as long as it latches closed, it doesn't really matter. All it has to do is stay solid.
And then its worth finishing the chicken wire. All I have left of that is wrapping some corners where the 4' rolls didn't quite reach. That involves some cutting and pacthing using leftovers, but I have enough of those.
It will be SO great to have this completed. Pictures when it is really completely done. But the "damn door" was 90% of the unfinished work, so I am about there.
Subscribe to:
Posts (Atom)
-
 I think I have it figured out now. I needed basic frame strength (cubes) plus top support (arches with a ridgepole) for shedding rain and s...
 -
I like to plant Pansies in the Fall. I replace the dead Tomatos and deck pot flowers with them most years. Best deal I found was 12-packs ...