Thursday, June 1, 2017

Compost Bin Site Cleanup, Part 2

First, wow did I have "fun" getting those pictures right yesterday  They suddenly showed up with dates on them.  Not that the dates were wrong, but I don't like sudden changes not in my control.  I searched and searched for the cause and how to delete the dates.

And...  it finally occurred to me to check the camera itself.  Yep, I had somehow changed the menu to REQUIRE dates on the photos.  My bad!  I had fun retouching the photos to erase the dates...

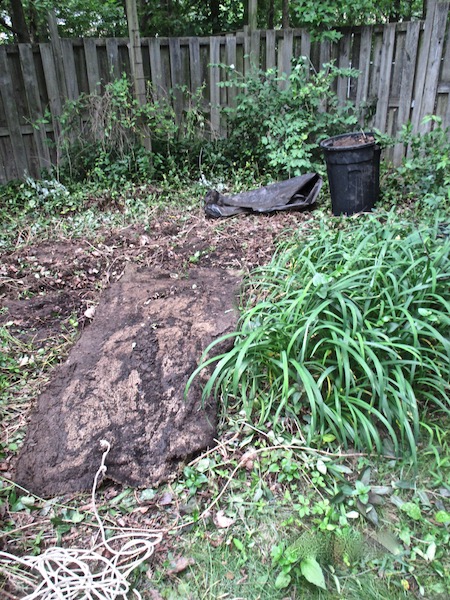
SO...  Here are my photos of the spot where the new compost bin will go.  It was 2 days of sweat and various BAD words.  I had forgotten there was carpet buried down deep among the vines and weeds.


The space needs to be leveled and that is a rototiller job.  But I was so worn out yesterday I just didn't want to do that.  And there are stumps of junk trees that need to be dug out (the rototiller can't do that).

And everything is wet and muddy.  I'm taking the day off from that.

But here is a picture of part of the old compost bin, fallen over sideways...


I can't believe I only nailed it together and had no diagonal braces in it.  But I was inexperienced then.  You live and learn... 

Not that I'm not doing anything.  The old toolshed has a leaky roof from when a tree fell over on it 2 years ago.  Rain got in an ruined the cheap particle board shelves I foolishly installed 25 years ago (hey, they were under a roof and should stay dry - it seemed like a good idea at the time).  They swelled up like sponges and warped and fell apart.  So I needed real shelves.  And a new roof.  I'm still thinking about that.

But it needed cleaning too.  Generations of mice nested in the dark corners , in boxes, and under old equipment.  I had to use a snow shovel to carefully scrape out the nests and poop careful to not disturb it into the air.

And there were old weird tool holders in there.  I had to detach them after cleaning out the mouse debris.  I can't figure out how I even screwed in the brackets that held up the old shelves.  The screws were unreachable with the cordless screwdriver.  I must have done it by hand.

So I just beat it all off with a sledge-hammer.  Sometimes direct force is the only way to go.  I have a wheelbarrow full of debris from that.  The trailer is going to be used a lot soon.  Garden carpet, particle board, bent brackets, old framed bed boards...  The landfill charges by the ton.  Fortunately, also by partial tons.  I may have a half ton.  Unless I pound off the old toolshed roof and replace it.  Then I might have a full ton, and it gets cheaper that way.

Anyway, the new compost bin site is nearly clear.  I just want to rototill it to get it all level.  Then I can dig the corner post holes and start setting some posts in loosely.  With modular parts preconstructed, it becomes more "fitting" than "measurement".  So I will make large holes at the corners to allow for some adjustment and see what changes I need to make.

When the whole thing is in place and firmly set around the belowground posts, I'll build a top to fit.  Latched.  Part of this is to keep the varmints out of the compost bin.  Not that they eat much, but I don't need them around.  Rabies, parasites, diseases that might harm the cats, etc.  And the more varmints around, the more likely they will find a way into the enclosed veggie garden.  Enclosures are good, but none are perfect.

Tomorrow may rain too.  It may be Friday or Saturday before I can get at the new compost bin site to rototill it flat.  Muddy rototilling is not fun.  You'll know when I post about this again, LOL!

Wednesday, May 31, 2017

Compost Bin Site Cleanup, Part 1

Now that I have the parts of the new compost bin nearly complete (one part needs to be fitted in place after the outsides are all in place), I needed to clear the area where it will go.

Before...


It's a mess there.  Vines, weeds, junk saplings...  Stuff I have ignored for too long. 

I went after it weed-whacker, loppers,  hedge-trimmer, and sickle!  Then I had to beat apart the original framed beds from 25 years ago still in place.  I must say that a heavy sledge hammer is wonderfully destructive! 

The pile of debris is impressive.

I dug up most of the relatively good fertile and live soil (left alone to the worms for 10 years) and put that in a big trash barrel at the side for spreading on the new compost bin in thin layers later. 

And discovered a layer of old carpet I had used between the old framed beds originally to smother weeds.  OK, I'll leave that for later.  Today's work was to remove the old boards and pull out most of the weedy vines.  Thank goodness for leather gloves!
The old carpet was too heavy to drag away.  I used my riding mower and rope to get it to the trailer where I am collecting debris for the landfill.   The mower has more horsepower than I do.  And after all the work loosening it, I enjoyed hauling it across the yard at no effort...

After:

Major improvement.  But still not done.

Lessons learned:  Carpet makes a great weed smotherer, but you can't leave it in place more than a year.
2.  A solid steel spade makes a good cutting/pry bar on buried carpet.
3.  A sickle is a good cutting tool to slide under buried carpet and cutting the roots below.

More tomorrow...


Yard Work 4

OK, now it is time to tackle the brambles in the far back yard!  I've tried to do it the easy ways (hedge trimmer, weed-whacker, pruners).  Of course those didn't work.  Well, if they HAD worked, I would be done with the problem and not writing this post.

Time to actually use the gas-powered metal-bladed death-whacker.  I've been afraid of the damn thing.  The instructions are full of warnings of how you can lose a foot if the blades bounce off something.  Well, chain saws are dangerous too, and I've used those.  Careful use is the key.

And there is a reason the spinning metal blades are 4' away down a handle.  If you keep it 4' away, there is no danger.

The brambles have GOT to go.  The spinning metal blades are the right way to do it.

Wish me safety...

And, by the way, what DO I DO with 4" of shredded bramble thorns underfoot (or in the case of the cats, underpaw)?   I guess I will have to get the shredder repaired and working...

Rubik's Cube

I had it sitting on a bookshelf for years.  A former friend said he solved it the first time he ever played with one, but he had a strange sense of humor.  If you couldn't prove him wrong, he claimed he did it it.  If you could, he denied saying he claimed to have done it.  Does that remind you of a President-Elect?

Anyway, I had the darn thing about 90% done but couldn't figure out how to get beyond that.

So I was looking at the thing last week and looked it up on the internet.  Several places claimed to show how to do it "in 2 easy steps".  Right.  The videos made little sense.  But they all said to start with a cross of any color and all started with white (because that is where the logo is, I suppose).

It took me a while to get THAT!  Then the idea is to get the corners white.  Baffled me.  I coyldn't follow the video even by repeating it.

I'm persistent.

I finally caught on to part of the trick.  You keep the top white you have and move the lower 2 levels around to where you can get another white up.  Then move the op away and spin the lower side  up and move the top back.

Doesn't make any sense, does it?  You have to DO it to get it.

Anyway, I have finally have a whole white side.  I bet the rest is tricky.  On the other hand, when you get one side all one color, it means the other colors are more concentrated.  That probably helps.

If I ever get the whole thing done, I'll take pictures.  If I never mention this again, it means I didn't.  But I'm keeping my mind working...

LOL!

Update:  I seem to have a faulty Rubik's Cube.   Following the detailed instructions does NOT get me to the picture on the next page.  Obviously *I* am not at fault...

Wednesday, May 24, 2017

Wildflowers

Posted for an example of wildflower seed packet results on a comment elsewhere.  But everyone can enjoy...


Monday, May 22, 2017

Uncovering New Plants

I have this spot I thought would be perfect to Astilbes.  I love Astilbes.  They want half-shade, and the spot was right.  I had old ones there in a corner, so I added 25 more last April.

I have a grass-weed that takes constant pulling/digging.  I get rid of it in one spot and it is spreading in another.  One day I will get the last one (making progress actually).  So it was overgrown where I planted new Astilbes in April.  They had to go...
The orange flags mark where I planted the Astilbes when the ground was bare.  I went after the grass yeasterday.  I got it down to this.  The grass came out relatively easily.  But those were the shoots on deep underground runner-roots.  Still, you can only pull up what you can get at.

And I did get mostly roots pulled up with the grass-tops!  A full bushel basket of them.  It looks much better now.
The grassy-looking plants mid left are actually flowers.  Crocosmia.  Lame small orange flowers for a week.  I may just pull them, but I hate to waste a flower.  Maybe I'll dig them up in Fall and try a new space for them.  They want more sun anyway.

The spot I have the Astilbes in is mostly shaded.  But it gets serious late afternoon sun, and they don't like that.  At least yesterday after I pulled up the 16" tall grasses, they had some shade.  After that, Mr Sun hit them hard and they wilted.  But it was only for 2 hours.  I hope they adjust.  Otherwise, I will be moving them in the Fall (and I have a spot in mind).  It depends on how well they do this year.

They looked better after some deep watering and with the landscaping flags removed...
I made a slight mistake planting the new ones.  I thought I knew where the established few were and where the Crocosmia were.  Well...  not quite.  I planted some of the new Astilbes among the established ones and among the Crocosmia were.  I'll move them to the front bed.  The corms are tough and tolerate moving.

The Baptisia will give them some shade soon.
I need to stake them though.  They flop over.  The Astilbes loved their shade, so I'm staking the Baptisia and tying them loosely upright this year.  I'm almost actually keeping up with gardening work this year.

I've been outside almost 4 hours per day for a few weeks now.  It shows.  I've never been so nearly caught up with gardening and yardwork before.  Yay!

Sunday, May 21, 2017

Various General Work

Some days are just catching up on small things. 

1.  I spent an hour pulling grass up from the new front yard island bed.  With 3" of Fall leaves topped with 3" of compost, the weeds don't have a solid grip.  But they were lots of small weeds and it took a while.  Better now than when they good good roots into the soil...

2.  The pole beans and cucumbers are up.  But there were a few spots where a seed didn't grow.  So I soaked a few replacement seeds in water for 4 hours and then planted them. 

3.  I can't BELIVE I forgot to plant a cherry tomato seedling with the regular ones.  So I planted it 3 days ago and shaded it from the direct sunlight for 2 days.  It wilted a bit the first day but is happily hydrated now. 

4.  I have a 2'x8' framed bed against the southern side of the house.  Hottest part of the yard.  I planted 2 blocks of bico9lor corn there today.  One matures 2 weeks before the other, so I'll have a staggerred harvest.  And I'll plant 2 more blocks in 2 weeks, for more staggerred harvest.

5.  The Meadow bed is full of several dozen large bright yellow flowers, some dozen multiple flowers in reds/pinks.white, some white daisies, and some small blue flowers.  The plants are listed on the packet; I will look them up so I know what they are called.

6.  The Hummer/Bee/Butterfly bed is too new to have flowers.  BUT, on a whim, I scatterred old veggie seeds in there too.  I am harvesting the best sweetest radishes ever!  And there are a few corn plants coming up.  It is going to be a weird bed this year.

7.  I've been growing bok choy to harvest young for stir fries.  Some are old even to flower.  I just discovered that the pre-flowering heads are like brocoli, only sweeter.  I coukld grow them just for THAT!  But I also like picking the young leaves for the stir-fries...

8.  Got one major project done I meant to do last year and waited too long.  And almost waited too long this year.  The Spring Bulb bed has daffodils, tulips, and hyacinths.  The Tulips and Hyacinths are in wire cages to protect them from the voles.  But there is unused space between the wire cages and I want to plant daffodils to fill the bed (except for the tulip and hyacinth cages).

So I had to mark the spots of the tulips and hyacinths.   It was a close call.  The tulip leaves were still just barely visible.   I thought because the tulips bloomed after the daffodils; the leaves would last longer.  Nope.  I had to to some careful searching to find the spots.  I did. 

Which led me to how to mark the spots.  Well, first, I found the cardboard cutouts I used to make the cages.  12'x14".  Then I had to find cardboard to cut to size to place on top of the cages (so I wouldn't auger in to them in the Fall while planting daffodils around them.

An aside...  I keep things the are of similar size because they seem useful that way.  A dozen liter juice bottles, a dozen plastic jars that hold mixed nuts, etc.  Well, I buy the same wine by the case and I had a dozen of them stacked up in the basement (thinking they would be good for storing stuff fitting together perfectly in tight spaces).

Well, guess what exact size they were with a wide side and flap?  The size of my tulip and hyacinth cages!  And I have a weird curved linoleum cutter my Dad made.  It sliced right down the corners of the boxes perfectly. 

And guess what I also had?  Fifty 10" tent stakes!  Perfect for holding the cardboard down.  I cut them to size, put the debris in the recycle bin, poked a hole through opposite corners with an awl, and carried them all outside.

It was hard to find the remnants of the tulip leaves, but I had pictures of the bed from 2 directions from the blooms last year.  Between the few leaves and the pictures, I set down the cardboard covers and stuck the tent stakes in the holes to keep them in place.

Then I weed-whacked the whole area.   Why?  So that I can cover the entire area with black plastic to kill all the weeds.  The bulbs won't care; they don't like rain while they are dormant.  When the weeds are dead, I'll uncover them in Summer so the bulbs won't overheat (they are shaded all day now).

9.  All this work has been awkward.  I like to keep my kitchen knives sharp.  Stele them once a week to straighten the edges (they curl with use), and sharpen them every few months.  You know that test about tossing a ripe tomato at a sharp knife and it cuts the tomato in half?  Mine do that.

It does that to fingertips too.  I'm careful.  I have brushes to keep my fingers away from the sharp edges while I clean them.  But OOPS!  I cut my fingertip badly a week ago.  I hadn't seen that much blood in 30 years.  It was 15 minutes before enough pressure even stopped the bleeding.  Fortunately, I coagulate fast.

Anyway, I finally managed to get enough coagulation to put a bandage on it.  I have some of that triple antibiotic ointment on it first, then a large bandaid, then some adhesive cloth bandage along my finger to hold the bandaid in place. 

It HAD to be the index finger of my right hand of course.  The MOST inconcenient finger for a right-handed person.  Makes even putting on my velcro-strap watch difficult, never mind tying shoes.

But I may be a bit lucky there.  I think I was a natural lefty, taught to be right-handed in the 1950s (a common practice in the US, then).  I still do some things with my left hand naturally and deliberately do some things left-handed for practice.

It has certainly helped. 

10.  Making progress on the compost bin.  Nothing to show, as I was just collecting boards and posts for cutting and assembly tomorrow.  I looked at the boards and posts I already had and adjusted my design slightly to account for those.  Might as well use up what I have rather than buy new boards!  I'm always flexible about designs.


Wednesday, May 17, 2017

Compost Bin, Part 2


I set the work aside for a couple of days to catch up on weeding while the weather was cool.  But it hit 90F yesterday, so it was a good day to work in the cool basement.


So, I mentioned using the tenon jig to make half-lap joints...
Image result for half lap joint

This is the jig.

It holds a board upright to cut a large slot high.  I apologize, this picture was a reconstruction and the saw blade was not as high as in reality.  Sometimes I forget to take pictures during my work and have to recreate them.
I can make tenon cuts in 4' boards.  I could do 5' by removing a ceiling tile.
There was massive sawdust everywhere.  I had to wear a nose/mouth mask! I tried wearing glasses too, but the mask directed my exhalations up and fogged the glasses.
 Here is the table saw blade going through the upright board.  There is a lot of wood being removed, so I had to push slowly.  Its a 220v tablesaw, so there is a lot of power, but I still don't like to push too fast.
The 10" saw blade only cuts 3" (part of the saw blade is below the table).  So I get only a 3" deep cut.
I tried a few ways to complete the cut.  A regular saw took too long, a flush-cut saw made an uneven cut (and was slow).  The Saws-All did the job wonderfully!  I love electricity over muscle-power everytime!
The weight of the saw is perfect for cutting down the right distance.  The cut part just falls off.
So then I was ready to assemble some frames.  I had everything ready.  One drill for pilot holes for the screws, another drill for counter-sinking the screw heads (to avoid splitting the boards), exterior glue,  a rag to wipe off squeezed-out glue, a square, and a tray of 1.5" square-drive screws (I love those things).
Here is the first assembled frame.
Then to add the wire mesh sides (to hold the compost in).  I used an electric stapler with 9/16" staples where possible.  Pressure-treated wood can be rather hard even though it it's pine, so sometimes the staples don't go all the way in.  That means some gentle patient tapping with a hammer.  Sometimes, they won't go in at all, so I also have some heavier-duty staples that have to be hammered in by hand.  That takes some effort to get them in straight.  Fortunately, with pliers to hold them straight and a patient hammering, I got them in.
So here are the 1st 4 frames.  These are the 2 backs and 2 sides.  I need to make a 5th, but until I make and set in the front posts (yet to be constructed) I don't know the exact size to make.  Some things just have to be "fitted" at the end.
The next part is to make the back corner and front posts.  The front posts need to have spaces for slats to fit into.  I could cut slots in posts, but it is easier to build posts from several boards to create slots rather than cut them. 

I'll show that next time.  Meanwhile, there are some old deteriorated beds where I want to install the new compost bin, so I need to demolish those first.  And there is a shrub I want to save from there. 


This isn't the best time of year to move a shrub, but I don't have much choice.  I think I will take a dozen tip-cuttings and try and root them indoors before digging the shrub up.  And I'll make the rootball extra large to give it a best chance to survive the transplant shock.

Tomorrow is predicted to hit 92F, so I don't think I want to do serious work outside then, but I'll break up the framed bed it is in and get that part done. 

And I have work I can do inside or outside in shade.  I really try to do as much work as possible in the shade.  LOL!

May 4th

 May The Farce Be With You this day!